Did you know the Adirondack Chair and Footrest Woodworking Plan you’re about to see has 16 pages? It was published in 2003. This guide will show you how to make your own adirondack chair with a footrest. It will turn your outdoor area into a cosy spot for relaxation.
If you love woodworking or enjoy DIY projects, this tutorial is for you. It will teach you how to make a perfect Adirondack chair with a footrest. You’ll learn the art of woodworking and see how an Adirondack chair with a footrest can enhance your outdoor space.
Key Takeaways
- Comprehensive guide to building an Adirondack chair with a footrest
- Step-by-step instructions for woodworkers and DIY enthusiasts
- Unlock the comfort and functionality of an Adirondack chair with a footrest
- Discover the unique benefits of this outdoor seating solution
- Explore a range of Adirondack chairs with footrest design options
Introduce the Adirondack Chair with Footrest
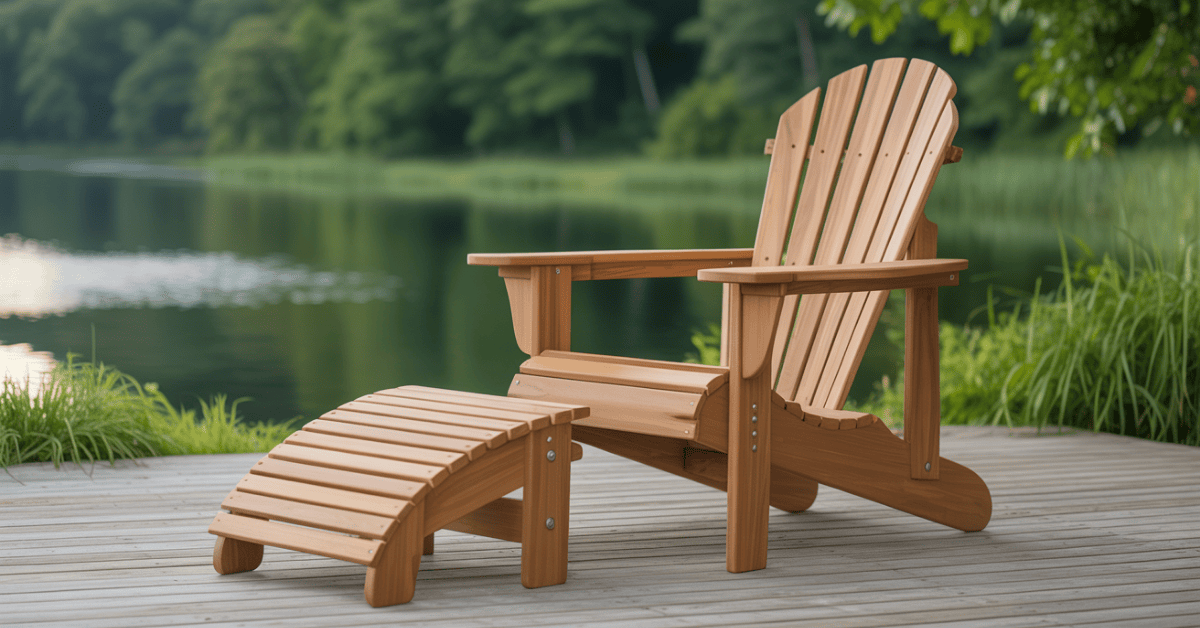
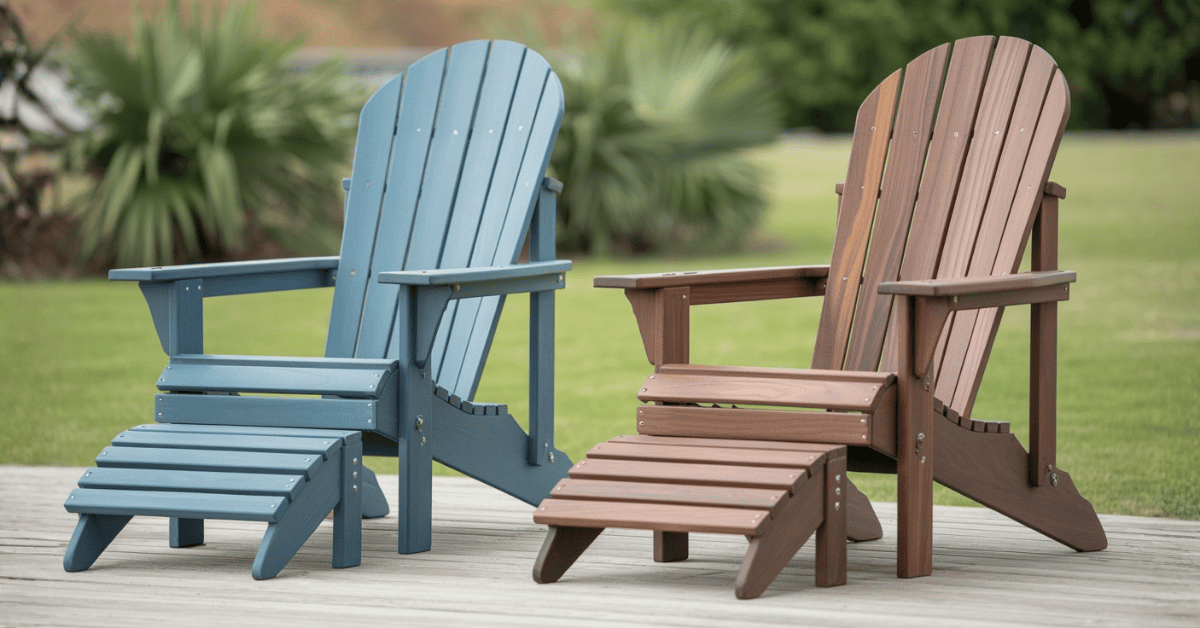
The classic Adirondack chair design is loved for its timeless style and unmatched comfort. Adding a built-in footrest takes this iconic outdoor seat to new levels of relaxation. This design lets you lift your legs for more comfort and function.
Why Adding a Footrest Enhances Comfort and Functionality
The footrest of an Adirondack chair does more than just add comfort. It also boosts functionality. When you recline and lift your feet, it improves blood flow and eases back and leg strain. This simple addition lets you fully relax and enter a deep state of calm.
Unique Benefits of an Adirondack Chair with Footrest
An Adirondack chair with a footrest offers more than just comfort. It brings unique benefits that make it stand out. The footrest is a handy spot for resting your feet, ideal for long lounging or reading sessions. It also adds elegance and beauty to the classic Adirondack look.
Looking to upgrade your backyard or create a cosy outdoor spot? An Adirondack chair with a built-in footrest is a smart choice. It makes your outdoor space more relaxing and inviting.
Why Choose an Adirondack Chair with Footrest?
Outdoor relaxation gets a boost with an Adirondack chair that has a footrest. This feature adds comfort and takes your relaxation to the next level.
How a Footrest Elevates the Relaxation Experience
The footrest lets you lift your legs, easing back and lower body pressure. This lets you fully relax in the chair. It’s perfect for enjoying the outdoors, whether you’re reading, having coffee, or enjoying the view.
The footrest also lets you adjust your feet for comfort. This can help prevent leg tiredness and improve blood flow. It makes your outdoor time more refreshing and restful.
Adding a footrest to your Adirondack chair can greatly improve your outdoor space. It enhances your relaxation and comfort.
Materials and Tools Needed to Make an Adirondack Chair with Footrest
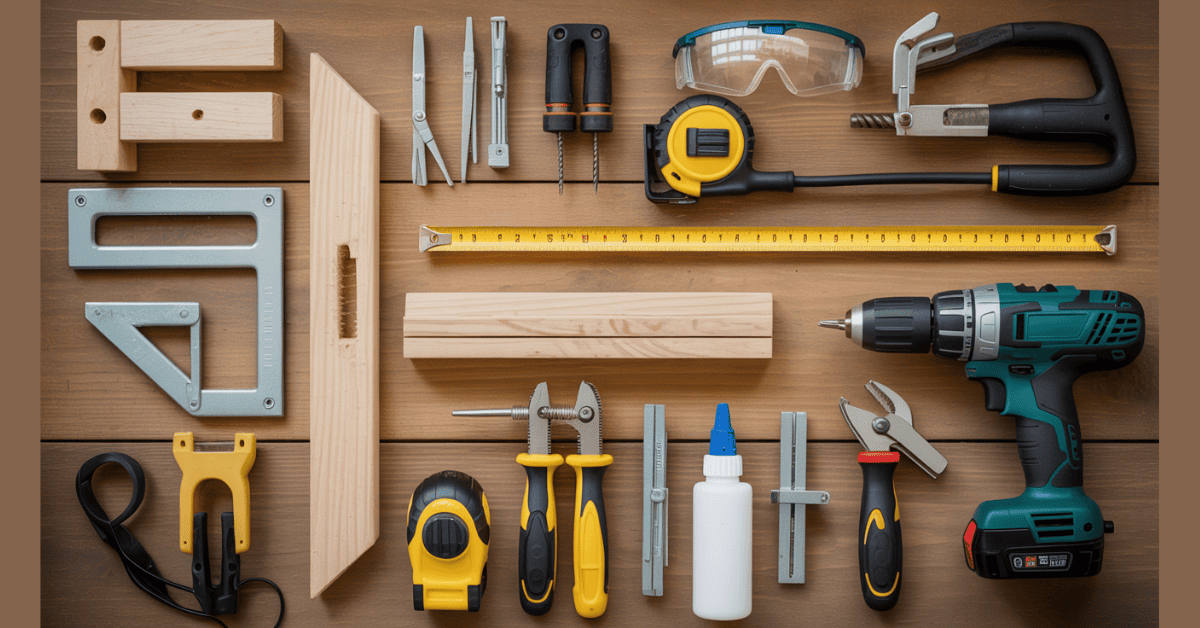
To make your own Adirondack chair with a footrest, you need the right materials and tools. You’ll need clear-grade western red cedar lumber, stainless steel screws, and carriage bolts. Also, you’ll need epoxy resin, penetrating epoxy, and an exterior varnish finish.
You’ll also need power saws, sanders, a palm router, a drill, and clamps. In fact, you can build the chair with just six handheld power tools, not counting table saws and bandsaws.
You’ll need about 30 linear feet of 5/4×8 cedar lumber for the chair and 9 linear feet for the footrest. The lumber is then planed down to a finished 1″ thickness.
| Materials | Quantity |
|---|---|
| Clear Grade Western Red Cedar Lumber | 30 linear feet (chair), 9 linear feet (footrest) |
| Stainless Steel Screws | 68 (2″) for chair, 32 for footrest |
| Carriage Bolts (1/4″ x 2-1/2″) | 6 for chair, 2 for footrest |
| Epoxy Resin, Penetrating Epoxy, Exterior Varnish | Enough for finishing |
When assembling, pre-drill holes for screws and bolts for strength. Use a 3/8″ quarter-round router bit to round over corners.
You’ll need various power tools like a circular saw, jigsaw, belt sander, and more.
With the right materials and tools, you’re ready to start this DIY project. You’ll make a comfortable and durable Adirondack chair with a functional footrest.
Essential Tools and Materials
To build an Adirondack chair with a footrest, you need specific tools and materials. The chair should have an angle of 100-105 degrees. You’ll need (1) 1x8x8, (1) 1x6x8, (3) 1x4x8, and (1) 1x2x8 boards8. Also, you’ll need 1.25″ softwood outdoor Kreg screws, #8 1.25″ exterior wood screws, #8 2″ exterior wood screws, and optional ⅜” wood plugs.
Cedar, teak, and redwood are good choices for wood because they last long and resist weather. Building an Adirondack chair in cedar costs about $166 in May 2023. This is much cheaper than the nearly $800 for a pre-made chair. You can also add a 1×6 slat in the middle to make the seat wider by 2″.
You’ll need a circular saw, jigsaw, belt sander, palm router, drill, driver, random orbit sander, and clamps for this project. Each leg needs 4 cuts, and sandpaper grits 100 and 150 are recommended for outdoor use. Use 1.25″ Kreg screws for assembly, and cut the leg angle at 5 degrees with a 70-degree angle.
| Tool | Description |
|---|---|
| Circular Saw | For ripping boards to width |
| Jigsaw | For cutting curved shapes and details |
| Belt Sander | For smoothing and shaping the wood |
| Palm Router | For adding decorative edges and details |
| Drill and Driver | For drilling holes and assembling the chair |
| Random Orbit Sander | For achieving a smooth final finish |
| Clamps | For holding the pieces in place during assembly |
With the right tools and materials, you can make a beautiful and comfy Adirondack chair with a footrest.
Choosing the Right Materials
When building an Adirondack chair with a footrest, picking the right materials is key. This project uses clear-grade western red cedar lumber, which has many benefits. Its vertical grain and natural weather resistance make it perfect for outdoor furniture. The lumber is rough-sawn, so it needs to be planed to a 1-inch thickness.
If you don’t have a thickness planer, you can get the boards pre-planed from a lumber supplier. You’ll need about 30 linear feet of 5/4×8 cedar for the chair and an extra 9 linear feet for the footrest.
For lasting durability, stainless steel screws and carriage bolts are used. The project also uses epoxy resin, penetrating epoxy, and exterior varnish to protect the wood and highlight its natural beauty. Poly lumber is another good choice for Adirondack chairs, as it’s easy to care for and comes with a 10-year guarantee. Poly lumber chairs are fade-resistant and don’t need covers or storage, making them a hassle-free option.
When picking materials, think about weather resistance, upkeep, and style to make a stunning and lasting Adirondack chair with a footrest.
“The right materials can make all the difference in the durability and beauty of your Adirondack chair with footrest.”
The materials you choose greatly affect your Adirondack chair’s look, feel, and life span. By considering weather resistance, upkeep, and your personal style, you can craft a unique and lasting outdoor space.
Adirondack chair with footrest plans
Making an Adirondack chair with a footrest is a fun DIY project. It can make your outdoor area better. The detailed plans help you make a chair that’s comfy and looks great.
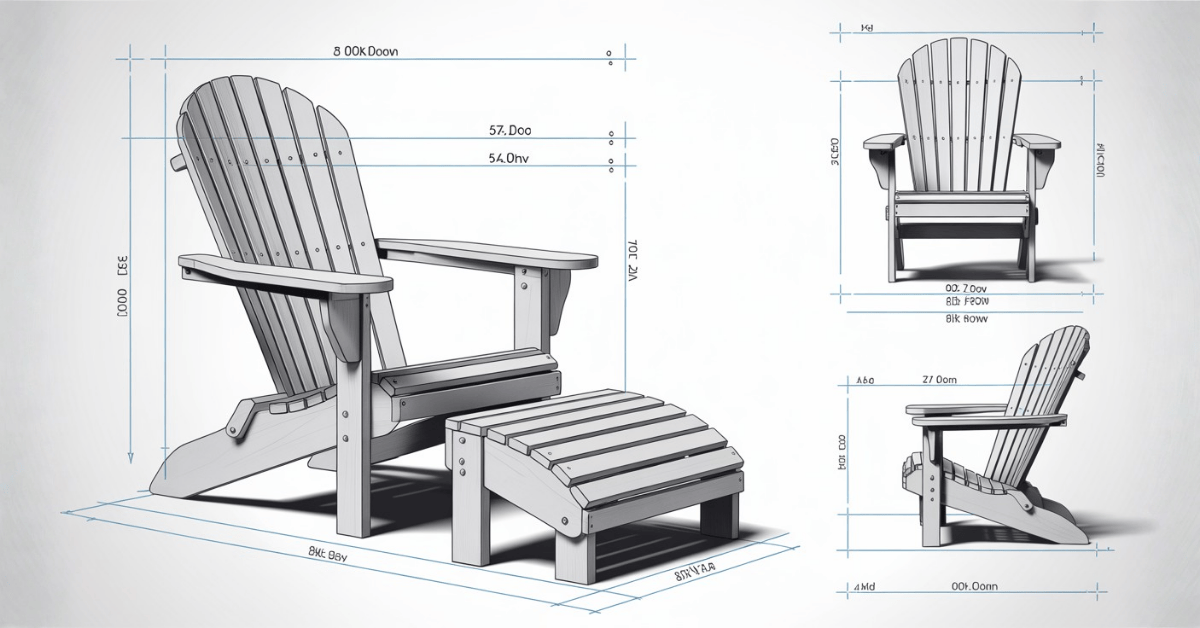
The plans give you exact measurements and step-by-step guides. They help you build a chair with a footrest. You can use a template or build it freehand, and it will look professional.
With the right tools and materials, you can make a top-notch Adirondack chair with a footrest. The plans take you through every step, from cutting the wood to the final touches.
| Material | Quantity | Price | Shipping | Origin |
|---|---|---|---|---|
| Adirondack Chair Plans with Footrest | {{price.Quantity}} | $19.50 | Free on Orders of $50+ | Made in Canada |
These plans are a full DIY guide for making a comfy outdoor seat. With the right tools and materials, you can make a custom chair that’s the highlight of your outdoor space.
The plans show you exactly what to do, from measurements to materials. They’re perfect for both experienced DIYers and beginners. These plans help you make a unique outdoor piece that will wow your guests and make your space better.
Step-by-Step Guide to Crafting the Chair with Footrest
Are you ready to make your own Adirondack chair with a footrest? This guide will help you through each step. You’ll make a beautiful outdoor piece that’s both stylish and useful. Let’s start and learn how to make the perfect chair with a footrest.
Step 1: Preparing the Wood and Cutting the Pieces
First, pick the wood for your project. Cedar, cypress, or pressure-treated pine are great choices for durability and comfort. Use a circular saw and a jigsaw to cut the wood into the right pieces. Make sure your cuts are precise and clean for easy assembly.
Step 2: Assembling the Chair Base and Seat
Now, let’s build the chair. Start with the base, attaching the legs and supports for a strong foundation. Then, work on the seat, aligning and securing the boards for comfort and levelness.
Step 3: Adding the Backrest and Armrests
Next, add the backrest and armrests. These are key to the classic Adirondack chair look. Pay close attention to the angles and connections for comfort and style.
Step 4: Crafting the Footrest – Key Details for a Perfect Fit
Now, focus on the footrest. Measure and cut the pieces carefully for a smooth fit with the chair. Make sure the dimensions and angled cuts are right for comfort and support.
Step 5: Sanding and Finishing
The last step is to sand the chair and footrest for a smooth finish. This is important for looks and durability. After sanding, stain or paint the chair to match your style and protect it from the weather.
By following these steps, you’ll create a beautiful Adirondack chair with a comfy footrest. Enjoy your new outdoor seating piece!
Tips for Customising Your Adirondack Chair with Footrest
After building your Adirondack chair with a footrest, it’s time to make it your own. You can add special touches like carvings or engravings. You can also adjust the footrest and change the reclining angle. Choose from natural wood or bright colors to match your style.
Customise the Chair
Make your chair stand out with unique features. Add carvings or engravings to the back and arms. You can also make the footrest adjustable for comfort. Some chairs even let you adjust the recline for your perfect spot.
Paint or Wood Stain Finishes
The final touches are key to your chair. Try different paints or stains to match your outdoor area and taste. The chair’s design works well with many finishes, letting you create something special.
“The possibilities for customization are endless when it comes to the Adirondack chair with footrest. Let your creativity shine through and make it a one-of-a-kind piece that reflects your personal style.”
Adirondack Chair with Footrest Design Ideas
Make your outdoor space special with a customised Adirondack chair that has a built-in footrest. This design is perfect for any backyard, patio, or deck.
Choose a natural wood finish for a classic look that fits right in. Or, pick bright colors to make your space pop.
- Add carved patterns or detailed designs for extra flair.
- Try a contrasting trim color for a striking look.
- Look into adjustable or foldable footrests for more use and flexibility.
Whether you want a cosy cottage vibe or a modern outdoor area, you can customise the Adirondack chair with a footrest to match your taste and setting.
The Adirondack chair with footrest is great for any outdoor space. It’s both comfortable and stylish, adding beauty to your area.
| Design Element | Description |
|---|---|
| Material | Most Adirondack chairs with footrests are made from POLYWOOD. It’s strong and easy to care for. |
| Color Options | You can choose from colors like Stepping Stone, Charcoal Black, and Classic White. This lets you match your outdoor look perfectly. |
| Functionality | Many of these chairs fold up for easy storage and moving. They’re very handy. |
| Seating Capacity | They usually seat 4 people, giving you plenty of room for fun and relaxation. |
Discover the many ways to design your Adirondack chair with a footrest. Create an outdoor space that shows off your unique style and preferences.
Adirondack Chair with Footrest Maintenance Tips
Keeping your Adirondack chair with a footrest in top shape is key. Regular cleaning, sanding, and applying protective finishes like epoxy resin and varnish are essential. They help keep the wood looking great and prevent damage from the weather.
How to Maintain and Protect Wooden Adirondack Chairs
To keep your chair looking its best, follow these tips:
- Clean the chair often with mild soap and water to remove dirt and grime.
- Sand the chair’s surface lightly with fine-grit sandpaper to smooth out any rough spots and get it ready for refinishing.
- Apply the protective finishes, like epoxy resin and varnish, as the manufacturer suggests. This will protect the wood from the weather and keep it looking vibrant.
Weatherproofing
Weatherproofing your Adirondack chair with a footrest can make it last longer, especially if it’s outside a lot. Use a sealant or water-resistant coating on the wood. This will protect it from the sun, rain, and other weather.
Seasonal Care
To make your Adirondack chair with a footrest last for many years, follow these seasonal care tips:
- Keep the chair indoors or cover it during the off-season to protect it from harsh weather.
- Before the season starts, check the chair for damage or wear. Clean, sand, and refinish it if needed.
- Always check the chair for loose screws or bolts and tighten them to keep it sturdy.
By following these maintenance tips, you can keep your outdoor space looking great. This ensures years of comfortable relaxation.
Build Comfort That Lasts — Grab Your Free Adirondack Chair Plan Now!
Get instant access to 16,000+ professional woodworking plans!
✨ What You’ll Get:
• Step-by-step blueprints that eliminate guesswork • Exact cutting & materials lists – no wasted wood • Multiple view angles so everything fits perfectly • Monthly new plans added for life (no recurring fees!)
🎯 Perfect for DIYers Who Want:
✓ Professional results without expensive tools
✓ Clear instructions that actually work
✓ Lifetime access to an ever-growing library
Limited Time: Just $67 (normally $297)
60-day money-back guarantee
Conclusion
The Adirondack chair with footrest is a great choice for outdoor seating. It makes your outdoor space more comfortable and relaxing. You can make your own chair with a footrest by following the guide’s instructions.
There are many ways to customize your chair to fit your style. Make sure to take care of it to keep it looking good for a long time.
Building an Adirondack chair with a footrest is a great project. It adds comfort and style to your outdoor area. It’s built to last, so you can enjoy it for many years.
So, why wait? Start this project today. Get the materials and tools you need. Create your own Adirondack chair with a footrest. It will make your outdoor space even better.
FAQ
What are the unique benefits of an Adirondack chair with a footrest?
An Adirondack chair with a footrest is more comfortable and useful. The footrest lets you recline and lift your legs. This improves blood flow and eases back and leg strain.
It’s a great spot to rest your feet, perfect for long relaxation sessions.
How does a footrest elevate the relaxation experience?
The footrest makes the chair more comfy and immersive. It eases pressure on your back and legs. This lets you relax fully in the chair.
It’s great for enjoying the outdoors for hours without discomfort.
What materials and tools are needed to make an Adirondack chair with a footrest?
You’ll need clear western red cedar lumber, stainless steel screws, and epoxy resin. Also, a palm router, drill, and clamps are essential tools.
What are the steps to craft an Adirondack chair with a footrest?
First, prepare the wood and cut the pieces. Then, build the chair base and seat.
Next, add the backrest and armrests. After that, make the footrest with special details. Finally, sand and finish the chair.
How can I customize my Adirondack chair with a footrest?
You can add personal touches like carvings or engravings. Try adjustable footrests or different reclining angles.
Choose paint or stain to match your outdoor decor and style.
How do I maintain and protect my Adirondack chair with a footrest?
Clean, sand, and reapply finishes like epoxy and varnish regularly. This keeps the wood looking good and prevents damage.
Weatherproofing and proper storage can also help it last longer.


