You can make your home better with a simple DIY project. The average American homeowner spends a lot on home improvements each year.
Building a step stool is a cheaper option. With woodworking plans for beginners, you can make a useful piece of furniture in just a few hours.
You’ll learn to do DIY furniture projects and feel proud when you’re done. Our free templates will help you every step of the way.
Key Takeaways
- Build a functional step stool in just a few hours
- Gain hands-on experience with DIY furniture projects
- Save money by creating your own furniture
- Use our free templates for a hassle-free experience
- Enhance your home with a simple and cost-effective project
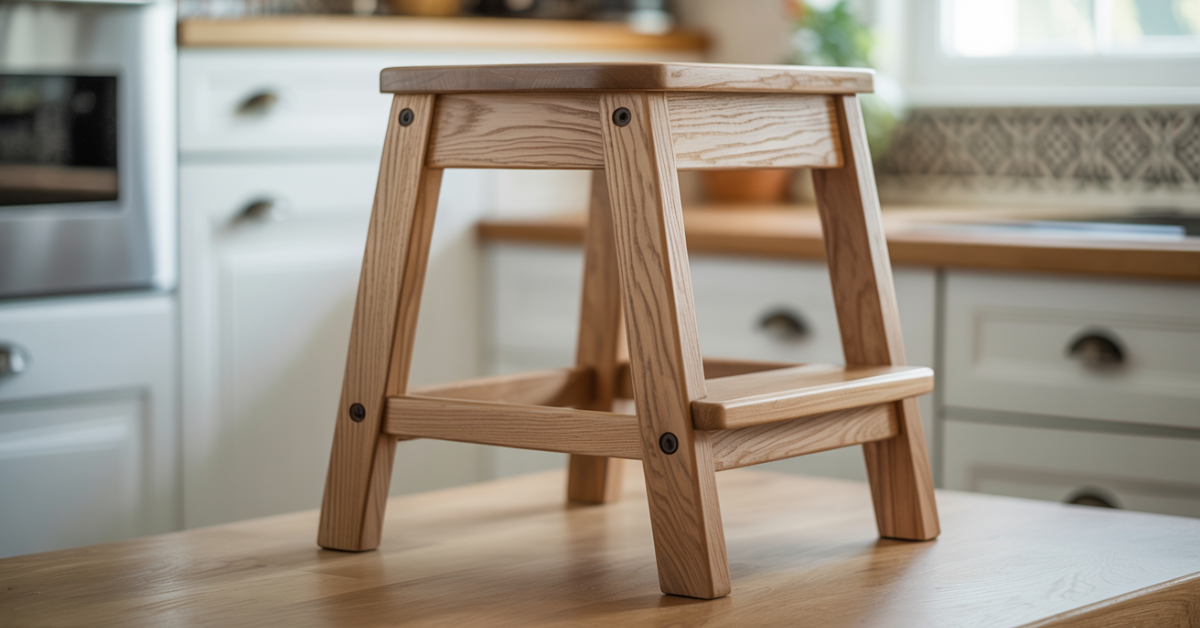
Why a Wooden Step Stool is the Perfect Beginner Woodworking Project
For beginners, a step stool is a great project. It’s simple yet useful. You’ll learn basic skills like measuring, cutting, and putting things together. It’s perfect for a weekend woodworking project.
Benefits of Starting with a Step Stool Project
Starting with a step stool project has many advantages. It lets you get used to basic tools and techniques without stress. You can finish it fast, which boosts your confidence for harder projects.
What You’ll Learn from This Project
This easy woodworking plan teaches you a lot. You’ll learn to measure and cut wood right, put parts together, and use simple hardware. These skills are key and will help you with more complex projects.
Materials Needed for Your Beginner Wooden Step Stool Plans: 3 Hour Weekend Project
To start your 3-hour weekend woodworking project, gather the right materials for your wooden step stool. The correct materials are key to a successful beginner woodworking project.
Wood Selection Guide
Choosing the right wood is crucial for your wooden step stool plans. The wood you pick will impact the stool’s durability and look.
Best Types of Wood for Beginners
Beginners should use woods like pine or cedar. These softwoods are easier to work with and more forgiving. Pine is a favourite because it’s affordable and easy to find.
Lumber Dimensions and Quantities
You’ll need specific lumber for your project. You’ll need 1×2 pine for legs and supports, 1×10 pine for the top, and ¾ inch dowel for extra support. The exact amount needed will depend on your design, but a general guide is in the table below.
| Material | Dimension | Quantity |
|---|---|---|
| Pine | 1×2 | 4 pieces @ 12 inches |
| Pine | 1×10 | 1 piece @ 12×12 inches |
| Dowel | ¾ inch | 2 pieces @ 12 inches |
Hardware and Fasteners List
You’ll also need specific hardware and fasteners. This includes screws for putting the parts together and a pocket hole jig for strong joints. Make sure you have the right size and type of screws for your project.
Optional Materials for Customisation
To make your step stool unique, consider adding decorative trim, paint, or a wood finish. These can enhance both the look and durability of your wooden step stool.
Essential Tools for Building Your Step Stool
To start your wooden step stool project, you need the right tools. The right tools make the job easier and ensure your stool is safe and functional.
Must-Have Tools for Beginners
Beginners should start with the basics. You’ll need a mitre saw for clean cuts, a pocket hole jig for joining parts, a drill for holes, and sandpaper for smooth wood. These tools are key to a successful project.
| Tool | Purpose |
|---|---|
| Miter Saw | Making precise angled cuts in wood |
| Pocket Hole Jig | Creating strong joints for assembly |
| Drill | Drilling holes for screws or other fasteners |
| Sandpaper | Smoothing out wood surfaces |
Optional Tools That Make the Job Easier
While not essential, a clamp helps hold pieces together. A woodworking vise keeps your work steady. These tools can make your project better and easier to do.
Safety Equipment You Shouldn’t Skip
Always prioritise safety with power tools and wood. Wear safety glasses to protect your eyes and a dust mask to avoid breathing in dust. These steps can greatly lower injury risk.
Understanding the Free Step Stool Templates

Starting your wooden step stool project is easy with free templates. These templates make woodworking simpler. They give you detailed plans and diagrams for cutting and putting your step stool together.
How to Download and Print Your Templates
Downloading and printing your templates is easy. First, make sure you have a good printer that can handle the paper size. Most templates need standard letter or A4 paper. Just click the download link, save it to your computer, and print it. Check the print preview to make sure everything is right.
Reading and Understanding the Plans
The plans come with detailed diagrams and cutting lists. It’s important to read the instructions carefully before you start. Look at the measurements, the wood you need, and how to assemble it. Knowing these will help you avoid mistakes and make a great step stool.
Scaling and Adjusting Templates if Needed
If you want to change the size of your step stool, you can scale the templates. But be careful, as changing sizes can affect the stool’s strength. Always check your measurements and talk to a more experienced woodworker if you’re not sure.
By following these steps and using the free step stool templates, you’ll do great on your beginner project.
Preparing Your Workspace for a Successful Build
Before starting your wooden step stool project, get your workspace ready. A well-prepared area is key to a smooth build. It’s vital for beginners in woodworking for beginners and DIY furniture projects.
Setting Up an Efficient Workspace
Start by organising your tools and materials. Place your wood selection, hardware, and tools where you can easily reach them. This setup helps you work faster and more efficiently. For beginners, a tidy workspace reduces stress and keeps you focused.
Safety Considerations Before Starting
Always prioritise safety in weekend woodworking projects. Make sure your workspace is bright and clear of clutter. This prevents accidents. Also, have safety gear like glasses and a dust mask ready before starting.
Managing Your Time: Completing the Project in 3 Hours

To finish your 3-hour beginner woodworking project, you must stay on track. This means knowing what the project entails, setting up your workspace, and following your plan without delays.
Breaking Down the Project into Timed Segments
Split your 3-hour project into smaller tasks. For a wooden step stool, you might need 30 minutes for cutting, 1 hour for assembly, and 30 minutes for sanding and finishing. This way, you can stay focused and keep moving forward.
Tips for Working Efficiently Without Rushing
To work well, keep your tools and materials close. Turn off your phone’s notifications and work in a quiet place. Also, knowing your plans well helps avoid mistakes that waste time. By staying focused and working carefully, you can finish your wooden step stool in 3 hours.
Step-by-Step Cutting Guide for Your Step Stool
Cutting wood accurately is key to a great woodworking project. This guide will show you how to measure, mark, and cut your wood for the step stool.
Measuring and Marking Your Wood
Measuring and marking your wood correctly is very important. The right tools for these steps can greatly improve your cuts.
Using Templates for Accurate Marking
Using the step stool woodworking plans templates is a good idea. Just place the template on the wood and trace the outline.
Double-Checking Measurements
Always double-check your measurements before cutting. This simple step can save you time and materials.
Making Precise Cuts for Each Component
Now that your wood is marked, it’s time to cut. Use a sharp saw and take your time for clean cuts. Look at your easy woodworking plans for the exact sizes needed for each part.
| Component | Dimensions | Quantity |
|---|---|---|
| Top Platform | 12″ x 12″ | 1 |
| Legs | 18″ x 2″ | 4 |
| Support Braces | 6″ x 2″ | 2 |
Troubleshooting Common Cutting Issues
If you run into problems like splintering, adjust your method or tools. By following these woodworking plans and tips, you can get professional-looking results.
Assembly Instructions: Putting Your Step Stool Together

Assembling your wooden step stool is the final step. You’ve cut all the parts, now it’s time to put it together. Follow these steps for a sturdy and reliable step stool.
Assembling the Top Platform
The top platform is where you’ll stand. It’s important to assemble it correctly. Attach the sides and backrest to the top using 2-inch wood screws. Make sure everything is flush and corners are square.
Attaching the Legs Securely
Attaching the legs is key. Make sure they’re evenly spaced and attached well to the top platform.
Ensuring Square Corners
Use a carpenter’s square to check corners before tightening screws. This is vital for your step stool’s stability.
Proper Fastening Techniques
Secure the legs with wood glue and 2.5-inch wood screws. Pre-drill holes to avoid wood splitting. Then, tighten the screws well.
| Component | Fastening Method | Tools Required |
|---|---|---|
| Top Platform | 2-inch wood screws | Drill, Screwdriver |
| Legs | 2.5-inch wood screws, wood glue | Drill, Screwdriver, Clamps |
Adding Support Braces for Stability
Support braces between the legs add stability. Use 1.5-inch wood screws to attach them. This is crucial for the step stool’s stability under weight.
“A sturdy step stool is not just about functionality; it’s also about safety. Ensuring that every joint is secure and every leg is stable is paramount.”
By following these steps, you’ll have a sturdy wooden step stool. It’s perfect for DIY projects or household needs.
Sanding and Finishing Your Wooden Step Stool
After you’ve put together your wooden step stool, it’s time for the final touches. Sanding and finishing make the stool last longer and look better. They also highlight the wood’s natural beauty, making your stool a great addition to your home.
Proper Sanding Techniques for Beginners
Sanding smooths out the wood, getting rid of splinters and rough spots. Begin with coarse-grit sandpaper (120-150 grit) and move to finer grits (220-240 grit) for a smooth finish. Always sand with the wood grain to avoid scratches.
Beginners should sand all surfaces evenly, focusing on areas that get a lot of use. Using a sanding block keeps the sandpaper flat, leading to a better finish.
Choosing the Right Finish for Durability
Choosing the right finish is key to your step stool’s durability and upkeep. You can pick from varnish, polyurethane, or oil-based finishes. Varnish and polyurethane offer a strong, protective layer, while oil-based finishes bring out the wood’s natural color and grain.
Think about how often you’ll use the stool and what you like when picking a finish. For a stool that’s used a lot, a tough finish like polyurethane is best.
Applying Finish Like a Pro
Applying the finish right is as important as picking the right one. Start with a thin coat using a clean brush or cloth, following the instructions. Let the first coat dry completely before lightly sanding with fine-grit sandpaper.
Put on more coats the same way; usually, two to three coats are enough. Make sure to work in a well-ventilated area and follow all safety rules when applying finishes.
Optional Customisations to Make Your Step Stool Unique

Now that you’ve built your wooden step stool, it’s time to make it truly yours. With a few simple customisations, you can turn a functional piece into a statement piece that reflects your personal style.
Adding Decorative Elements
You can add decorative elements to give your step stool a unique look. Consider adding carved patterns or intricate designs to the legs or top platform. You can also use metal or wooden ornaments to add a touch of elegance.
Incorporating Storage Features
If you want to make your step stool more functional, consider adding storage features. You can add a storage compartment under the top platform or attach a small tray to the side for holding small items.
Personalising with Paint or Stains
Personalize your step stool with paint or stains to match your home decor. Choose a color that complements your existing furniture, or go bold with a bright hue. You can also use a combination of stains to create a unique, multi-tonal look.
By incorporating these customisations, you can turn your wooden step stool into a one-of-a-kind piece that showcases your creativity. Whether you’re working on DIY furniture projects or exploring beginner woodworking projects, this step stool is a great starting point.
Troubleshooting Common Issues During Your Build
Troubleshooting is key in woodworking, even for beginners. Issues like alignment problems, wood splitting, and a wobbly stool can happen. These problems can pop up even with careful planning.
Fixing Alignment Problems
Alignment issues often come from small measurement mistakes. To solve this, double-check your measurements against the template. If parts still don’t fit, use clamps to adjust them gently.
Make sure your workspace is flat, and your tools are sharp. This can help avoid many alignment problems.
Dealing with Wood Splitting and Splintering
Wood splitting or splintering can occur when cutting or drilling. To avoid this, use sharp tools and pre-drill holes for screws. If splitting happens, apply wood glue and clamp it until it dries.
Solutions for Wobbly Stools
A wobbly step stool is unsafe. Ensure all legs are evenly cut, and the floor is level. If it still wobbles, add adjustable feet or shims under the legs to stabilise it.
| Issue | Cause | Solution |
|---|---|---|
| Alignment Problems | Measurement discrepancies | Double-check measurements, use clamps to adjust |
| Wood Splitting | Dull tools, improper drilling | Use sharp tools, pre-drill holes |
| Wobbly Stool | Uneven legs, uneven floor | Check leg length, add adjustable feet or shims |
🔨 Want to Build Your Wooden Step Stool Without Guesswork?
If you enjoyed these beginner-friendly step stool plans, imagine having step-by-step blueprints for 16,000+ woodworking projects—all designed to be easy, clear, and frustration-free.
👉 With Ted’s Woodworking, you get:
- ✅ 16,000 done-for-you woodworking plans (step stools, furniture, DIY projects & more)
- ✅ Beginner-friendly, step-by-step instructions — no experience required
- ✅ Exact cutting & materials lists to save time, money, and wood
- ✅ Detailed diagrams & multiple viewing angles (no guesswork at all)
- ✅ Lifetime access + free monthly plan updates
- ✅ Bonus guides & videos to improve your skills faster
🔥 One-time payment. Lifetime access. No monthly fees.
Conclusion: Celebrating Your First Woodworking Success
You’ve finished your beginner wooden step stool plans. This shows you’ve got the hang of woodworking. Your new step stool is not just useful, but it also makes you feel more confident in your abilities.
Finishing this project is a big win. It proves you can stick to a plan, manage your time well, and solve problems. These skills will help you with even harder projects in the future.
As you keep working on woodworking, the skills you learned from this project will be super helpful. You’ll be able to take on more challenging projects. This will make your woodworking even better and more creative.
FAQ
What is the best type of wood for a beginner wooden step stool project?
Softwoods like pine or spruce are great for beginners. Hardwoods like oak or maple are also good. These woods are easy to work with and available.
What tools are required for building a wooden step stool?
You’ll need a circular saw, drill press, and a hand saw or jigsaw. A sander and drill are also essential. Clamps, a tape measure, and a square might be needed, too.
How do I scale the free step stool templates to fit my needs?
Use a photocopier or Adobe Acrobat to resize the PDF. Adjust the dimensions to keep the step stool strong and stable.
What safety precautions should I take when working with power tools?
Always wear safety glasses and keep loose clothes tied back. Avoid jewellery that could get caught. Keep your area clean and follow the tool’s instructions.
How can I prevent wood splitting and splintering during the build?
Make pilot holes for screws and use a sharp saw blade. Applying a wood sealant or finish can also help protect the wood.
What are some common issues that may arise during the build, and how can I troubleshoot them?
Issues like alignment problems and wood splitting can happen. Check your measurements and adjust your cutting. Make sure the legs are securely attached.
Can I customise my step stool with decorative elements or storage features?
Yes, you can add carvings, engravings, or a shelf. Personalize it with paint or stains to match your style.
How long does it take to complete a beginner wooden step stool project?
It usually takes about 3 hours. This includes planning, cutting, assembling, and finishing.
What are the benefits of building a wooden step stool as a beginner woodworking project?
It helps you learn essential skills like measuring and assembling. It also boosts your confidence for more projects.
Are the free templates provided compatible with different types of wood?
Yes, the templates are versatile for various woods. You might need to adjust dimensions or cutting techniques based on the wood type.
Can I use the skills learned from this project for more complex woodworking projects?
Yes, the skills from this project can help with more complex projects. You’ll learn basic skills that can be built upon.

