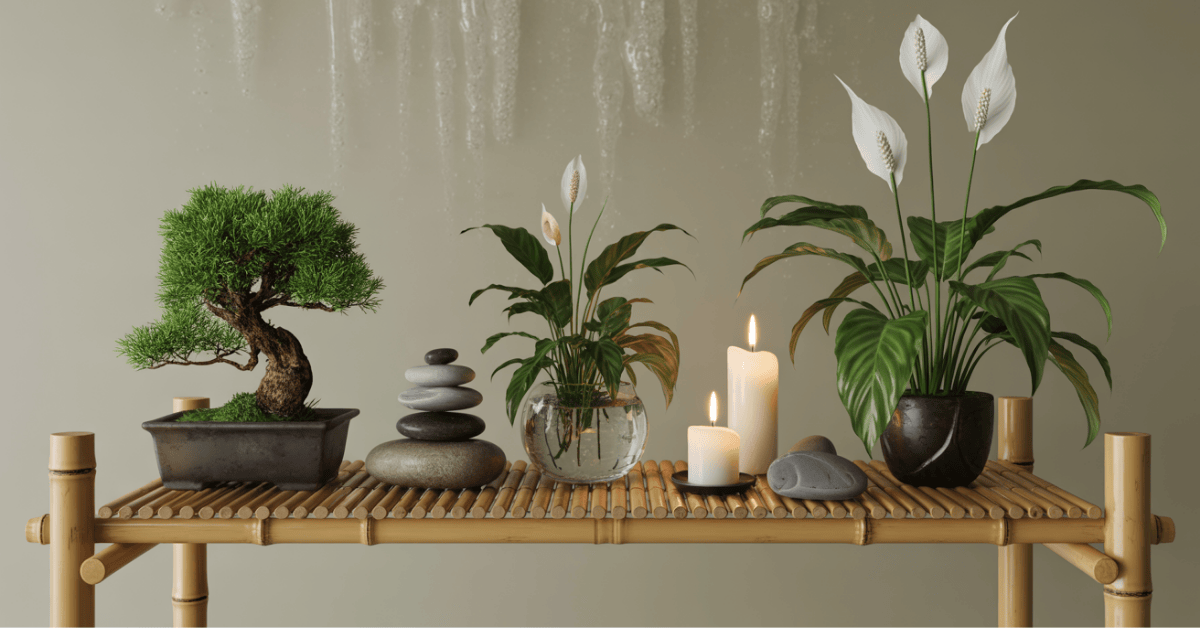
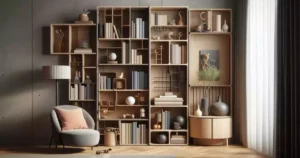
Bringing the outdoors into your home can be a big change. One easy way is to show off your favourite plants on wooden shelves.
Indoor plants clean the air and make you happier. They also bring natural beauty to your space. Showing them on shelves can make any room look better.
This guide will show you how to make your own DIY wooden plant shelves. You’ll create an indoor garden display that shows off your style.
Key Takeaways
- Learn how to plan and design your DIY wooden plant shelves
- Understand the materials needed for the project
- Follow step-by-step construction instructions
- Discover tips for displaying your plants attractively
- Customise your shelves to fit your home decor
The Benefits of DIY Wooden Plant Shelves for Your Indoor Garden
Building your own wooden plant shelves is a great way to make your indoor garden look better. It helps you use space well and adds beauty to your home.
Space Optimisation for Plant Collections
DIY wooden plant shelves are great for saving space. They use vertical space to hold many plants, keeping your floors and surfaces clear. This is perfect for small homes or apartments where space is tight.
| Benefits | Description |
|---|---|
| Space Optimization | Allows for a tailored design to fit your home décor |
| Customization | Allows for tailored design to fit your home décor |
| Aesthetic Appeal | Enhances the visual appeal of your indoor garden |
Customisation Options for Your Home Décor
DIY wooden plant shelves let you customise to match your home. You can pick the wood, design, and finish to fit your style. This way, your shelves will look great with your furniture and garden.
Adding DIY wooden plant shelves to your garden makes it both beautiful and useful. It’s a great way to show off your plants and improve your home’s look.
Planning Your DIY Wooden Plant Shelves Project
Before you start building your DIY wooden plant shelves, it’s crucial to plan your project carefully. Proper planning ensures that your shelves fit perfectly in your available space and meet your indoor gardening needs.
Assessing Your Available Space and Light Conditions
Start by checking the space where you plan to put your shelves. Think about the natural light it gets, as this affects the plants you can grow. Measure the dimensions of your space carefully to figure out the maximum size of your shelves.
Determining the Size and Style of Your Plant Shelves
Choose the size and style of your plant shelves based on your space and what you like. You can go for a modern look or something more classic. Think about how many plants you want to display and their sizes.
Sketching Your Design and Taking Measurements
Sketch your design on paper or use a digital tool to see your project. Take exact measurements of your space and the materials you’ll need. This step helps you avoid costly mistakes during construction.
To help you plan, here’s a simple table to organise your thoughts:
| Measurement | Size | Notes |
|---|---|---|
| Wall Space Width | 48 inches | Available space for shelves |
| Shelf Depth | 12 inches | Sufficient for small to medium plants |
| Shelf Height | 30 inches | Allows for easy access |
By following these planning steps, you’ll be well-prepared to create beautiful and functional DIY wooden plant shelves that enhance your indoor garden.
Essential Tools for Building Wooden Plant Shelves
Getting the right tools is key to your DIY wooden plant shelves project. The right tools make the job easier, safer, and ensure your shelves look great.
Basic Carpentry Tools You’ll Need
You’ll need basic carpentry tools to make your indoor plant display shelves. These tools fall into two groups: cutting and measuring, and assembly.
Cutting and Measuring Tools
You’ll need a tape measure, a square, a pencil, a saw, and sandpaper for cutting and measuring. Accuracy is key to making sure your shelves fit right.
Assembly Tools
To put your shelves together, you’ll need a drill, drill bits, a hammer, and screws or nails. Using the right fasteners is important for your shelves’ stability and durability.
Safety Equipment and Precautions
Always prioritise safety when using power tools and working with wood. Wear safety goggles, a dust mask, and keep loose clothes tied back. Make sure your workspace is well-ventilated and clear to avoid accidents.
Selecting the Right Materials for DIY Wooden Plant Shelves Indoor Garden Display

Choosing the right materials for DIY wooden plant shelves is key. It affects both how long they last and how they look. The right picks can make your indoor garden stand out and stay strong.
Types of Wood Suitable for Indoor Plant Shelves
The wood you pick can change how your shelves look and last. It’s important to know the differences between different types of wood.
Softwoods vs. Hardwoods
Softwoods like pine or fir are cheaper but not as tough as hardwoods. Hardwoods, such as oak or maple, last longer and look fancier but cost more. Think about your budget and what you want to see when picking between softwoods and hardwoods.
Budget-Friendly Options
For a cheaper option, think about using reclaimed or engineered wood. Reclaimed wood gives a special look, while engineered wood is stable and won’t warp. Both are good for saving money.
Hardware and Fasteners
The hardware and fasteners need to hold up your plants and shelves. Go for rust-resistant stuff like stainless steel or brass to avoid rust. Make sure the hardware fits the wood you’re using.
Finishes and Sealants Safe for Plants
Finishing your shelves safely is important. Stay away from toxic finishes that can hurt your plants. Instead, pick natural, safe options like beeswax or water-based polyurethane. These protect the wood and keep your garden safe.
Preparing Your Workspace
A well-prepared workspace is key to a successful DIY wooden plant shelves project. It ensures you work efficiently and safely. Before starting, make sure your work area is ready to avoid hazards and make your work easier.
Setting Up a Safe Work Area
To make your workspace safe, clear it of clutter or anything that might get in the way. Make sure there’s good air flow, which is important when using wood finishes or power tools. Always have a fire extinguisher nearby and wear clothes that won’t get caught in tools.
Organising Your Materials and Tools
Organise your materials and tools to work more efficiently. Use labelled containers for your wood and hardware so they’re easy to find. Keep your tools sharp and in good condition. Also, have a special place for your power tools to prevent accidents.
With a safe and organised workspace, you can focus on building your DIY wooden plant shelves. You’ll achieve a beautiful indoor plant shelf design that will enhance your home’s look.
Step-by-Step Construction Process

Now that you have your materials and tools ready, it’s time to start building your DIY wooden plant shelves. This is the key part where your plan turns into real furniture. It will beautifully display your indoor plants.
Measuring and Cutting the Wood
Getting the wood right is the first step. You need to measure it according to your design. This is the base of your DIY project.
Making Precise Cuts
For accurate cuts, use a sharp saw blade. A mitre saw is best for angled cuts. Always wear safety goggles and keep your fingers away from the blade.
Creating Joints
Strong joints are key to your plant shelves’ stability. Use screws and wood glue for a sturdy frame.
Assembling the Frame
Assembling the frame means putting the cut wood pieces together. Start with the sides and then add the back panel and top.
Use clamps to hold the pieces while you screw them in place. This makes sure the frame is square and strong.
Attaching the Shelves
After the frame is built, attach the shelves. Space them evenly for your plants. Think about the size and type of plants you’ll display.
Use shelf brackets or attach the shelves directly to the frame with screws. Make sure they’re level and secure.
Reinforcing the Structure for Plant Weight
To support your plants’ weight, you might need to add extra support. This can be done with more brackets or thicker wood for the shelves.
Think about the maximum weight your shelves will hold. A strong structure is important for safety and lasting use.
| Step | Description | Tools Needed |
|---|---|---|
| 1 | Measure and cut the wood | Tape measure, saw |
| 2 | Assemble the frame | Screwdriver, clamps |
| 3 | Attach the shelves | Screwdriver, shelf brackets |
| 4 | Reinforce the structure | Additional brackets, screws |
Sanding and Finishing Your Wooden Plant Shelves
After building your DIY wooden plant shelves, it’s time to sand and finish them. This step makes them look better and last longer. It also keeps them safe from moisture from indoor plants.
Proper Sanding Techniques for Smooth Results
Begin by sanding with a medium-grit sandpaper (120-150 grit) to get rid of rough spots. Then, switch to a finer grit (220-240) for a smooth finish. Always sand in the wood grain direction to avoid scratches.
Applying Stain or Paint for Aesthetic Appeal
After sanding, you can add stain or paint to make your shelves look great. Pick a finish that fits your home’s style and is safe for plants. Follow the instructions for applying thin, even coats, letting each dry before adding the next.
Sealing for Moisture Protection from Plants
To keep your shelves safe from moisture, apply a clear sealant after the stain or paint dries. Use a water-based polyurethane or a plant-safe sealant. This step is key to making your shelves last, even with plants that need lots of water.
| Finishing Technique | Purpose | Recommended Product |
|---|---|---|
| Sanding | Smooths the wood surface | 120-240 grit sandpaper |
| Staining/Painting | Enhances aesthetic appeal | Plant-safe stain or paint |
| Sealing | Protects against moisture | Water-based polyurethane |
Mounting Options for Your Plant Shelves

Mounting your plant shelves correctly is key to their stability and function in your home. The mounting method impacts your plants’ safety and your indoor garden’s look.
Wall-Mounted Shelves Installation
Wall-mounted shelves need to be securely attached to the wall to avoid tipping. This means finding the studs and using the right wall anchors.
Finding Studs and Secure Mounting
To find studs, use a stud finder or knock on the wall to find denser spots. Mark the stud spot and drill a pilot hole. Use a level to make sure your shelf is straight before attaching it.
Using the Right Wall Anchors
If your shelf can’t be placed over a stud, use wall anchors that can handle the shelf’s weight. For heavy shelves, toggle bolts or molly bolts are good choices because they offer extra support.
Freestanding Shelf Placement and Stability
Freestanding shelves need careful placement for stability. Place them in a corner or against a wall to prevent tipping. Ensure the floor is level and think about adding anti-tip brackets for more safety.
By following these tips, your DIY wooden plant shelves will be both useful and safely set up. Whether you go for wall-mounted or freestanding, your indoor plant shelf ideas will bring life to your home with greenery.
Creative Design Variations for Indoor Plant Shelves
You can take your indoor gardening to the next level with creative plant shelving ideas. There are many designs to pick from. You can find the perfect shelf that matches your home’s style and meets your plant needs.
Ladder-Style Plant Shelves
Ladder-style shelves are great for saving space in your home. They have multiple levels for plants, using vertical space well. This design is perfect for small spaces like apartments or rooms with little floor area.
You can hang a ladder-style shelf on a wall or in a corner. It makes a beautiful plant display. Add decorative pots and plants with different textures and colors to make it even more appealing.
Floating Corner Shelves for Maximising Space
Floating corner shelves are ideal for making the most of your home’s space. They use the often-wasted corner areas to create a stunning plant display. These shelves are easy to install and can be tailored to fit your needs.
They’re great for showing off small plants or herbs. They add a green touch to your living area.
Window Plant Display Shelves for Optimal Sunlight
Window plant display shelves are perfect for getting your plants the sunlight they need. By placing plants near a window, they get the light to grow well. These shelves are narrow and can be attached to the windowsill or frame.
They provide a beautiful spot for your plants. Choose plants that love sunlight, like succulents or flowering plants.
| Shelf Type | Space Efficiency | Light Optimization |
|---|---|---|
| Ladder-Style | High | Medium |
| Floating Corner | High | Variable |
| Window Display | Low-Medium | High |
Choosing the right design for your indoor plant shelves can make your home look and feel better. Whether you choose a ladder-style, floating corner, or window display shelf, your plants will flourish. They’ll add natural beauty to your space.
Styling Your DIY Wooden Plant Shelves

Styling your DIY wooden plant shelves is the final step in creating a stunning indoor garden. It should reflect your personal style. To make the most of your new shelves, consider the following tips to enhance your indoor plant shelf decor.
Plant Arrangement Tips by Light Requirements
Arrange your plants according to their light requirements to ensure they thrive. Place plants that need bright light near sunny windows. Those who prefer shade can be placed further away from direct sunlight. This will help create a balanced and healthy indoor garden.
Grouping Plants by Size and Growth Habits
Group plants by their size and growth habits to create a visually appealing display. Place taller plants towards the back of the shelf and smaller ones towards the front. This will prevent larger plants from overshadowing smaller ones and create a harmonious arrangement.
Incorporating Decorative Elements
Incorporate decorative elements such as vases, sculptures, or other ornaments to add a personal touch. Choose items that complement the style of your wooden plant shelves and the overall aesthetic of your home.
By following these tips, you can create a beautiful and unique display on your DIY wooden plant shelves. It will showcase your indoor plants and personal style.
Troubleshooting Common Issues with DIY Plant Shelves
Enjoying your DIY wooden plant shelves can sometimes come with a few problems. Issues like wobbly shelves, water damage, or shelves that sag under weight can happen. Here are some easy fixes to keep your shelves sturdy and working well.
Fixing Wobbly Shelves
A wobbly shelf can be a problem and might make your plants fall. First, make sure the shelf is level and the wall anchors are tight. Tightening loose screws or adding more support brackets can help. Also, make sure the floor is level if your shelf is freestanding.
Addressing Water Damage and Prevention
Water damage is common with plant shelves because of the moisture. To prevent this, seal your shelves with a waterproof finish. Check the shelves regularly for water damage and repair it promptly. Using planters with good drainage can also stop water from getting on the shelves.
Reinforcing Shelves That Sag Under Weight
If your shelves are sagging under the weight of plants, you can add support. Use brackets or corbels under the shelves for extra strength. You can also make the shelves thicker or use stronger materials. Spreading the weight of your plants more evenly can also help.
✨ Want to Build Stunning Wooden Plant Shelves Without Guesswork?
If you loved this DIY plant shelf tutorial, then you’ll be thrilled to know there’s a way to make any woodworking project 10× easier, faster, and more professional — even if you’re a beginner.
👉 Unlock 16,000+ step-by-step woodworking plans that eliminate all confusion.
Perfect for building shelves, planters, garden décor, furniture, or ANY project you dream of!
🎯 Get Ted’s Woodworking — the world’s largest woodworking plan collection trusted by 50,000+ creators.
⭐ Why You’ll Love Ted’s Woodworking
- 16,000 “Done-For-You” Plans with detailed diagrams, cutting lists & A-to-Z instructions
- Beginner-friendly & pro-level — no expensive tools or big workshop needed
- Crystal-clear schematics & multiple angle views so you never guess anything
- Lifetime free monthly plans + access from any device
- Free bonuses: 150 premium videos, CAD plan viewer, business guide & more
- One-time price — no monthly fees (limited-time discount!)
- 60-day “Love it or Get Your Money Back” guarantee — zero risk!
🔥 Ready to Build Like a Pro?
👉 Click Here to Get Instant Access to Ted’s Woodworking
Transform your woodworking confidence and create stunning plant shelves, home décor, and furniture with ease!
Conclusion
Now you know how to make DIY wooden plant shelves. It’s time to make your indoor garden shine. Follow the steps from this article to create a stunning display for your plants.
Starting your DIY project is exciting. The joy of making something yourself is just as good as having plants. It’s a rewarding feeling.
With your new shelves, you can show off your plants and make your home cosier. So, start building and enjoy the process!
FAQ
What type of wood is best for building indoor plant shelves?
The best wood for indoor plant shelves depends on your style and budget. Solid oak, pine, and cedar are good choices because they’re strong and handle moisture well. Look for sustainably sourced wood for an eco-friendly option.
How do I ensure my DIY plant shelves are stable and won’t topple over?
For stability, attach your shelves to the wall if they’re tall or heavy. Use wall anchors or screws to secure them to studs. For freestanding shelves, a wide base and anti-tip brackets can help.
What are some creative ways to style my DIY wooden plant shelves?
Style your shelves by arranging plants by light needs, size, and growth habits. Add vases, sculptures, or other decorations for interest. Mix textures, colors, and shapes for a lively look.
How do I protect my wooden plant shelves from water damage?
Apply a waterproof sealant like polyurethane or varnish to protect your shelves. Clean spills right away and avoid plants with saucers that can overflow.
Can I use reclaimed or recycled wood for my DIY plant shelves?
Yes, reclaimed or recycled wood adds a unique touch to your garden. Make sure it’s sturdy, dry, and pest-free. Clean, sand, or refinish it before use.
What are some common mistakes to avoid when building DIY wooden plant shelves?
Avoid mistakes like not measuring right, using the wrong materials, and not securing shelves well. Follow safety rules, use proper techniques, and test your shelves before adding plants.
How can I maximise space with my indoor plant shelves?
Use ladder-style or floating corner shelves to save space. Wall-mounted shelves or those near windows also make the most of light.
What are some tips for choosing the right plants for my indoor garden?
Choose plants based on light, temperature, and humidity needs. Pick ones that do well indoors and fit your lifestyle. Group plants with similar needs for easier care.