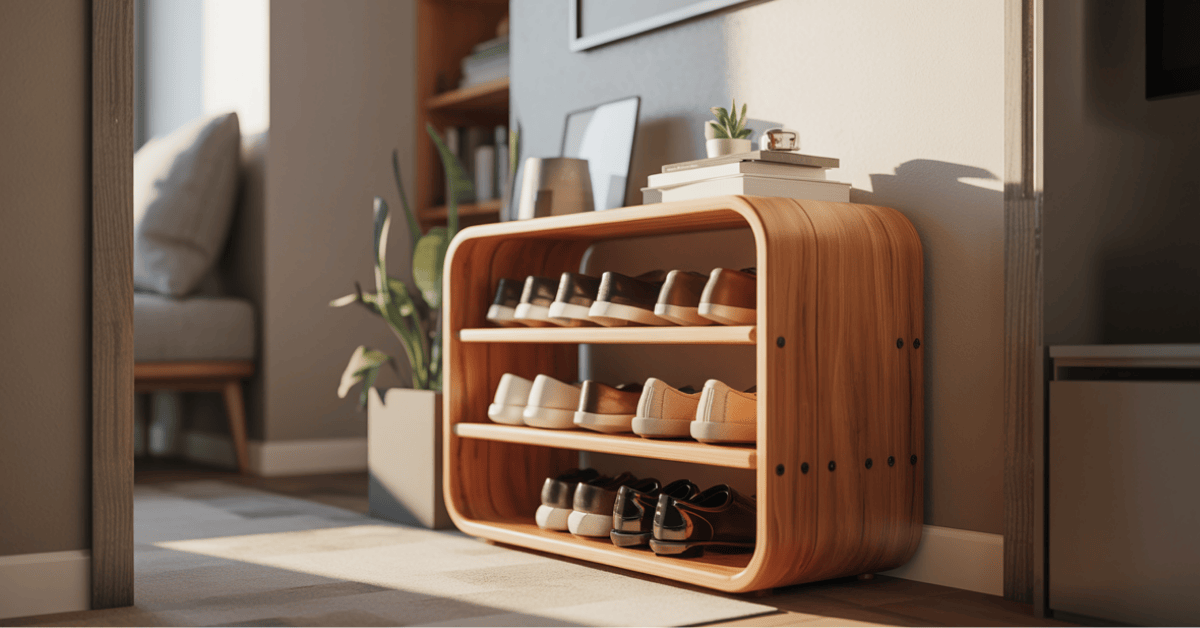
Are you tired of cluttered entryways and disorganised footwear? With limited space becoming common in urban homes, finding good storage is key. A well-made wooden shoe rack can change the game, offering a neat way to store your shoes.
Creating a custom shoe rack keeps your shoes organised and adds personal style to your home. This easy guide will show you how to make a functional and stylish wooden shoe storage for small spaces.
Key Takeaways
- Learn how to build a custom wooden shoe rack for small spaces.
- Discover beginner-friendly DIY techniques for wooden shelves.
- Understand the importance of shoe storage in maintaining a clutter-free home.
- Get tips on customising your shoe rack to fit your personal style.
- Explore the benefits of using wooden shelves for shoe organisation.
Why a DIY Wooden Shoe Rack is Perfect for Small Spaces
In small homes, every inch counts. A DIY wooden shoe rack can be a big help. With more small space shoe rack ideas and creative shoe storage diy projects, people want to make the most of their space. A custom wooden shoe rack keeps your shoes tidy and adds warmth to your home.
Space-Saving Benefits of Custom Shoe Storage
A custom wooden shoe rack fits your space perfectly. It’s great for tight spaces. By making it yourself, you can place it in your entryway, closet, or under the stairs. Some benefits include:
- Maximising vertical space to keep floors clear
- Customising the size to fit your specific needs
- Utilising often-wasted spaces like corners or against walls
Cost Advantages of Building Your Own Rack
Building your own wooden shoe rack can save you money. You get to pick the materials and design. This means you can:
- Save money on labour costs
- Select affordable materials that fit your budget
- Create a product that is tailored to your needs, reducing the need for additional storage solutions
This way, you save money and feel proud of what you’ve made.
Planning Your DIY Wooden Shoe Rack for Small Spaces

Planning is key to a functional DIY wooden shoe rack in small areas. You need to think about a few important factors. These will help make your shoe rack work well.
Measuring Your Available Space
Start by measuring the height, width, and depth of your space. For example, a rack that’s 45 inches wide, 30 inches tall, and 18 inches deep is common. Make sure to measure carefully so your rack fits right.
Determining Shoe Capacity Needs
Then, think about how many shoes you need to store. This will help you choose the right size and number of wooden shelves. Remember, boots take up more space than sandals.
Choosing the Right Design for Your Space
The design of your shoe rack should match your space. Think about how you can use the space best.
Vertical vs. Horizontal Designs
Choose between a vertical or horizontal design based on your space. Vertical designs are good for narrow spots, while horizontal ones fit well under benches or in closets.
Corner-Fitting Options
If you have a lot of corner space, think about a corner-fitting shoe rack. It’s a smart way to use space that’s often wasted, making your area more organised.
Essential Tools and Materials for Your Project

Before starting your wooden shoe rack, gather all the tools and materials you need. This step ensures your project goes smoothly and quickly.
Required Tools for Beginners
Beginners need basic tools for their DIY wooden shoe rack. These include:
- Basic Hand Tools: A tape measure, carpenter’s square, and clamps are key for measuring and holding pieces.
- Optional Power Tools: A saw and drill/driver can speed up your work. They’re not required, but help a lot.
Best Woods for Shoe Rack Construction
Choosing the right wood is important for your shoe rack’s look and durability. Here are some options:
- Budget-Friendly Options: Pine or fir wood is affordable and still looks good.
- Durable Wood Choices: Oak or maple wood lasts longer and is perfect for a shoe rack.
Hardware and Additional Supplies
You’ll also need hardware and supplies to finish your project. These include:
- Wood glue for bonding pieces together.
- Screws or nails for putting the rack together.
- Sandpaper for making the wood surfaces smooth.
Having the right tools and materials is crucial for a successful DIY wooden shoe rack. By picking the right wood and hardware, you can make a useful and stylish shoe storage for small spaces.
Safety Precautions for DIY Woodworking
To have a safe and fun DIY experience, it’s key to follow safety rules when working with wood. Making a wooden shoe rack can be a great project. But it’s important to stay safe to avoid accidents.
Personal Protective Equipment
Always wear protective gear, like safety glasses and a dust mask, when using power tools. This gear keeps your eyes safe and stops you from breathing in wood dust. Wood dust can harm your health.
- Safety glasses protect your eyes from debris.
- A dust mask prevents inhalation of wood particles.
- Hearing protection is also crucial when operating loud machinery.
Safe Tool Handling Practices
Handling tools safely is vital to avoid accidents in your workshop. Here are some important practices to follow:
- Read the manual for each tool before use.
- Keep your work area clean and clear of clutter.
- Use tools with guard protection to prevent accidental contact with blades.
By following these safety tips, you can reduce risks. This way, you can enjoy making your DIY wooden shoe rack for small spaces.
Preparing Your Wood for the Shoe Rack

Getting your wood ready is key to making a strong DIY wooden shoe rack for small spaces. This step includes several important actions. It makes sure your shoe rack works well and looks good.
Measuring and Marking Your Wooden Pieces
First, measure and mark your wood based on your design. Use a tape measure and a pencil to mark the wood. Make sure your measurements are right to avoid mistakes when cutting.
You’ll need pieces for the frame, shelves, and maybe a back panel for a standard shoe rack.
Cutting the Wood to Size
After marking, cut the wood to size. You can use a circular saw or a hand saw, depending on what you prefer and what tools you have. For example, cut the pine top to size with a 2-inch overhang on each side.
This makes the surface sturdy for your shoes and adds elegance to the design.

Sanding Techniques for Smooth Edges
After cutting, sanding is vital to smooth out the edges and surfaces. Begin with coarse-grit sandpaper (about 120-grit) and move to finer grit (220-grit or higher) for a smooth finish. This step is key to a professional look and safety.
You can also stain the wood, like dark walnut, to add contrast and improve the look.
Some important sanding techniques include:
- Sanding with the grain to avoid scratches
- Using a sanding block for flat surfaces
- Sanding edges carefully to prevent damage
Step-by-Step Assembly of Your DIY Wooden Shoe Rack for Small Spaces

Now that you have all the pieces ready, it’s time to start building your wooden shoe rack. This guide will help you through the assembly process. It will make sure your DIY project is both functional and looks great.
Building the Frame Structure
To begin, lay one side of the frame flat on a stable surface. Make sure the grooved side is facing up. Apply a thick layer of wood glue in each groove for a strong bond.
Then, place the shelves into their grooves, making sure they’re evenly spaced and aligned. Next, attach the other side of the frame to the shelves. Use clamps to hold everything in place while the glue dries. This step is key to a sturdy base.
Installing the Wooden Shelves
With the frame structure in place, focus on installing the wooden shelves. Make sure each shelf is level and evenly spaced. Adjust the spacing based on your shoe size and rack design.
Securing All Components Together
To secure all components together, you can use nails or screws. Both have their benefits, depending on your preference and tools.
Nail vs. Screw Options
Nails are quicker and provide a clean finish. But screws offer more holding power, which is good for heavier constructions. Think about the weight your shoe rack will hold when choosing between nails and screws.
Using Wood Glue for Extra Stability
Applying wood glue to the joints also enhances stability. This extra step makes your DIY project durable and long-lasting.
By following these steps, you’ll have a functional and stylish DIY wooden shoe rack for your small space. Make sure all parts are securely attached and the rack is stable before using it.
Finishing Touches for Your DIY Shoe Storage
Now that your DIY wooden shoe rack is built, it’s time to add the final touches. These steps will make it both useful and stylish. They’re key to improving its look and lasting power.
Sanding the Assembled Rack
Sanding is a must before staining or painting. Begin with medium-grit sandpaper to smooth out any rough spots. Then, switch to fine-grit sandpaper for a glossy finish. This makes your shoe rack look professional and fits well with your home’s style.
Staining or Painting Options
Deciding between staining and painting depends on your taste and your home’s style. Staining highlights the wood’s natural beauty, while painting lets you choose from many colors. Think about your space’s style before you decide, and test samples first.
Applying Protective Sealant
After staining or painting, apply a protective sealant. A clear coat of polyurethane or varnish will keep your rack looking good longer. This is crucial in busy areas like entryways, where your rack will get a lot of use.
Troubleshooting Common Issues in Wooden Shoe Rack Construction
Building a DIY wooden shoe rack for small spaces can have its challenges. But with the right troubleshooting techniques, you can overcome them. As you follow your woodworking shoe rack tutorial, be ready for any problems that might come up.
Fixing Wobbly Racks
If your shoe rack wobbles, first check if the legs are even and the floor is level. You can use shims or adjustable feet to make it stable. It’s important to have a level floor, as unevenness can make the rack wobble. As “A stable foundation is key to a sturdy shoe rack.”
Addressing Uneven Shelves
Uneven shelves can be a problem if the wood isn’t aligned right or if the shelves aren’t level. To fix this, double-check your measurements and make sure the shelves are evenly spaced. Use a level tool to ensure the shelves are perfectly horizontal. Proper alignment is crucial for a professional look.
Solutions for Tight-Fitting Pieces
If some pieces fit too tightly, you can use a few methods to adjust them. Sanding the edges or tapping them gently with a mallet can help. But be careful not to apply too much force, which can harm the wood. As a professional woodworker once said,
“Measure twice, cut once, and assemble with care.”
By tackling these common issues, you can make sure your DIY wooden shoe rack small space project is sturdy and functional. With these tips, you’ll be ready to solve any problems that come up during construction.
Creative Small Space Installation Ideas
Maximising storage in small spaces needs creativity. A DIY wooden shoe rack is a great solution. The right way to install it can make a big difference in organising your shoes in tight areas.
Entryway Placement Strategies
Your entryway is a great spot for a shoe rack. It’s where you first enter and last leave. A wall-mounted wooden shoe rack or a slim behind-door installation keeps your shoes tidy without taking up floor space. A wall-mounted rack is perfect for very tight spots, offering storage without using up floor area.
Under-Stair Utilisation
The space under a staircase is great for storage. A custom DIY wooden shoe rack fits well under the stairs. It’s a convenient spot for your shoes. This under-stair utilization organizes your shoes and uses often-wasted space.
Closet and Bedroom Solutions
For more shoe storage, think about a shoe rack in a closet or bedroom. A wooden shoe rack can sit on the floor or be mounted on the wall to save space. In closets, a behind-door shoe rack is a smart choice, using the space behind the door.
Wall-Mounted Options
Wall-mounted shoe racks are versatile and can go in many rooms, from entryways to bedrooms. They keep your shoes off the floor, reducing clutter and making the area look neater.
Behind-Door Installations
Behind-door installations are a smart way to use dead space. These racks can be put on the back of a door, adding storage without using floor or wall space.
| Installation Idea | Space Saved | Storage Capacity |
|---|---|---|
| Wall-Mounted Rack | Floor Space | Up to 10 pairs |
| Behind-Door Rack | Wall and Floor Space | Up to 8 pairs |
| Under-Stair Rack | Under-Stair Space | Up to 12 pairs |
By using these creative ideas, you can have a more organised home with plenty of shoe storage, even in the smallest spaces.
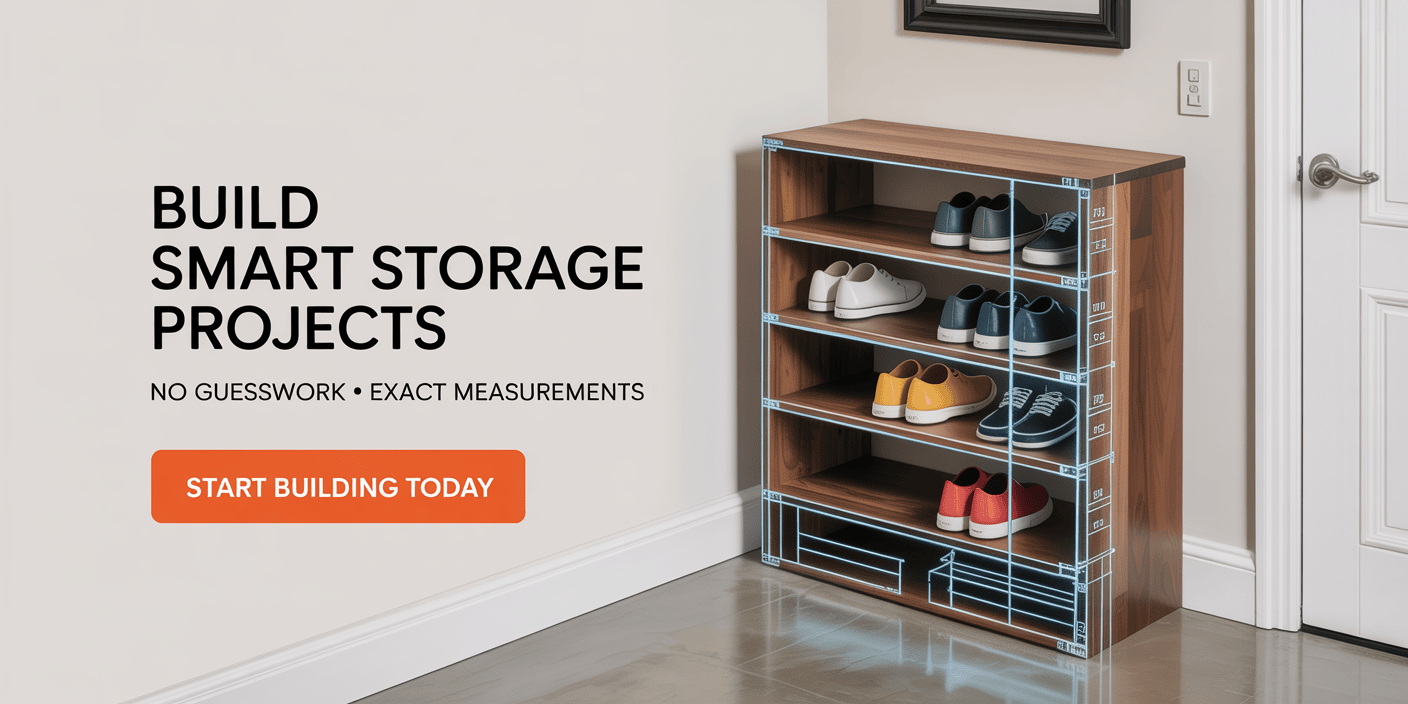
Ready to Build More Smart Wooden Projects Like This?

If you enjoyed this wooden shoe rack tutorial for small spaces, imagine having step-by-step plans for 16,000+ woodworking projects—all in one place.
🔨 Why Woodworkers Trust Ted Woodworking:
- ✅ 16,000 done-for-you woodworking plans with clear step-by-step instructions
- ✅ Exact cutting & material lists – no guesswork, no waste
- ✅ Beginner-friendly designs (no expensive tools or big workshop needed)
- ✅ Detailed diagrams & multi-angle schematics for perfect results
- ✅ Lifetime access + free monthly new plans (one-time payment)
💡 Whether you want to build shoe racks, shelves, storage units, furniture, or space-saving home projects, this library has everything you’ll ever need.
👉 Click here to get instant access to Ted Woodworking and start building smarter today
(Limited-time one-time access – no monthly fees)
Conclusion: Enjoying Your New DIY Wooden Shoe Storage Solution
With the right tools, a bit of planning, and creativity, you’ve built a wooden shoe rack. It looks great and works perfectly in your small space. Your new diy wooden shoe rack for small spaces is now ready to keep your shoes organised and easily accessible.
The wooden shelves in your shoe storage solution provide ample space for your shoe collection. They keep your shoes dust-free and in good condition. By choosing to build your own small space shoe rack, you’ve saved money and created a customised shoe storage solution that perfectly fits your needs.
As you enjoy your new shoe storage solutions, you’ll appreciate the convenience and style it brings to your home. Whether it’s placed in the entryway, under the stairs, or in your bedroom, your wooden shoe rack is sure to be a practical and attractive addition to your living space.
FAQ
What type of wood is best for building a DIY wooden shoe rack?
The best wood for a DIY shoe rack depends on your budget and how durable you want it. Oak, pine, and maple are good choices. They are affordable and strong.
How do I determine the ideal size for my shoe rack?
Measure the space where you’ll put the shoe rack. Think about how many shoes you need to store. You can also pick a design that fits in a corner or uses vertical space.
What safety precautions should I take when working with power tools?
Always wear safety gear like glasses, a dust mask, and gloves when using power tools. Keep your clothes and hair tied back. Avoid jewellery that could get caught.
Can I customise my DIY wooden shoe rack to fit my specific needs?
Yes, building a DIY shoe rack lets you customise it. You can choose its size, design, and features to match your space and shoe collection.
How do I prevent my wooden shoe rack from becoming wobbly?
To keep your shoe rack stable, make sure it’s well put together and securely attached. You can add support brackets or adjust the feet to level it.
What are some creative ways to install a shoe rack in a small space?
Creative ideas for small spaces include using the area under stairs or installing a rack in a closet or bedroom. Wall-mounted racks are also great for entryways.
How do I maintain and clean my DIY wooden shoe rack?
Keep your shoe rack clean by dusting it with a soft cloth. Avoid too much moisture. Applying a wood finish or sealant can protect the wood and make cleaning easier.
Can I build a DIY wooden shoe rack if I have no prior woodworking experience?
Yes, you can make a DIY shoe rack even without woodworking experience. This guide is easy to follow. With careful planning and safety, you can make a useful and stylish rack.