Did you know a post on DIY wooden wall art has been shared 142.9K times? This shows how popular DIY wooden wall art is becoming. It’s a favourite among those who love to craft and want to make their homes special. In this guide, we’ll show you how to make beautiful wood crafts that are easy on your wallet and reflect your style.
DIY wooden wall art is all about being creative and making pieces that show who you are. Whether you’re new to crafting or have some experience, this article will help you. You’ll learn how to make things like rustic wood wall hangings and geometric designs. These projects are designed to be fun and easy to follow.
Key Takeaways
- The rise of DIY wooden wall art reflects a growing interest in personalised home décor.
- You can find inspiration from a variety of styles, including rustic and modern wooden wall hangings.
- This guide offers practical steps to help beginners dive into DIY wood wall décor.
- Creating wooden art can serve as a cost-effective and fulfilling creative outlet.
- It’s easier than ever to transform scrap wood into beautiful art pieces.
Introduction to DIY Wooden Wall Art
The trend of DIY wooden wall art is growing fast. People want unique and personal DIY home decor projects. Wood is great because it can be rustic or modern, fitting all skill levels.
Wood wall art highlights the beauty of wood’s grain and texture. It’s durable and eco-friendly, making it a smart choice for home decor. You can make beautiful pieces by layering wood and using recycled materials, all while saving money.
Making wooden wall art is rewarding. You can start simple or try complex 3D designs. For example, you can cut a wooden post and play with patterns to create a stunning 3D piece. You can also use wood that’s good for the planet or add color with stains, making your art truly yours.
DIY wooden wall art ideas spark creativity and make your home special. This trend focuses on using sustainable materials and craftsmanship. It not only makes your home look great but also connects you with wood’s natural beauty, opening up many wooden wall decor possibilities.
| Aspect | Details |
|---|---|
| Cost | Recycled wood, plywood, wood glue, spray polyurethane |
| Materials Used | Hand saw, drill, sandpaper, level |
| Tools Required | Layering, staining, and custom designs |
| Creative Techniques | Recycled wood, plywood, wood glue, and spray polyurethane |
Benefits of Creating DIY Wooden Wall Art
Making your wooden wall art has many benefits. It can make your home look better. Wood art is timeless and lets you show off your style. Each piece is unique, with its grain and color, making it special.
Enhancing Your Home Décor
Handmade wall decorations add warmth and charm to any room. They make the space feel welcoming. Different types of wood add their special touch, making the room feel more alive.
Natural wood art also brings a sense of calm. It highlights the beauty of wood, creating a peaceful vibe.
Cost-Effective Crafting Solution
DIY wood wall decor is a budget-friendly option. It’s cheaper than buying expensive art. Plus, it can boost your creativity and productivity.
Using scrap wood is also good for the planet. It’s a sustainable choice that helps reduce waste.
Promoting Creativity and Personal Expression
Creating DIY wooden wall art lets you express yourself. It encourages creative thinking and new ideas. It also helps you feel connected and fulfilled.
With so many woodworking plans out there, you can make anything you want. It’s a journey that’s as rewarding as the final product.
Essential Tools and Materials for Wooden Wall Arts

Starting your DIY wooden wall art project means knowing the key tools and materials. With the right tools and materials, you can make your artistic dream come true. Using the best wood wall art tools and materials boosts your creativity and ensures top-notch results.
Basic Tools You Need
Having the right tools is crucial for any wood wall art project. You’ll need:
- Mitre saw for precise cuts
- Power drill for making holes
- Orbital sander and grit sandpaper for smooth finishes
- Wood glue and wood putty for strong bonding
- Jewellery tool kit for wire work
- A stapler for holding things together
Drill bits like 1/16″ and 5/64″ are needed for different tasks. Tools like the Festool Domino can also improve your woodworking skills.
Types of Wood and Materials Recommended
Picking the right wood is key to your project’s success. Popular wood types include:
- Pine
- Oak
- Maple
- Birch
- Reclaimed wood for eco-friendliness
Using walnut and birch edge banding can add beauty, depending on your style. Aim for 220-240 wooden blocks in sizes 0.5, 1, 1.5, and 2 inches. These can be painted in colors like Gold, Brown, Almond, Copper, and White to make your art unique.
| Material | Recommended Uses | Notes |
|---|---|---|
| Pine | General projects | Readily available and cost-effective |
| Oak | Durable installations | Great for a classic look |
| Poplar | Stain-friendly projects | Ideal for Nutmeg color enhancement |
| Reclaimed wood | Eco-friendly options | Promotes sustainability |
| Spray Paints | Finishing touches | Gold, Brown, Almond, Copper, and White recommended |
DIY Wooden Wall Art Projects Overview
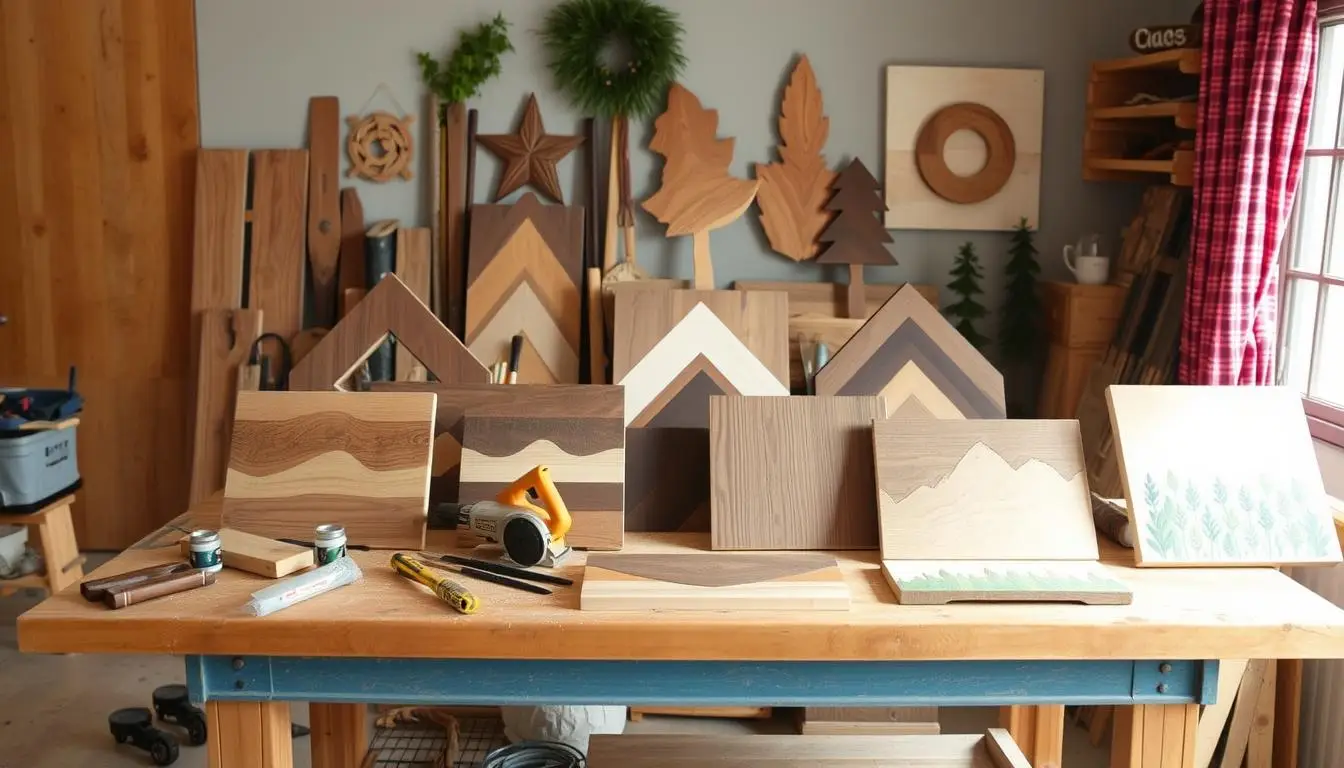
Creating DIY wooden wall art is a fun way to explore different styles and techniques. You can choose from rustic to modern, depending on your taste. Scrap wood is a great material to use, making your ideas come to life.
Variety of Styles and Techniques
Wood wall art can be many things, like geometric shapes or abstract designs. You can use plywood or pine boards for unique wood wall art patterns. Even beginners can start, needing just a few tools and materials like a mitre saw and clamps.
What You Can Achieve with Scrap Wood
Using scrap wood is rewarding. You can turn leftover pieces into beautiful handmade wooden wall decorations. For example, you can make geometric designs by glueing wood slices together.
This method saves money and lets you customise your art easily. Adding different stain colors can make your scrap wood artwork even more special.
| Technique | Material Used | Final Appearance |
|---|---|---|
| Geometric Design | Plywood & Pine | Modern & Structured |
| Rustic Wall Hanging | Reclaimed Wood | Warm & Cozy |
| Abstract Shapes | Various Scrap Pieces | Creative & Artistic |
| Wood Slice Mounting | Multiple Wood Types | Natural & Textured |
These creative projects let you show off your style and add beauty to your space.
15 Easy DIY Wooden Wall Art Ideas
DIY wood wall art can make your home look better and show off your style. This section has 15 easy ideas for making wooden wall art. These ideas range from simple to complex, making it fun for everyone to create.
Rustic Wood Wall Hanging
Make a rustic wall hanging with reclaimed wood. You can stack different planks for a textured look. This adds warmth and charm to your home.
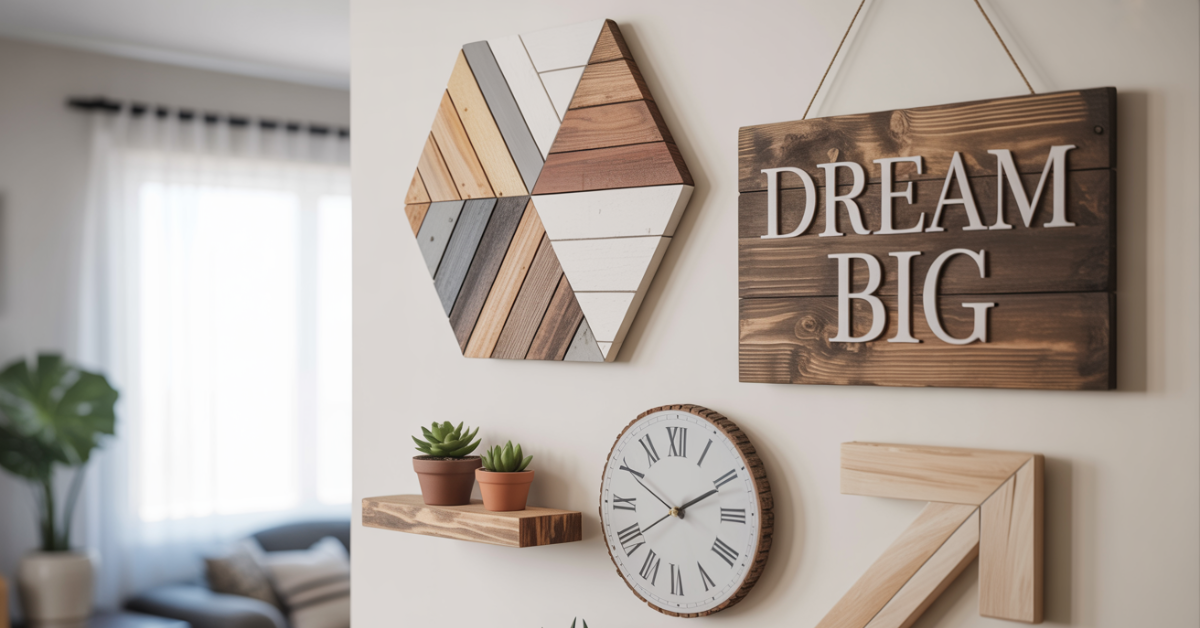
Geometric Wood Wall Art
Geometric patterns bring a modern feel to your walls. Use wood strips in different sizes and colors. This makes your walls stand out.

Abstract Wooden Block Art
Turn wooden blocks into abstract art. Paint or stain them in bright colors and glue them together. This lets your creativity shine.
Reclaimed Wood Wall Decor
Using reclaimed wood is good for the planet and adds character to your decor. Arrange wood pieces of different colors and textures for a unique look.
Modern Wooden Wall Hanging
Make a modern wall hanging with clean lines and simple finishes. Use straight-edged wood and paint it in calm colors. This creates elegant decor.
Wood Wall Art Patterns
Explore wood patterns to add depth to your walls. Try layered or patterned styles. This makes your walls interesting and unique.
Scrap Wood Artwork
Use leftover wood to make art. This saves resources and lets you be creative. You can make collages or abstract shapes.
Handmade Wooden Wall Decorations
Make decorations that show your style. Use stencils, paints, and textures. These pieces will spark conversations and make your space special.
Creative Wood Art Using Stencils
Stencils make art easy and impactful. Use them to add colors and patterns to your wood. This is great for those who like precise designs.
Multi-Dimensional Wooden Art
Try making art with layers for depth. Stack wood pieces of different sizes. This adds a modern twist to your walls.
Wood Plank Art with Paint
Paint wood planks for colorful artwork. Use color blocking or stencils for interest. This adds life to any room.
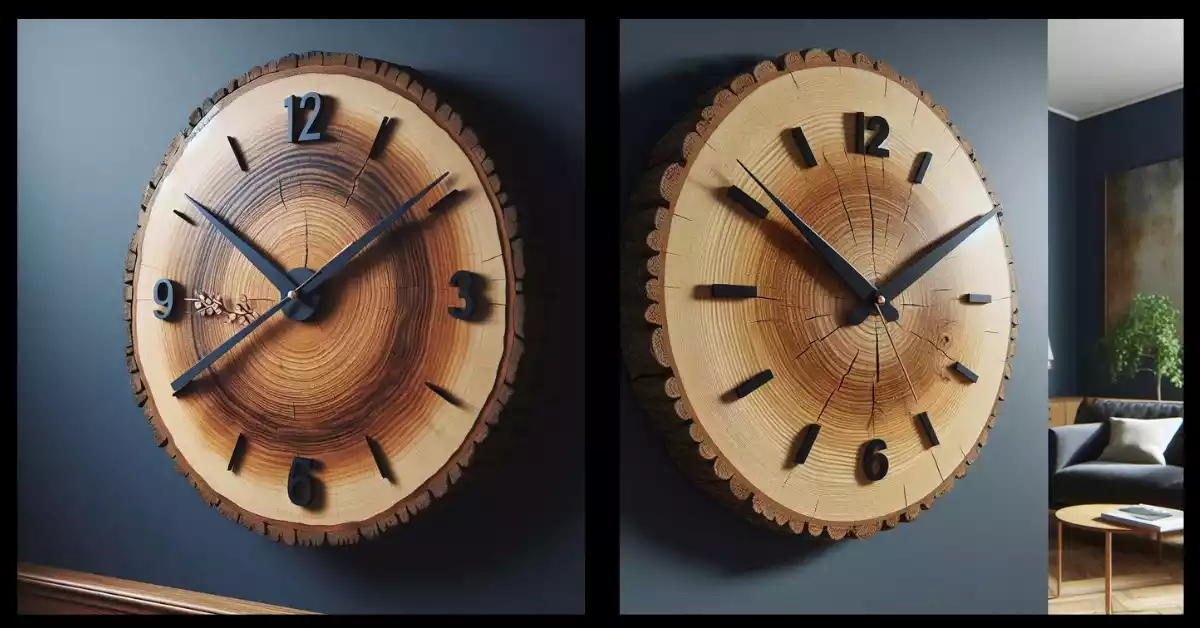
Nature-Inspired Wooden Wall Art
Make art inspired by nature. Use leaves or branches. This connects your home to the outdoors.
Personalised Monogram Wall Art
Make personalised monogram art. Carve or paint initials on wood. This adds a warm touch to your space.
Family Tree Wooden Wall Decor
Make a family tree wall decor. Add photos or names. This creates a lasting piece for your family.
Seasonal Wooden Decor Ideas
Change your decor with the seasons. Make themed pieces for holidays or events. This keeps your home fresh and sustainable.
Step-by-Step Tutorial for DIY Wooden Wall Art

Making your wooden wall art is a fun and rewarding project. This step-by-step guide for DIY projects will help you go from idea to finished piece.
First, get the materials you need. You’ll require a wood lathe bundle, 1/2-inch x 2-foot x 4-foot plywood, wood glue, 1/2-inch pin nails, a sanding sponge, stain or paint, a foam brush, a drop cloth, and a heavy-duty French cleat for hanging.
Then, prepare the tools you’ll use. You’ll need a straightedge, clamps, a circular saw, a mitre saw, a pencil, a pneumatic nailer (if needed), and a tape measure. Remember, the slats should be 1/4 inch thick and 1 1/2 inches wide, so plan your design.
Choose your design and measure your wood. Cut the wood according to your design. The tutorial focuses on geometric wood wall art, which requires symmetry and precision. Use protractors for accurate angles and draw your design on the wood before cutting for a clean finish.
After cutting the wood, start assembling it. Use wood glue to hold the slats together, then add 5/8-inch pin nails for extra strength. Take your time to make sure each piece fits perfectly.
Once assembled, it’s time to finish the piece. You can use charred wood accelerator, aged wood accelerator, whitewash stain, white paint, or clear polyurethane for a glossy look. Remember, let the wax paste cure for 12 hours before applying the clear gloss spray for sealing.
Finish by trimming the edges and creating a frame with extra wood. Attach a heavy-duty French cleat for secure hanging. You’ll be proud of your handiwork and how it enhances your space.
Tips for Successful DIY Wooden Wall Art Projects
Starting a DIY wooden wall art project is exciting. Planning well is crucial to bringing your ideas to life. Smart strategies can make your project easier and more impressive. Whether you’re new to DIY wood art or want to get better, here are some tips for success.
Planning Your Project and Layout
Having a clear design and layout is key to DIY wooden wall art. Start by sketching your ideas to see what it will look like. Choose the right size for your space carefully. Making a cardboard mock-up helps you check sizes before cutting wood.
Popular designs include geometric shapes and rustic themes. These allow for many different looks.
Common Mistakes to Avoid
One big mistake is not checking the measurements correctly. Always double-check before cutting wood to avoid wasting materials. Don’t skip the prep work, like sanding, as it affects the final look.
Keep designs simple for a bigger impact. Use materials like plywood or scrap wood for better results. Customising with colors and designs is a great way to express yourself.
| Common Mistakes | Solutions |
|---|---|
| Inaccurate Measurements | Always double-check before cutting |
| Poor Preparation | Sand rough edges before assembly |
| Overcomplicated Designs | Choose simpler concepts for greater impact |
| Incorrect Material Selection | Use plywood or upcycled scrap wood |
| Neglecting Customization | Experiment with colors to personalize |
Being careful and detailed makes your crafts better. Well-planned DIY wooden wall art projects can also improve your home décor. They show off your creativity and personal style.
🎯 Ready to Take Your DIY Wood Art Skills to the Next Level?

Unlock 16,000+ Woodworking Plans with Ted’s Woodworking – the #1 Toolkit for DIY Creators!
✔️ Step-by-step instructions with detailed schematics – no guesswork!
✔️ Perfect for beginners (even with zero workshop experience)
✔️ Build wall art, furniture, decor & more – easily and affordably
✔️ Lifetime access + monthly free plans + bonus tutorials & videos
✔️ One-time payment – no hidden fees, no subscription!
👉 Click here to explore all 16,000 DIY projects now »
(Limited-time offer – Get it for just $67!)
Conclusion
Making DIY wooden wall art is fun and rewarding. It lets you add a personal touch to your home with handmade decorations. You can use tools like plywood and pine strips, even if you’re new to crafting.
Whether you like modern or rustic designs, there’s a lot you can make. This guide has given you the tools to start your DIY project. You’ll learn about cutting, staining, and different techniques to make unique pieces.
Creating wooden wall art is all about expressing yourself and making your space special. Now, it’s time to get creative with DIY wooden wall art. You can turn old wood into beautiful pieces that make your home cosy. So, go ahead and try out different styles and materials. Your imagination is the only limit!
FAQ
What are some beginner-friendly DIY wooden wall art projects?
Beginners can try making rustic wood wall hangings, geometric wood art, and scrap wood pieces. These projects are simple and can be tailored to match your home’s style.
What tools do I need to start creating wooden wall art?
You’ll need saws, drills, sanding blocks, and paint brushes. When working with reclaimed or scrap wood, always wear goggles and gloves for safety.
How can I ensure my DIY wooden wall art looks polished?
Plan your design before starting. Take your time with painting and finishing. Using a sealant can add a professional touch and protect the wood.
Can I use leftover wood or scrap wood for my projects?
Yes, using scrap wood is a great idea. It saves money and reduces waste. It also lets you create unique pieces that show off your creativity.
What styles of wooden wall art can I create?
You can make many styles, like rustic, modern, abstract, and nature-inspired. Wood is versatile, so you can express your style freely.
Are there any cost advantages to making my wooden wall art?
Making your wall art is cheaper than buying it. It also lets you create unique pieces that reflect your style without spending a lot.
Where can I find inspiration for my DIY wooden wall art projects?
Look for inspiration on home décor blogs, Pinterest, and local craft fairs. Find ideas that match your taste and style.
How do I maintain the finished wooden wall art?
Keep your wooden art clean with a soft cloth. Avoid direct sunlight and too much moisture. If needed, reapply sealant every few years to keep it looking good.

