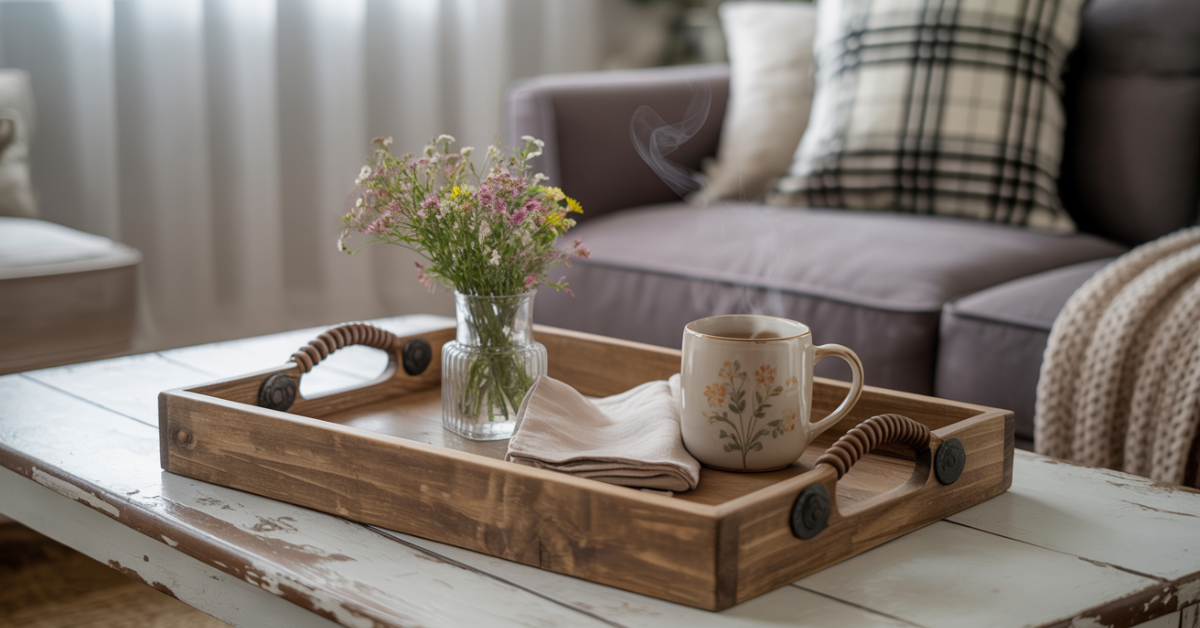
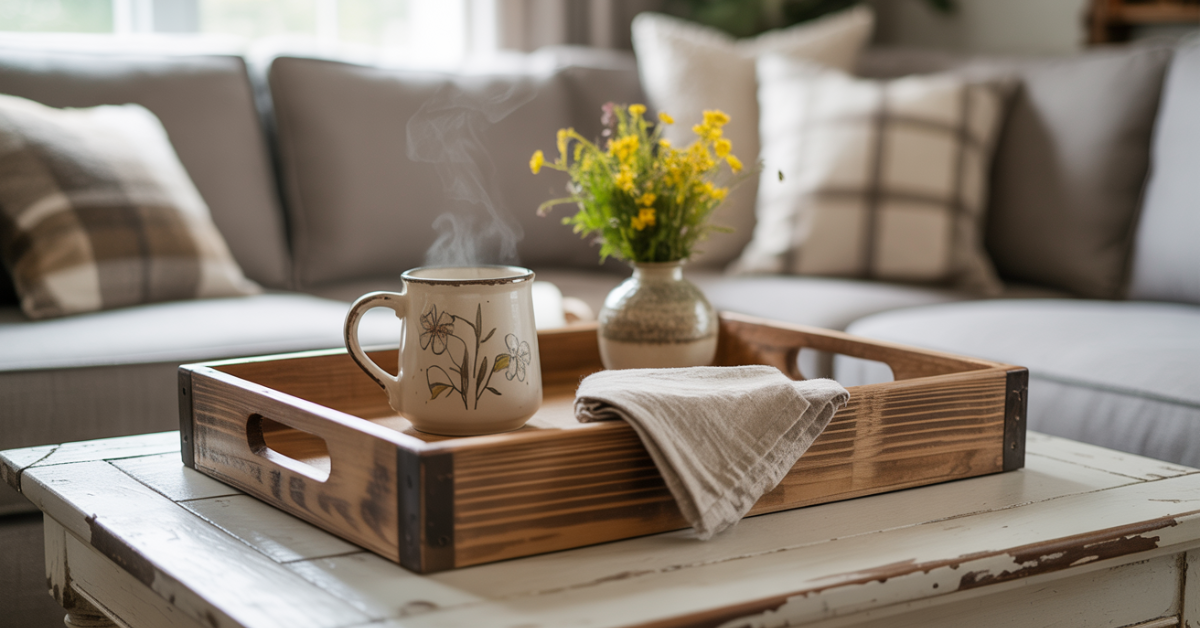
Looking for a creative way to organise your coffee table? A DIY wooden tray with handles is perfect. It keeps small items tidy and adds rustic charm to your living room. Plus, you can customise it to fit your style.
It’s great for serving drinks and snacks or showing off decorative items. With basic tools and woodworking skills, you can make a stunning farmhouse-inspired wooden tray. It brings warmth and character to your home.
Key Takeaways
- Create a beautiful and functional wooden tray with handles for your coffee table.
- Customise the tray to match your unique style and decor.
- Use the tray to organise small items, serve drinks and snacks, or display decorative items.
- With basic woodworking skills, you can make a rustic wooden tray that adds warmth to your home.
- A DIY wooden tray makes a thoughtful and personalised gift.
The Charm of Farmhouse Wooden Trays in Home Decor
Farmhouse wooden trays are a big hit in home decor. They bring a rustic farmhouse decor vibe to any room. They’re loved for their versatility and charm, making them a top pick for homeowners.
These trays fit well in many settings. They’re great for a farmhouse-style living room or a modern kitchen. They’re a valuable addition to any home decor.
Why Farmhouse Style Continues to Captivate
Farmhouse style is still popular because it focuses on natural materials and vintage looks. A wooden serving tray is a perfect example. It adds warmth and character to your home. The rustic charm of these trays brings a cosy, nostalgic feel to any room.
The Versatility of Wooden Trays in Modern Homes
Vintage wooden trays are more than just decorations. They’re also very useful. You can use them to serve guests, show off decorative items, or keep your coffee table tidy. Their flexibility makes them a favourite for adding a rustic touch to your decor.
Adding a farmhouse wooden tray to your decor can create a unified look. It can tie together different parts of your home. Whether you want to add a rustic feel to your living room or a practical serving piece for your kitchen, a wooden tray is a great choice.
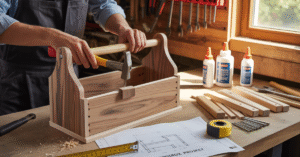
Materials Needed for Your DIY Farmhouse Wooden Tray
The success of your DIY farmhouse wooden tray project depends on the quality of the materials you select. To create a beautiful and durable tray, you’ll need to choose the right wood, hardware, and tools.
Wood Selection Guide
Choosing the right type of wood is crucial for your farmhouse wooden tray. Consider using reclaimed wood or rustic pine for a genuine farmhouse look. The type of wood you choose will significantly impact the appearance and durability of the final product.
When selecting wood, look for pieces that are free from large knots and cracks. You can also consider using wood with character, such as wood with interesting grain patterns or unique imperfections.
Hardware and Fasteners
The hardware and fasteners you use can add to the overall aesthetic of your tray. For a farmhouse-style tray, consider using brass or iron handles. Ensure that you select hardware that complements the style and material of your tray.
For assembling the tray, you’ll need wood screws and possibly wood glue. Ensure that your fasteners are rust-resistant to maintain the tray’s integrity over time.
Tools You’ll Need
To construct your DIY farmhouse wooden tray, you’ll need a variety of tools. Start with the basics: a saw for cutting wood, a drill for making screw holes, and a sander for smoothing out the wood surfaces.
Other essential tools include a tape measure, clamps, and a square to ensure your tray is assembled accurately.
Planning Your Farmhouse Wooden Tray with Handles

Before you start building your farmhouse wooden tray, planning is key. You need to decide on its size, style, and design. This ensures it fits well and looks good in your space. A good plan also helps avoid mistakes during building.
Determining the Perfect Size for Your Space
Think about where your tray will go. Measure the area carefully. Make sure it’s not too big or too small for what you want to display.
Choosing a Design Style
Your tray’s design should match your home’s style. Think about the colors and furniture you have. You might want a rustic look or something more modern. Choosing a style that fits your taste will make the tray a great addition.
Creating a Simple Blueprint
After picking your size and style, make a simple blueprint. You don’t need a fancy drawing. Just a basic sketch with measurements will do. Include the tray’s size, handle placement, and any design features. A clear plan makes building easier and more fun.
“Measure twice, cut once” is a mantra that rings true for any woodworking project, including your rustic wooden tray.
Step-by-Step Construction of Your Farmhouse Wooden Tray with Handles
Now that you have your materials, it’s time to build your farmhouse wooden tray. This project is both enjoyable and practical. It involves several important steps to create a sturdy and beautiful tray.
Cutting the Wood to Size
The first step is to cut the wood to the right size. Use a mitre saw or circular saw for accurate cuts. Always double-check your measurements to avoid mistakes.
Here’s a simple cutting plan to follow:
| Component | Quantity | Dimensions |
|---|---|---|
| Base | 1 | 18″ x 12″ |
| Sides | 4 | 2″ x 12″ |
| Handles | 2 | 1″ x 6″ |
Assembling the Base of the Tray
After cutting all parts, it’s time to build the base. Use wood glue and nails to hold it together. Make sure it’s square, and the corners are tight.
Adding the Sides
Now, attach the sides to the base. Apply wood glue and use nails to secure them. Ensure the sides are even and the corners are aligned.
To add stability, use corner brackets. This will keep your tray sturdy over time.
Installing the Handles
The last step is to add the handles. Measure the space between them for even spacing. Use screws to attach the handles to the sides.
With the handles on, your tray is ready for sanding and finishing. This will make your rustic farmhouse decor piece look and last better.
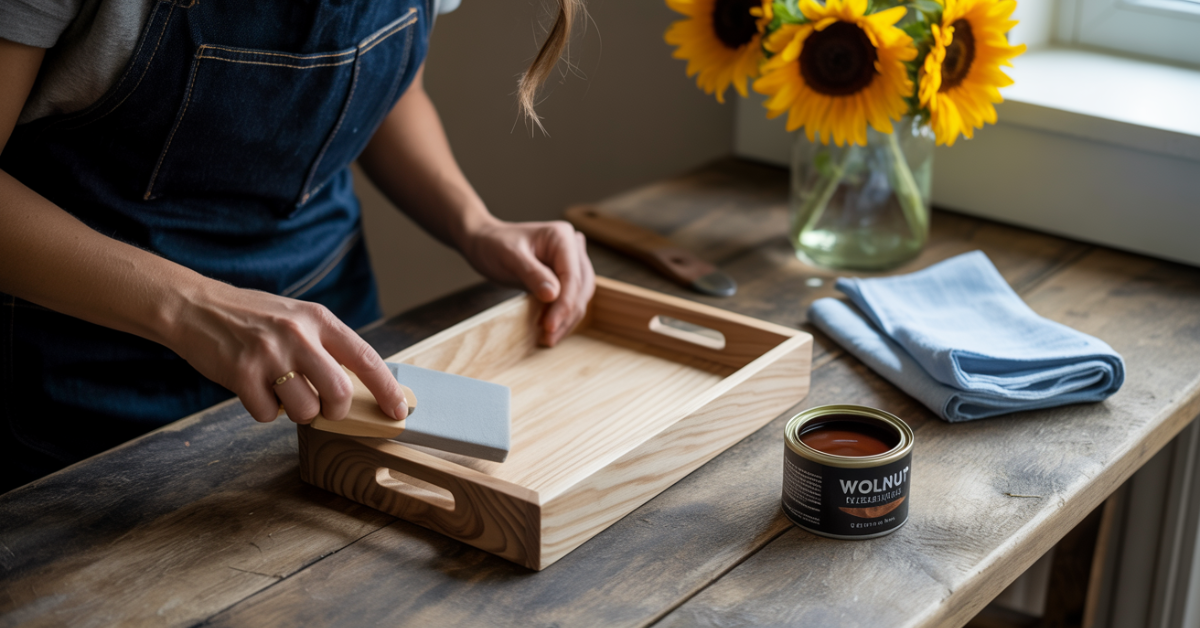
Sanding and Preparing Your Wooden Tray

Sanding is key to a smooth finish on your rustic wooden tray. It makes your coffee table tray DIY look better and gets it ready for staining or sealing. This ensures it lasts longer.
Proper Sanding Techniques
Begin with coarse-grit sandpaper (about 80-100 grit) to remove rough spots or wood fibres. Then, move to finer grits (120-150) for a smoother finish. Always sand with the wood grain to avoid scratches.
“Sanding is an art that requires patience,” says a seasoned woodworker. “Taking your time to sand properly will result in a beautifully finished farmhouse furniture piece.”
Preparing the Surface for Finishing
After sanding, your farmhouse wooden tray is ready for finishing. Make sure the surface is dust-free by wiping it down with a tack cloth. This is crucial for a uniform stain or seal.
- Inspect the tray for any remaining imperfections.
- Use a fine-grit sandpaper for one last sanding.
- Wipe down the tray with a tack cloth to remove dust.
By following these steps, you’ll enjoy your handcrafted farmhouse wooden tray for years.
Finishing Options for Your Rustic Wooden Tray
Finishing your DIY farmhouse wooden tray is where you add your personal touch. The finish greatly affects how your tray looks and lasts. You can choose from staining, painting, and sealing, each giving a unique look and protection.
Staining Techniques for a Vintage Look
Staining is great for a vintage or rustic look. Start by preparing the surface with a wood conditioner. This ensures the stain goes on evenly. Pick a stain color that fits your farmhouse style.
Apply the stain with a brush or cloth, following the wood grain. For a distressed look, use a “dry brushing” technique. This method gives subtle, uneven color variations.
Tips for Staining: Always test the stain on a small area first. Use a water-based stain for easy clean-up or an oil-based stain for richer colors.
Paint Options for Farmhouse Style
Painting your tray is another way to get a farmhouse style. You can pick a bold color or a tone that blends with your decor. For a vintage look, try a distressed paint technique.
Apply a base coat, let it dry, and then add a top coat in a different color. Use sandpaper to distress the edges and surfaces, revealing the base coat underneath.
Choosing the Right Paint: Go for a high-quality, water-based paint for a smooth finish. Chalk paint is great for a matte, vintage look without primer.
Sealing Your Tray for Longevity
Sealing your tray is key, whether stained or painted. A clear sealant protects the wood from spills, moisture, and wear. Choose a water-based or oil-based polyurethane varnish based on your desired finish and protection level.
Apply thin coats, letting each dry before adding the next.
| Finishing Option | Appearance | Durability |
|---|---|---|
| Staining | Enhances wood grain, vintage look | Moderate |
| Painting | Custom color, farmhouse style | High |
| Sealing | Clear finish, protects wood | Very High |
By choosing and applying the right finish, you can make a beautiful, durable wooden tray. It will enhance your coffee table decor and last through daily use.
Troubleshooting Common Issues in DIY Wooden Tray Projects
Starting your DIY farmhouse wooden tray project might bring up some common problems. But with the right troubleshooting, you can solve them easily. Making a wooden tray with handles needs careful attention and problem-solving skills. Here, we’ll cover some common challenges and offer solutions to fix them.
Fixing Gaps and Uneven Joints
Dealing with gaps and uneven joints is a common issue. You can use wood filler to fill gaps and then sand it smooth. For uneven joints, double-check your measurements and use the right joints for your project. Clamps can help keep pieces together while the glue dries.
Addressing Warping and Wood Movement
Warping and wood movement can be tough, especially with solid wood. To prevent warping, make sure your wood is dry and stored properly. Using a rustic farmhouse decor style can also hide small flaws. For bigger warping, you might need to change your design or add extra support.
| Issue | Cause | Solution |
|---|---|---|
| Gaps | Inaccurate measurements | Use wood filler and sand |
| Warping | Improper wood drying | Ensure proper drying and storage |
| Finish imperfections | Incorrect application | Sand and reapply finish |
Repairing Finish Imperfections
Fixing finish imperfections can be a bit of a challenge. If you see uneven staining or brush strokes, sand it lightly and reapply the finish. For bigger problems, you might need to remove the finish and start again. Remember, working on a DIY farmhouse wooden tray project takes patience.
Knowing how to tackle these common issues will help your farmhouse coffee table tray look great and be useful in your home.
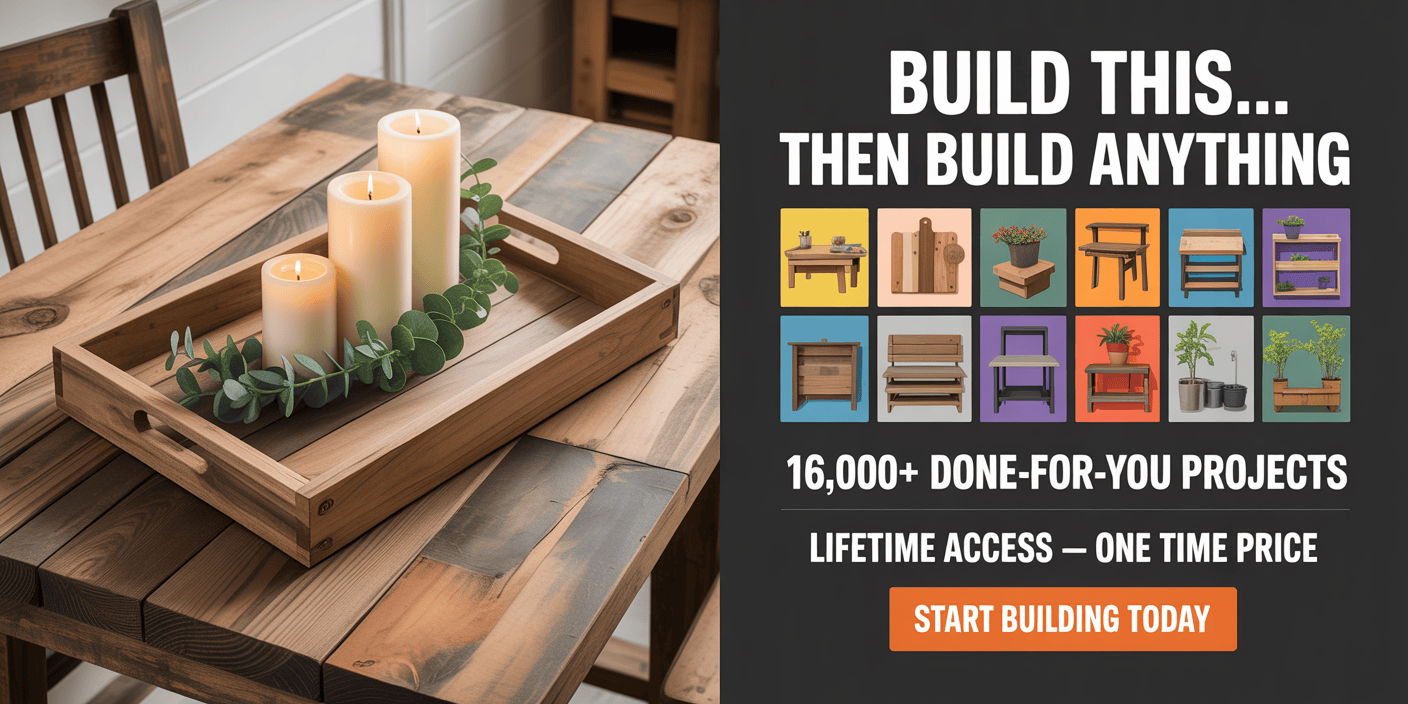
Styling Your Coffee Table Tray DIY for Different Spaces
Now that you’ve made your DIY farmhouse wooden tray, it’s time to see how to style it. Your wooden serving tray can add beauty to many rooms, like the living room, kitchen, and more.
Living Room Coffee Table Arrangements
In the living room, your farmhouse coffee table can be a centrepiece. Decorate it with candles, vases, and books. It’s also great for keeping small items like remotes and coasters organised.
Add some rustic accents like a vintage vase or a wooden box. This will make your living room cosy and inviting.
Dining Room and Kitchen Display Ideas
In the dining room or kitchen, your tray can hold serving dishes, decorative bowls, or be a centrepiece. Fill it with seasonal fruits or greenery for a fresh look. Or use it to serve appetisers and snacks when you have guests over.
It’s also handy for keeping kitchen utensils or spices organised. This way, your DIY project becomes a part of your daily life.
Bedroom and Bathroom Applications
Don’t just use your tray in the living areas. In the bedroom, it can hold jewellery, perfumes, or other personal items on a dresser or nightstand. In the bathroom, it’s perfect for organising toiletries or displaying decorative soaps and lotions.
Using your DIY farmhouse wooden tray in different rooms adds a touch of farmhouse decor. It also makes your home feel connected.
🧰 Build More. Waste Less. Craft Like a Pro with 16,000 DIY Woodworking Plans!

Turn your tray project into just the beginning of your woodworking journey—no experience needed!
👉 Grab the Plans Now for Just $67 »
📘 16,000+ Done-for-You Plans – Build anything from farmhouse trays to full outdoor furniture sets with step-by-step blueprints.
- 🧰 Beginner-Friendly & Pro-Ready – Plans for every skill level, no need for expensive tools or big workshops.
- ✂️ Cutting Lists & Material Guides – Avoid waste and overspending with precise measurements and supply lists.
- 🔍 Crystal-Clear Schematics – Full-colour diagrams, multiple angles, and no guesswork.
- 💻 Lifetime Access + Free Monthly Plans – Download new projects every month at no extra cost.
- 🎁 4 Free Bonuses – Includes 150 premium videos, CAD software, a business starter guide, and a 200+ page woodworking manual.
- ✅ One-Time Price, No Recurring Fees – Just $67 for lifetime access. Risk-free with a 60-day money-back guarantee.
🛠️ Craft your dream woodworking projects—starting today!
👉 Click Here to Unlock All 16,000 Plans »
Conclusion: Enjoying Your Handcrafted Farmhouse Wooden Tray
Now that you’ve made your DIY farmhouse wooden tray with handles, it’s time to enjoy it. This piece is not just useful, but also adds beauty to your home. You can place it on your coffee table, dining room, or even in your bedroom or bathroom.
Your wooden tray with handles is very versatile. It can help create a cozy feel or serve drinks and snacks. It will become a favourite in your home.
Using your DIY tray will make you feel proud of your handiwork. It’s a great way to make your home more personal. Plus, it’s a great topic for conversation when you have guests.
With your new tray, you can try out different styles and arrangements. It’s a fun way to make your living space more interesting. So, get creative and enjoy your handcrafted farmhouse wooden tray!
FAQ
What type of wood is best for a farmhouse wooden tray?
For a farmhouse wooden tray, consider using reclaimed oak, pine, or maple. These woods offer a rustic charm and durability. The choice of wood depends on the desired aesthetic and the level of distressing you’re aiming for.
How do I choose the right size for my farmhouse coffee table tray?
To find the perfect size, measure your coffee table and the space where you plan to place it. A good rule is to leave some overhang around the edges. This creates a visually appealing display.
Can I use my farmhouse wooden tray in outdoor spaces?
While wooden trays can be used outdoors, they need proper sealing and protection. If you plan to use your tray outside, make sure it’s made with weather-resistant wood. Also, apply a waterproof sealant.
How do I prevent warping or cracking in my wooden tray?
To prevent warping or cracking, use properly dried wood and ensure the tray is well-sealed. Avoid exposing the tray to extreme temperatures or moisture changes.
What are some creative ways to style my farmhouse wooden tray?
You can style your tray in various ways. Use it as a coffee table centrepiece, display decorative items, or as a serving tray for entertaining. Experiment with different arrangements and decor to find a look that suits your farmhouse-style living room.
Can I stain or paint my wooden tray to match my home decor?
Yes, you can stain or paint your wooden tray to match your home decor. Choose a stain or paint that complements your farmhouse style. Follow the manufacturer’s instructions for application and drying times.
How do I maintain and clean my farmhouse wooden tray?
To maintain your wooden tray, dust it regularly. Avoid using harsh chemicals or abrasive cleaners. For tougher stains, mix a solution of mild soap and water. Gently scrub the area.
Can I make a farmhouse wooden tray with handles without prior woodworking experience?
While some woodworking experience is helpful, it’s not necessary. Follow a step-by-step guide, and take your time to ensure accurate measurements and cuts. If you’re new to woodworking, consider starting with a simpler project before tackling a tray.

