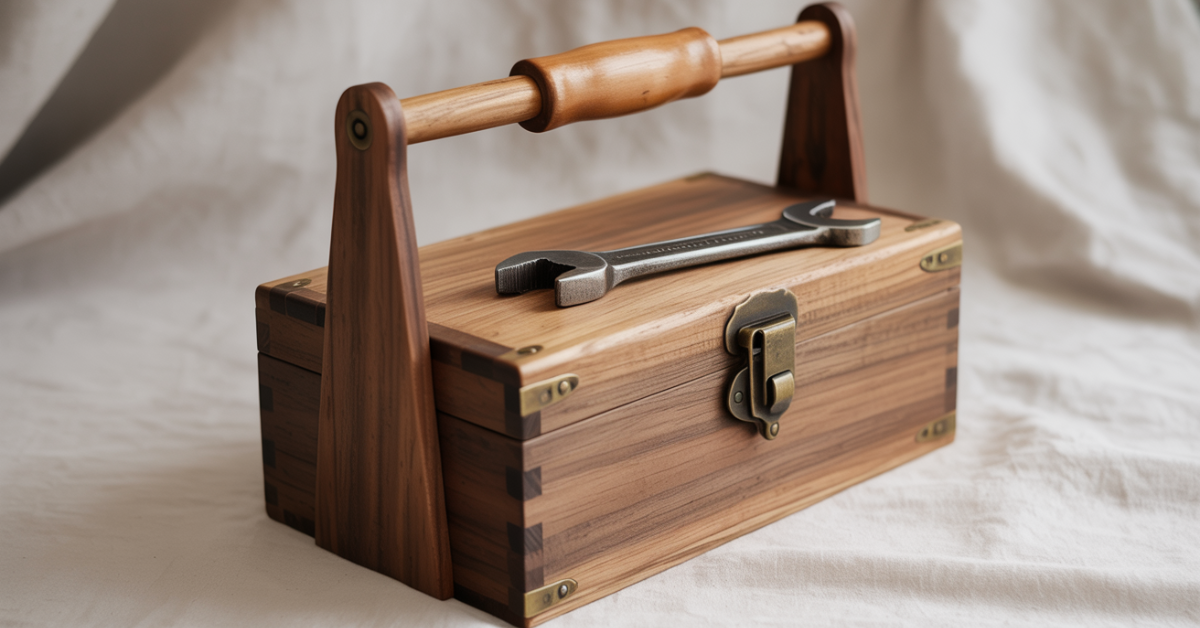
Are you tired of cluttered workspaces and disorganised tools? A compact and portable storage solution can boost your productivity. A well-made wooden tool box is great for your workshop or garage.
Making a DIY tool box lets you tailor it to your needs and save money. It’s a chance to show off your woodworking skills. You’ll have a tool box that keeps your tools organised and easy to find.
Key Takeaways
- Create a customised storage solution for your tools
- Enhance your woodworking skills with a practical project
- Save money by making your own tool box instead of buying one
- Enjoy a more organised and clutter-free workspace
- Have a portable tool box that can be easily taken to different locations
Benefits of a DIY Wooden Tool Box with Handle
Building a DIY wooden tool box with a handle has many advantages. It lets you make it fit your exact needs. This way, your tools are organised and easy to find.
Portability and Convenience
A wooden tool box with a handle is portable and convenient. The handle makes moving your tools simple. This is great for both hobbyists and professionals who often push their tools.
Durability and Customisation Options
A DIY wooden tool box is durable and lets you add your own touches. You can arrange it with compartments and dividers. Additionally, you can select the wood and finish that best suits you.

Eco-Friendly Storage Solution
Using wood for your tool box is an eco-friendly choice. Wood is natural and can be sourced sustainably. A well-built wooden tool box also lasts a long time, saving you from buying new ones often.
In summary, a DIY wooden tool box with a handle is a smart and green way to store your tools. It offers the perks of being portable, durable, and customizable.
Planning Your Portable Wood Tool Box

Start with a solid plan to ensure your tool box meets your needs. Planning is key in any DIY woodworking project, like a portable wood tool box. Think about size, design, and functionality for a practical and easy-to-carry tool box.
Determining the Right Size for Your Needs
The size of your tool box depends on your tools and available space. Think about the projects you do and the tools needed. A space-saving tool box is great for small workshops or when you need to move tools around.
Choosing a Design Style
The design of your tool box should match its purpose. For a DIY carry tool box, choose a design that’s both functional and easy to carry. Consider the material, weight, and handle placement.
Sketching Your Tool Box Plans
After deciding on size and design, sketch your plans. This step helps you visualise your project and make any needed changes before building.
Dimensions and Proportions
Make sure your tool box fits the tools it will hold. A well-proportioned box looks good and ensures tools fit well inside.
Handle Placement Considerations
The handle’s position is key for comfort and convenience. It should be placed to distribute weight evenly, making it easier to carry.
| Consideration | Importance | Tips |
|---|---|---|
| Size | High | Measure your tools and workspace |
| Design Style | High | Consider the material and weight |
| Handle Placement | High | Ensure even weight distribution |
Essential Materials for Your Wooden Tool Box with Handle DIY Project
The right materials are key to a great wooden tool box. When making a wooden tool box with a handle DIY, picking the best materials is important. They affect durability, function, and looks.
Wood Selection Guide
Picking the right wood for your homemade wooden tool box is crucial. The wood you choose will impact how long it lasts and how it looks.
Hardwood vs. Softwood Options
Hardwoods like beech and oak are tough and last long, perfect for a tool box. Softwoods, like pine, are cheaper but not as durable.
Plywood Alternatives
Plywood is also a good choice. It’s cheaper than solid hardwoods and can be very strong. But it might need extra finishing to look right.
| Wood Type | Durability | Cost |
|---|---|---|
| Hardwood (e.g., Beech) | High | Moderate to High |
| Softwood (e.g., Pine) | Low to Moderate | Low to Moderate |
| Plywood | Moderate to High | Low to Moderate |
Hardware Components
The hardware for your DIY wooden tool caddy is key to its use. Hinges, handles, and latches make it practical and easy to use.
Finishing Supplies
Finishing supplies like stains, varnishes, and sandpaper protect and beautify your tool box. Pick finishes that match your wood type.
Tools Required for This Woodworking Project
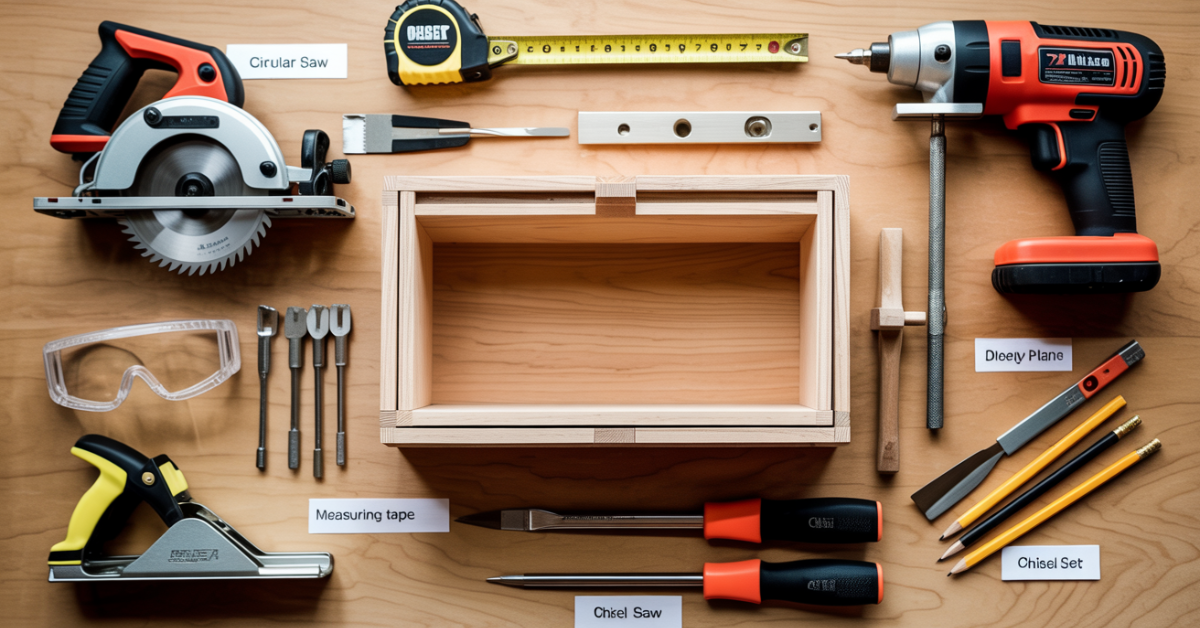
Building a wooden tool box needs the right tools. The correct equipment makes the job easier and keeps you safe.
Basic Hand Tools
You’ll need basic tools like a tape measure, square, clamps, and chisels. These are key for measuring, marking, and shaping the wood. A high-quality tape measure and a precision square are crucial for accurate cuts and assembly.
Power Tools That Will Help
Power tools, like a table saw, circular saw, drill press, and sander, are vital. A table saw is great for straight cuts, and a sander smooths out wood surfaces. These tools speed up the construction process.
Safety Equipment
Safety is a must. You’ll need safety glasses, hearing protection, and a dust mask. These protect you from debris, loud noises, and dust. Always wear safety glasses with power tools. Using a dust collection system also helps reduce airborne particles.
Preparing Your Workspace and Materials

Before starting your DIY wooden tool caddy, get your workspace and materials ready. This is key for a successful diy woodworking project. A tidy workspace keeps you organised and focused.
Setting Up a Safe Work Area
Begin by clearing a flat surface, like a workbench or table. This gives you a stable area for your project. Make sure your workspace is well-lit and free from distractions. Keep safety gear, like safety glasses and a dust mask, handy.
Measuring and Cutting the Wood
Getting your measurements right is crucial in wooden tool chest plans. Use a reliable tape measure and square for precise cuts. When cutting, use a sharp saw blade to avoid splintering and get clean cuts.
Preparing the Wood Surfaces
After cutting, check the wood surfaces for any flaws or splinters. Sand the surfaces to smooth out any rough edges or splinters. This step is vital for a professional finish on your diy wooden tool caddy.
Step-by-Step Construction of Your Space-Saving Tool Box
With the right materials and tools, you can build a durable and portable wooden tool box that meets your specific needs.
Building the Base and Sides
The foundation of your space-saving tool box is crucial for its durability and functionality. Start by cutting the wood according to your plans.
Creating Joinery for Strength
To ensure the structural integrity of your tool box, you need to create strong joinery. You can use dovetail joints or dado joints for this purpose.
Assembly Techniques
Assemble the base and sides using wood glue and nails. Make sure the corners are square, and the sides are even.
Constructing the Box Structure
Once the base and sides are assembled, you can start constructing the box structure. Attach the back panel and the front panel, ensuring they are flush with the sides.
Adding Dividers and Compartments
Dividers and compartments are essential for organising your tools. You can create fixed dividers or removable organisers based on your needs.
Creating Fixed Dividers
Fixed dividers can be attached using screws or nails. Measure carefully to ensure the dividers are evenly spaced.
Making Removable Organisers
Removable organisers can be made using small trays or boxes that fit inside the main toolbox. This allows for flexibility in organising your tools.
| Component | Material | Quantity |
|---|---|---|
| Base | Plywood | 1 |
| Sides | Pine Wood | 2 |
| Back Panel | Plywood | 1 |
By following these steps, you can create a wooden tool box with a handle DIY that is both functional and portable.
Designing and Attaching a Carry-Friendly Handle
To make your wooden tool box portable, a sturdy handle is key. The handle is crucial for the toolbox’s usability.
Handle Material Options
You have many options for handling materials. Wood, metal, and plastic each have benefits. Wooden handles can match your tool box’s look. Metal handles are durable and strong. Plastic handles can be shaped for comfort.
Creating a Comfortable Grip
A good grip is essential for a tool box that’s easy to carry. Choose a handle with an ergonomic design or add a grip cover. Use rubber or foam for a soft, non-slip grip.
Secure Attachment Methods
It’s important to attach the handle securely. This ensures it can handle the weight and frequent use. There are two main ways: recessed handle installation and swing handle mounting.
Recessed Handle Installation
A recessed handle fits into the tool box, leaving a flush surface. This is great for small spaces and a clean look.
Swing Handle Mounting
Swing handles are on the sides or top and swing out when not in use. They’re good for heavy boxes, making them easier to carry.
Designing and attaching a good handle greatly improves your wooden tool box’s portability and function.
Finishing Touches for Your Portable Wooden Tool Box
Now that your DIY wooden tool caddy is almost done, it’s time for the final touches. These steps will make it both useful and nice to look at. They’re key to making your tool box better and more useful.
Sanding for a Professional Look
Sanding is key to a smooth finish. Begin with coarse-grit sandpaper and move to finer grits for a shiny finish. This step not only looks good but also gets the surface ready for stain or seal.
Staining and Sealing Options
Pick a stain that fits your workshop’s style. Then, apply a sealant to protect the wood from moisture and wear. A waterproof sealant can make it even more durable.
Adding Protective Elements
To make your DIY carry tool box last longer, add some protection.
Non-Slip Bottom Features
Putting non-slip material on the bottom stops the box from sliding. This is very useful.
Corner Reinforcements
Adding metal or plastic brackets to the corners makes the box stronger. This is a great idea.
By doing these steps, you’ll not only make your wooden tool box better but also keep it in great shape for years. These DIY ideas will help you keep your tools tidy and easy to find.
Practical Uses for Your DIY Carry Tool Box
Now that you’ve built your wooden tool box with a handle, let’s talk about its many uses. A carry-friendly tool box like yours is versatile. It meets your needs in many situations.
Workshop Organization
A tidy workshop boosts productivity. Your portable wood tool box keeps tools organised and within reach. This makes it easier to work on projects. By storing tools in a box, you cut down on clutter and streamline your work.
On-the-Go Repairs
Whether you’re a pro or a DIY fan, you often need to fix things on the move. Your space-saving tool box is great for carrying the tools you need to any job site. It ensures you’re always ready to go.
Specialised Tool Storage Solutions
Different tasks need different tools. You can tailor your tool box to fit your specific needs. For example, you can organise carpentry tools or gardening tools in separate spots.
Carpentry Tool Organisation
For carpentry, having the right tools is crucial. Customise your tool box to hold chisels, hand saws, and more. This keeps them organised and easy to find.
Gardening Tool Storage
Gardening tools also benefit from being organised. Use your tool box to store pruning shears, trowels, and other essentials. It makes gardening easier.
Your DIY carry tool box is a key tool for any project. Use it for organising your workshop, for quick repairs, and for storing specialised tools. It will help you work more efficiently.
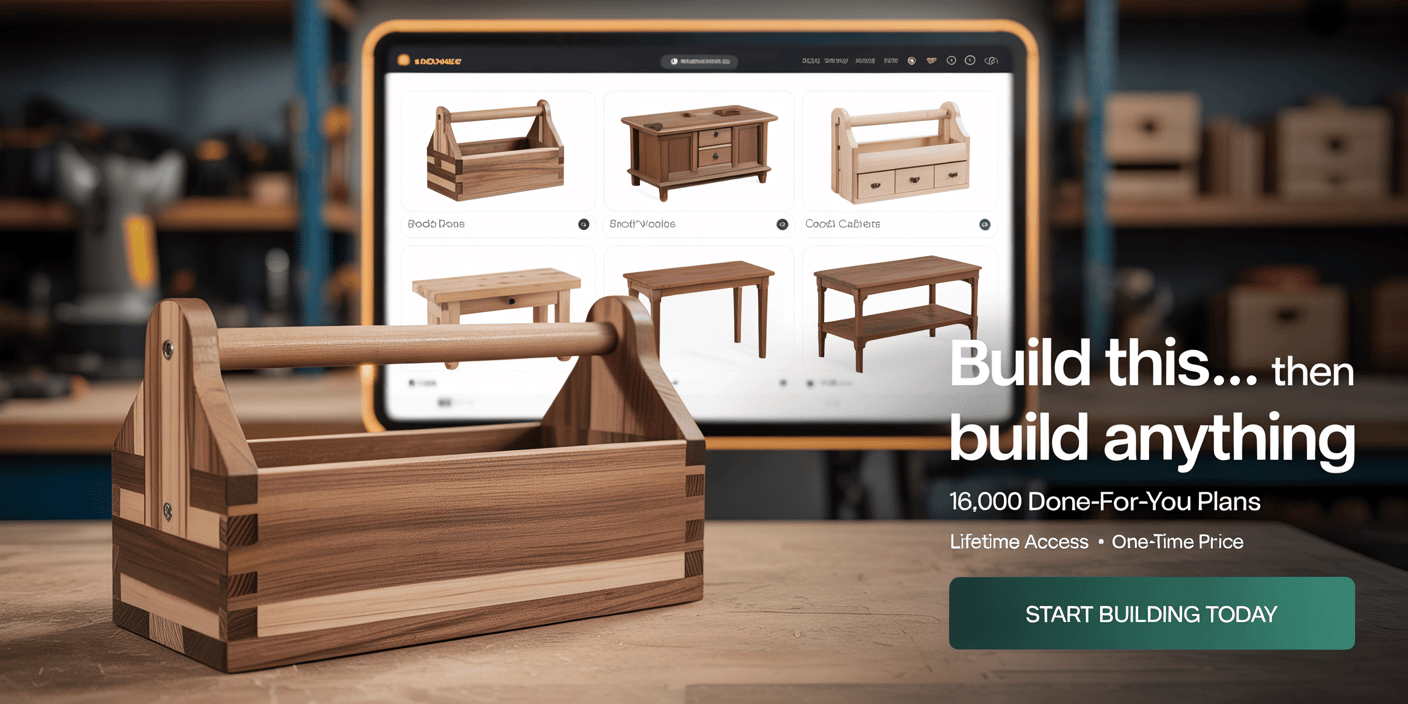
🔨 Ready to Build More Amazing Projects Like This?
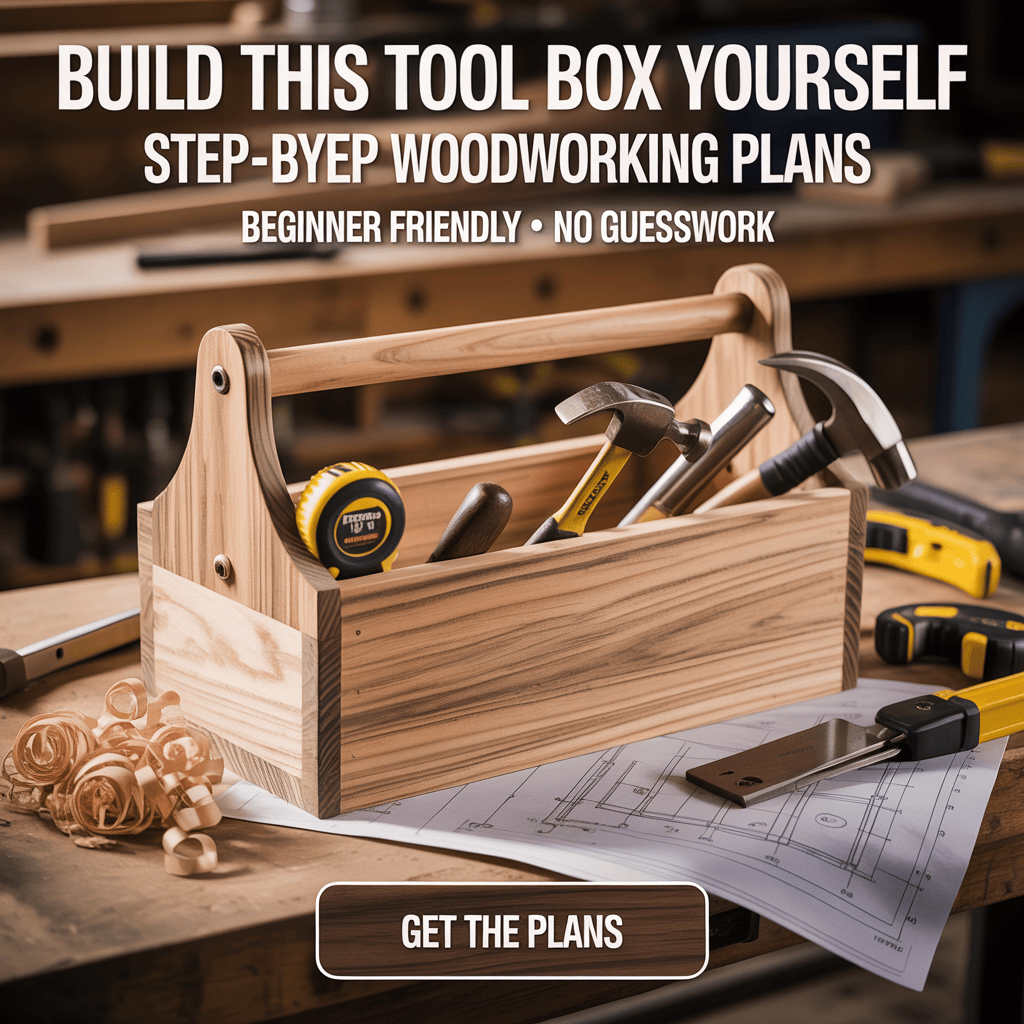
Loved making your wooden tool box? This is just the beginning of your woodworking journey!
Get Access to 16,000+ Professional Woodworking Plans
✅ Step-by-step blueprints – No guesswork, just follow along
✅ Complete cutting & materials lists – Buy exactly what you need
✅ Beginner to expert projects – Perfect for your skill level
✅ Monthly new plans for life – Never run out of ideas
✅ Custom plan requests – Get plans drafted just for you
From simple crafts to stunning furniture – everything you need to turn your workshop dreams into reality!
🎯 SPECIAL LAUNCH OFFER
~~$297~~ Just $67 (One-time payment) Limited time – No monthly fees ever!
👉 GET INSTANT ACCESS TO 16,000 PLANS NOW
60-Day Money-Back Guarantee – Risk Free!
Conclusion
Building a wooden tool box with a handle is a fun DIY project. It gives you a custom place to store your tools. By following the steps in this article, you can create a toolbox that fits your needs.
Finishing this project makes you proud of your new storage system. Your toolbox will be both useful and long-lasting. It’s great for keeping your workshop tidy and for repairs on the go.
Now, you can carry your tools around easily with your new wooden toolbox. This DIY project improves your workshop experience. It makes it simpler to find the tools you need quickly.
FAQ
What type of wood is best for building a wooden tool box?
The best wood for a toolbox depends on what you need. Oak, maple, and pine are good choices. They are durable and affordable. Oak and maple give a premium look.
How do I determine the right size for my toolbox?
Think about the tools you have and how you want to organise them. Measure your tools. Also, consider where you’ll store the toolbox.
What are the benefits of a DIY wooden tool box compared to a store-bought one?
A DIY toolbox lets you customise it for your tools. It’s cheaper and more satisfying to make. You can pick the wood and design you like.
What safety equipment is essential for this woodworking project?
You’ll need safety glasses, a dust mask, and a push stick. Wear ear protection and keep loose clothes tied back.
Can I use a DIY wooden tool box for heavy-duty tools?
Yes, a DIY toolbox can hold heavy tools. Use thick wood and strong hardware. This ensures it can handle the weight.
How do I add dividers and compartments to my toolbox?
Use thin wood strips or other materials for dividers. Attach them with nails, screws, or adhesive. This depends on your design and materials.
What are some common mistakes to avoid when building a wooden tool box?
Avoid wrong measurements, poor sanding, and weak construction. Double-check your measurements. Sand well. Use strong hardware for a solid toolbox.
How can I make my toolbox more portable?
Add a comfortable handle and use light materials. Design it to be compact. Wheels or a strap make it easier to carry.
What are some creative ways to organise my tools within the toolbox?
Use dividers, trays, and compartments. Consider removable holders or magnetic strips. This keeps tools easy to find.
Can I customise my toolbox to fit specific tools or equipment?
Yes, a DIY toolbox can be tailored for your tools. Measure them and design custom spaces. This keeps everything organised.


Pingback: Wooden Tool Box with Drawers: Organize Your Workshop in Style
Pingback: Beginner’s Guide to Building a Wooden Tool Box Kit: Step-by-Step Tutorial