
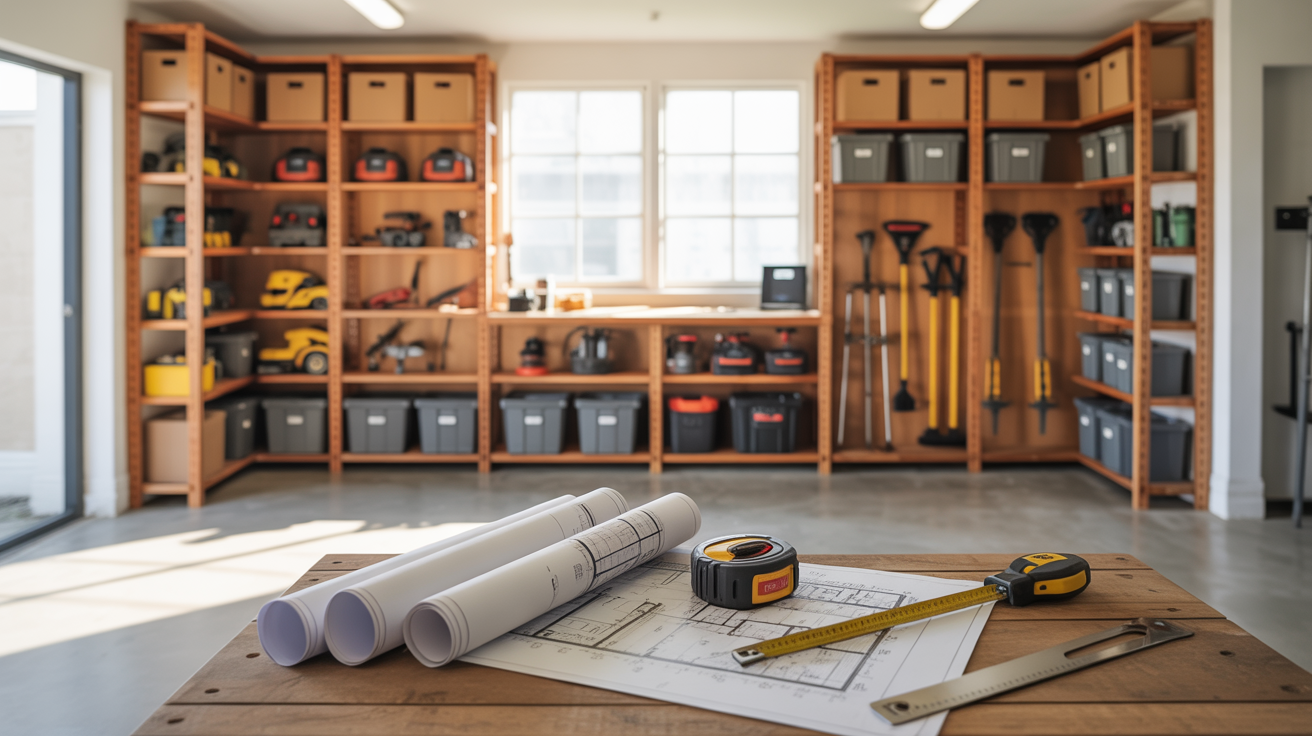
Are you tired of cluttered garage spaces and disorganised storage systems? Creating adjustable DIY wooden shelves can change your home organisation game. They offer a customised solution and flexibility for changing needs.
Building your own wooden shelves ensures they fit your space perfectly. This guide will show you how to make adjustable shelves. It’s a practical and efficient way to organise your garage.
Key Takeaways
- Customise your garage storage with adjustable shelves
- Maximise storage space with DIY wooden shelves
- Improve garage organisation with a practical shelving solution
- Adapt to changing storage needs with adjustable shelves
- Enhance your home’s functionality with a well-organised garage
Why Build Adjustable DIY Wooden Shelves for Garage Workshop Storage
Adjustable DIY wooden shelves are a flexible storage solution for your garage workshop. They let you create a storage system that fits your changing needs.
Benefits of Custom Shelving Solutions
Custom shelving solutions have many benefits. They help you use your space better and keep things organised. With DIY wooden shelving systems, you can design them to meet your specific needs. This keeps your garage workshop tidy and efficient.
Some key advantages of custom shelving include:
- Increased storage capacity
- Improved accessibility to stored items
- Enhanced organisation and reduced clutter

Advantages of Adjustable Systems Over Fixed Shelves
Adjustable shelving systems are more flexible than fixed shelves. You can change the shelf spacing to fit different sizes of items. This makes them perfect for garage workshops where storage needs change often.
| Feature | Adjustable Shelves | Fixed Shelves |
|---|---|---|
| Flexibility | Highly adjustable | Limited flexibility |
| Customization | Easily customizable | Difficult to modify |
| Storage Efficiency | Optimized storage | Potential for wasted space |
Choosing adjustable DIY wooden shelves means you get a versatile storage system. It grows with your needs, keeping your garage workshop organised and functional.
Planning Your Garage Storage Shelving Project
Before starting your DIY wooden shelves, plan your garage storage project well. Good planning ensures your shelves fit your storage needs and your garage space.
Assessing Your Storage Needs and Available Space
First, figure out what you need to store. Think about the size and weight of your items. This helps you decide how many shelves and their size you’ll need.
Measure your garage’s space, including any obstacles like windows or plumbing. Customizable shelving helps you use your space more effectively and keeps your garage tidy.
Determining Shelf Dimensions and Weight Capacity
Choose shelf sizes based on what you’ll store. For heavy items, make sure your shelves are strong. Pick materials that can hold the weight of your items.
Workshop organisation tips stress the need for sturdy shelving for heavy tools.
Creating a Materials Shopping List
After planning, make a list of what you need to buy. This includes lumber, brackets, screws, and other hardware for your adjustable DIY wooden shelves. A detailed list helps you avoid delays.
By following these steps, you’re ready to build a useful garage storage system that fits your needs.
Essential Tools and Materials for DIY Wooden Shelves
Before starting your DIY wooden shelves, gather all the needed tools and materials. Having everything ready will make the project easier and faster.
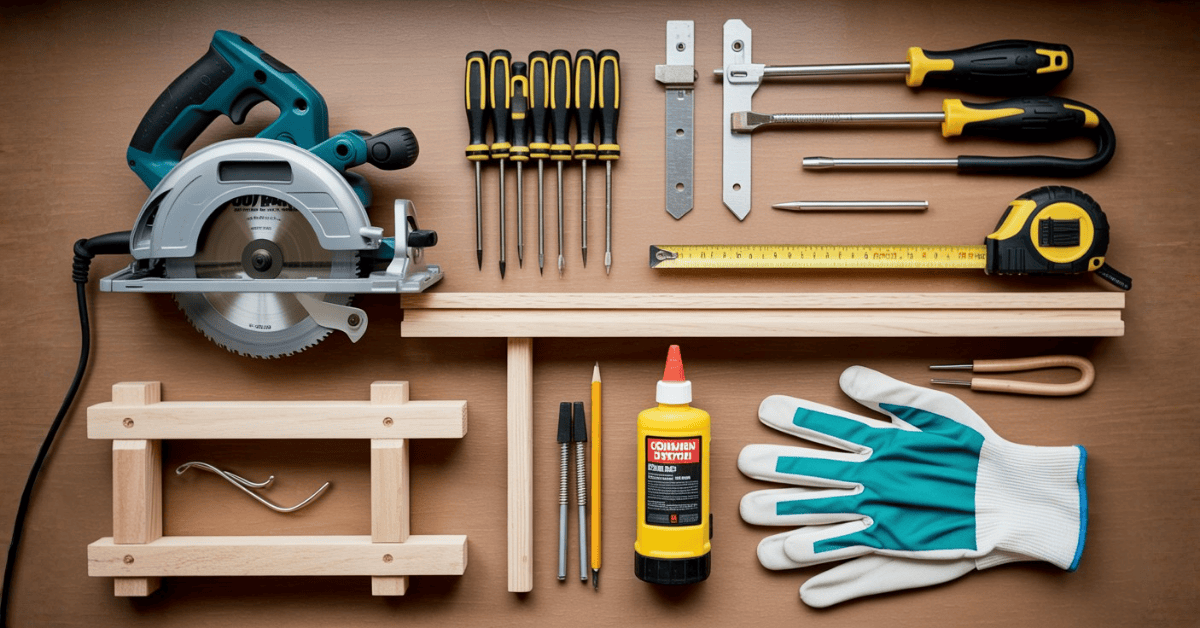
Required Tools for the Project
You’ll need various tools for your woodworking project. A circular saw is key for cutting wood. A drill press helps with precise drilling, and a tape measure ensures accurate measurements. Clamps are vital for holding wood in place while you glue and screw it.
A level keeps your shelves straight, and safety gear like goggles and a dust mask protects you. These tools are essential for a safe and successful project.
Wood Selection Guide for Garage Shelving
Choosing the right wood is crucial for your shelves. Consider plywood or solid wood for the boards. They offer strength and are cost-effective. For the frame, 2×4 lumber is a good choice because it’s sturdy and easy to work with.
Make sure the wood is free from defects and properly dried. This prevents warping and ensures your shelves last longer.
Hardware and Fasteners for Adjustable Systems
The right hardware and fasteners are key to a stable and adjustable shelving system. You’ll need track-and-bracket systems or pin-and-hole systems. Screws, nuts, and bolts are required to build the frame and secure the shelves.
Choose hardware that fits the weight and type of wood you’re using. This ensures your shelves are sturdy and reliable.
Understanding Different Adjustable Shelf Systems

Adjustable shelf systems are key for garage organisation ideas. They let you change your storage as your needs change. Knowing about adjustable DIY wooden shelves and their types is important for better storage.
Track and Bracket Systems
Track and bracket systems are loved for their flexibility and simple setup. They have vertical tracks on walls or shelves, with brackets for shelves. This makes it easy to adjust shelf heights for different sizes of items.
Pin and Hole Systems
Pin and hole systems need holes in vertical supports for shelf pins. It’s a simple, affordable way to make shelves adjustable.
Slotted Standard Systems
Slotted standard systems have slots for shelf brackets. They offer great adjustability and are strong, making them good for heavy use.
Knowing about these shelf systems helps you pick the right one for your garage. This ensures your adjustable DIY wooden shelves work well and are efficient.
Safety Considerations for Woodworking Projects
When you’re working on woodworking projects, like making adjustable DIY wooden shelves, safety comes first. A safe workspace protects you from harm and makes your work better.
Personal Protective Equipment (PPE) Requirements
It’s key to wear the right gear when using power tools and wood. Safety glasses shield your eyes from dust and debris. Ear protection keeps your hearing safe, and a dust mask stops you from breathing in wood particles. Always wear the right PPE to lower injury risk.
Safety glasses with a wrap-around frame offer extra protection by blocking debris from the sides. A respirator or dust mask with a high filter rating also cuts down on dust inhalation.

Workshop Safety Practices
Keeping your workshop safe is as important as wearing PPE. Make sure your area is well-lit and clear of clutter. Clutter can cause trips or block your work. Clean your tools and machines regularly and use them as the maker says.
“A cluttered workspace is a hazardous workspace. Keeping your work area organized is key to preventing accidents.”
Also, have a fire extinguisher nearby and know how to use it. It’s wise to have a first-aid kit in your workshop too.
| Safety Measure | Description | Benefit |
|---|---|---|
| Personal Protective Equipment | Safety glasses, ear protection, dust mask | Reduces risk of injury |
| Workshop Organization | Clean and clutter-free workspace | Prevents accidents and improves efficiency |
| Fire Safety | Fire extinguisher and knowledge of its use | Prevents fire-related injuries |
Designing Your Adjustable Shelving System
Before starting your DIY wooden shelves, plan a system that meets your storage needs. A good shelving system is key to an organised garage workshop.
Creating a Detailed Shelving Plan
First, figure out what you need to store and how much space you have. Think about the items you’ll store, like tools and supplies. Make a list of these items and their sizes to help with your design.
Using workshop organisation tips will make your shelving system work better and be more efficient.
Measuring and Marking Your Work Area
Getting the right measurements is important for your shelving project. Measure the area where you’ll put your shelves. Use a tape measure and graph paper to sketch out your space.
Remember to mark any obstacles like outlets or windows that could affect your design.
Calculating Load Distribution
It’s vital to figure out how much weight each shelf can hold. Decide the maximum weight for each shelf and pick materials that can handle it. A strong custom adjustable shelving system will grow with your storage needs.
By following these steps, you can make a shelving system that’s both useful and can change with your needs.
Preparing the Wood for Your DIY Garage Shelves
Before you start building your rustic garage storage shelves, you need to prepare the wood. This involves several important steps. These steps are key to the durability and stability of your shelves.
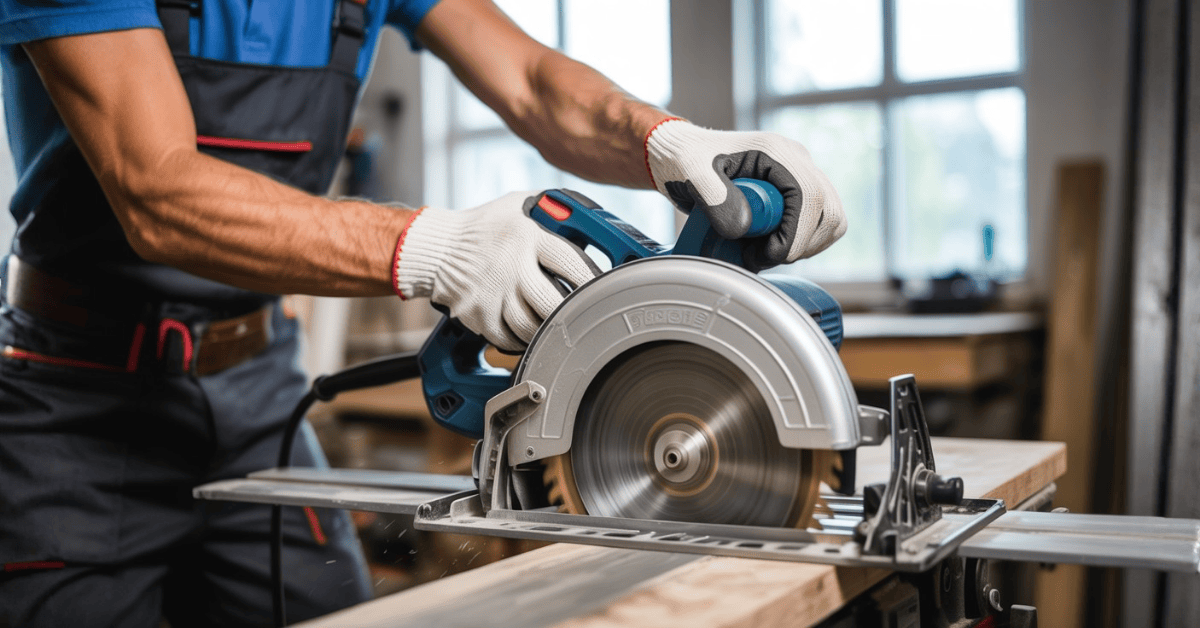
Cutting the Vertical Supports
The first step is cutting the vertical supports to the right height. Use a circular saw or a mitre saw for precise cuts. Make sure your measurements are spot on to avoid any problems later.
Preparing the Shelf Boards
Next, cut the shelf boards to the right size. Make sure they are smooth and free of splinters. Use a table saw for cutting and a planer if needed to get them all the same thickness.
Sanding and Preparing the Wood Surfaces
Sanding is a key step for a smooth finish. Start with coarse-grit sandpaper and move to finer grits. This not only looks better but also removes splinters and rough edges.
By following these steps, you’ll have your wood ready for your DIY garage shelving project. You’ll get a sturdy and attractive storage solution.
Building the Frame for Your Adjustable DIY Wooden Shelves Garage Workshop Storage
The foundation of your garage storage system is building a sturdy frame for your adjustable shelves. This step is key as it supports the weight of your storage and lets you adjust the shelves as needed.
Constructing the Vertical Support Posts
To begin, build the vertical support posts that will be the backbone of your shelving unit. Use 2×4 lumber for extra stability. Cut the posts to the height you want your shelving unit to be. Make sure the posts are level and securely attached to the floor and wall for stability.
Installing the Adjustable Track System
Next, install the adjustable track system on the vertical support posts. This system lets you easily adjust the height of your shelves. to ensure the tracks are perfectly aligned. Follow the manufacturer’s instructions for installing the tracks and brackets.
Securing the Frame Structure
After setting up the vertical support posts and adjustable track system, secure the frame to prevent movement or instability. Use heavy-duty brackets and screws to reinforce the corners. A sturdy frame is crucial for supporting heavy loads.
| Component | Material | Function |
|---|---|---|
| Vertical Support Posts | 2×4 Lumber | Provides structural support |
| Adjustable Track System | Metal Tracks and Brackets | Allows for adjustable shelving |
| Frame Securing Brackets | Heavy-Duty Metal | Ensures frame stability |
By following these steps, you’ll have a strong and adjustable shelving system for your garage. The adjustable DIY wooden shelves will improve your garage organisation and offer a flexible storage solution.
Creating and Installing the Shelf Boards
Now that you’ve built the frame for your adjustable DIY wooden shelves, it’s time to create and install the shelf boards. This step is crucial in completing your garage storage project and ensuring it meets your storage needs.
Cutting and Finishing Individual Shelf Boards
To start, you’ll need to cut the wood for your shelf boards to the appropriate size. Measure carefully to ensure a precise fit within the frame. Use a saw suitable for the type of wood you’ve chosen. After cutting, sand the edges to smooth them out and prevent splinters.
Installing Shelf Supports and Brackets
Next, you’ll install the shelf supports and brackets. These components are essential for the stability and adjustability of your wooden shelving systems. Follow the manufacturer’s instructions for installing the brackets, ensuring they are securely attached to the frame.
| Component | Function | Follow the manufacturer’s instructions |
|---|---|---|
| Shelf Boards | Hold storage items | Measure twice, cut once |
| Shelf Supports | Provide stability | Secure to frame |
| Brackets | Enable adjustability | Follow manufacturer’s instructions |
Testing Weight Capacity and Stability
Once the shelf boards are installed, test the weight capacity and stability of your diy storage solutions. Load the shelves with the items you plan to store and check for any signs of strain or instability. Make adjustments as necessary to ensure your shelving system is safe and functional.
Mounting Your Shelving System Securely
Mounting your DIY wooden shelves securely is a key step. It makes sure your shelves are stable and safe for your items.
Finding Wall Studs and Secure Mounting Points
To mount your shelves correctly, find the wall studs first. Use a stud finder to spot them. Mark the studs with a pencil.
It’s important to anchor your shelves to these studs. This gives them the support they need for heavy loads.
Proper Anchoring Techniques for Heavy-Duty Shelving
For heavy shelves, the right anchoring is key. Use screws or bolts that go through the drywall and into the studs. For extra security, use shelf brackets made for heavy loads.
| Anchoring Technique | Description | Weight Capacity |
|---|---|---|
| Screws into studs | Directly screws into wall studs for maximum support | High |
| Molly bolts | Expands behind drywall for secure hold | Medium to High |
| Toggles | Spring-loaded for secure anchoring | High |
Ensuring Your Shelves Are Level and Stable
After mounting, check if your shelves are level and stable. Use a level tool to make sure they’re horizontal. If not, adjust the brackets.
Also, test the shelves by adding weight. Look for any signs of sagging or tilting.
By following these steps, you’ll have a sturdy storage solution. It will help organise your workshop and meet your shelving needs.
🪚 Ready to Take Your DIY Woodworking to the Next Level?

Tired of guessing your way through projects or struggling with incomplete plans?
With Ted’s Woodworking, you’ll get 16,000+ step-by-step woodworking plans — each one carefully designed to make your building process faster, easier, and frustration-free.
✅ Perfect for your next adjustable garage shelving project — and every DIY idea you’ve ever imagined!
🎯 Why DIY Enthusiasts Love Ted’s Woodworking
- 🪵 16,000+ ready-to-use woodworking plans — from simple shelves to advanced furniture.
- 📘 Detailed blueprints, 3D diagrams & cutting lists — no guesswork, no missing steps.
- 🧰 Beginner-friendly and pro-approved — ideal whether you’re just starting or refining your skills.
- 📐 Exact material & measurement guides — save time, money, and wasted wood.
- 💡 Lifetime updates & free new plans monthly — endless inspiration for future builds.
- 🎥 150+ step-by-step woodworking videos — watch and build along with expert instruction.
- 💻 Instant online access + optional DVDs — learn and build anytime, anywhere.
- 💸 One-time payment, no monthly fees — yours forever with a 60-day money-back guarantee.
⚡ Take the Guesswork Out of Woodworking
Get instant access to the world’s largest collection of woodworking plans and start creating stunning, professional-quality projects — even if you’ve never built anything before.
👉 Click Here to Get Ted’s Woodworking – Start Building Smarter Today!
(Special Offer: Lifetime access to 16,000 plans for just $67 – one-time payment only!)
Conclusion
You now know how to make adjustable DIY wooden shelves for your garage. Building rustic garage storage shelves improves your garage’s organisation and adds style.
Working on woodworking garage projects lets you tailor storage to fit your needs. This way, every item has its place. It’s a cost-effective and rewarding project.
Once you finish your shelves, you’ll see how they improve your garage workshop. You can adjust the shelves as your storage needs change. This makes your shelving system versatile and ready for the future.
With your new shelves, you can store tools and equipment efficiently. This keeps your garage neat and makes the most of the space. Start your woodworking project today for a more organised garage.
FAQ
What are the benefits of building adjustable DIY wooden shelves for garage storage?
Building adjustable DIY wooden shelves for garage storage offers flexibility and customisation. You can tailor the shelving system to your specific needs. This maximises your garage’s storage capacity.
What type of wood is best for garage shelving?
The best wood for garage shelving depends on your needs and preferences. Pine, spruce, and plywood are popular choices. They offer durability and affordability.
How do I determine the weight capacity of my shelving system?
To find the weight capacity of your shelving system, consider the wood type, shelf board thickness, and support spacing. You can also test it by adding weight gradually.
What are the different types of adjustable shelf systems available?
There are several adjustable shelf systems available. These include track and bracket, pin and hole, and slotted standard systems. Each has its own mechanism and application.
How do I ensure my shelving system is level and stable?
To make sure your shelving system is level and stable, use a level tool during installation. Also, secure the frame to the wall studs using proper anchoring techniques.
What safety precautions should I take when building DIY wooden shelves?
When building DIY wooden shelves, wear safety glasses and a dust mask. Follow safe working practices, including proper tool handling and workshop safety guidelines.
Can I customise my shelving system to fit my specific garage storage needs?
Yes, building adjustable DIY wooden shelves lets you customise the system to fit your garage storage needs. You can adjust the size and weight capacity of the shelves.
How do I properly anchor my shelving system to the wall?
To anchor your shelving system to the wall properly, locate the wall studs. Use heavy-duty anchors or screws. Make sure the shelves are level and secure.
What are some common mistakes to avoid when building garage shelving?
Common mistakes to avoid include inadequate planning, incorrect measurements, and insufficient anchoring. These can lead to unstable or collapsed shelving.
Can I use my adjustable DIY wooden shelves for storing heavy equipment or tools?
Yes, you can use adjustable DIY wooden shelves for storing heavy equipment or tools. Just make sure to consider the weight capacity. Ensure the shelving system is properly anchored and secured.


