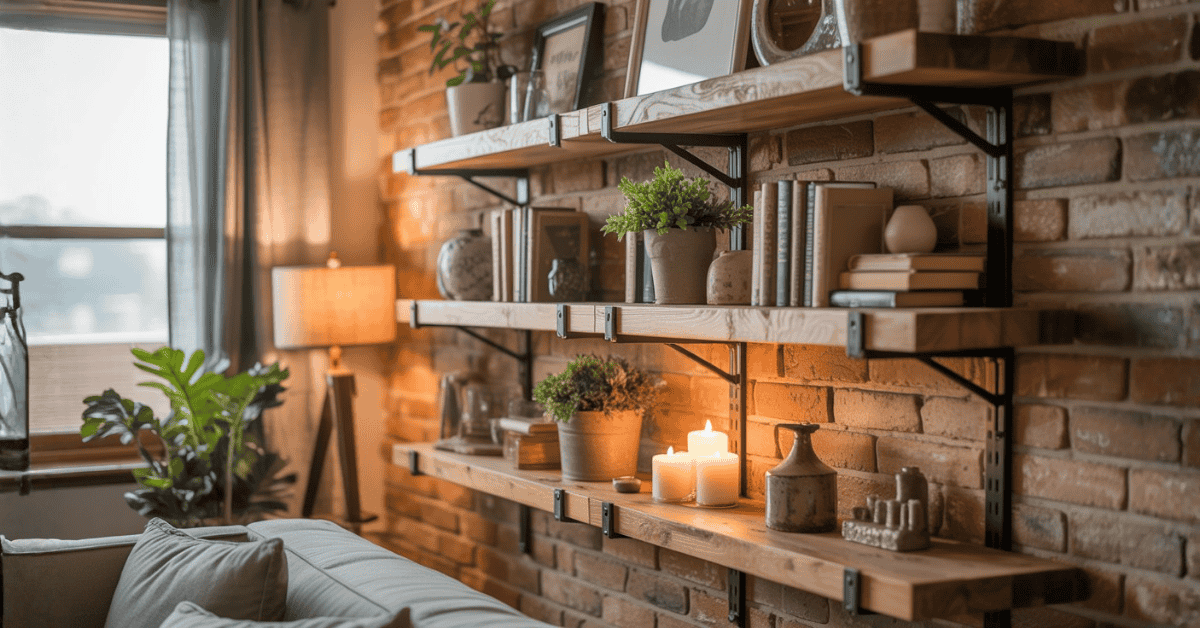
Turning your living space into something special is simple. Adding reclaimed wood to your decor brings warmth and character. It also helps the planet.
Make wooden shelf ideas from old barns and factories. This way, you add history and charm to any room. Follow this guide to make your own rustic DIY wooden shelves. You’ll see the perks of using reclaimed wood.
Key Takeaways
- Create unique, functional pieces using reclaimed wood.
- Add warmth and character to your home decor.
- Contribute to a more sustainable environment.
- Learn a step-by-step guide to making rustic DIY wooden shelves.
- Discover the benefits of working with reclaimed materials.
The Beauty and Benefits of Reclaimed Wood Projects
Using reclaimed wood in your projects is a smart choice. It lets you make special items and helps the planet. This wood comes from old barns and factories, making each piece unique.
Environmental Impact of Using Reclaimed Wood
Reclaimed wood saves forests and cuts down on waste. It’s a green way to work with wood. By picking reclaimed wood, you help the environment.

Unique Character and Aesthetic Appeal
Reclaimed wood has a special look that new wood can’t match. It shows signs of age and wear, making your projects stand out. This adds charm to your home.
Cost-Effectiveness of Reclaimed Materials
Reclaimed wood is often cheaper than new materials. It comes from places like demolition sites. This makes your projects more valuable and unique.
Choosing reclaimed wood means you’re making something beautiful and eco-friendly. It’s perfect for DIY projects like wooden shelves. It’s a great way to care for the environment while creating something special.
Gathering Essential Tools and Materials for Your Project

Before starting your rustic DIY wooden shelves, gather all the needed tools and materials. The right tools make your project efficient and safe.
Required Tools List
To start your easy woodworking projects, you’ll need various tools. You’ll need a table saw or circular saw for cutting, a drill press for precise drilling, and a hand saw or jigsaw for curved cuts. Clamps, a tape measure, and a square are also necessary.
Materials Checklist
For your handmade rustic furniture tutorial, you’ll need reclaimed wood, pocket screws, and wood glue. Decorative nails or brackets add support and beauty.
Safety Equipment You’ll Need
Safety is key when working on DIY wooden shelving projects. Wear safety glasses, a dust mask, and hearing protection. A first aid kit is also crucial in case of accidents.
Optional Tools That Make the Job Easier
While not essential, some tools can make your job easier. A planer smooths wood surfaces, and a sander gives a fine finish. A stud finder helps find wall studs when mounting shelves.
With all the necessary tools and materials, you’re ready to complete your rustic DIY wooden shelves project.
Finding and Selecting Quality Reclaimed Wood

Finding the right reclaimed wood is key to your project. It gives your shelves a unique look. But you must pick it carefully for quality and lasting use.
Sources for Reclaimed Wood
You can find reclaimed wood in old barns, salvage yards, and online. These places offer wood that’s been weathered and aged. It adds a special character to your shelves.
How to Assess Wood Quality and Condition
When checking wood quality, look for damage, rot, or pests. Check for cracks, warping, or wear. These can harm your shelves’ structure.
Identifying Different Wood Types and Their Characteristics
Wood types vary in look and durability. For example, oak is strong and durable. Pine is softer and can dent easily.
Avoiding Wood with Harmful Treatments or Infestations
Stay away from wood treated with harmful chemicals or pests. Watch for discolouration or odd smells. Also, check for any signs of pests.
Choosing the right reclaimed wood makes your rustic DIY wooden shelves beautiful and strong. They can enhance any room’s look.
Preparing Your Reclaimed Wood for the Project

Before you start making your rustic DIY wooden shelves, you need to prepare the reclaimed wood. This step is key to making sure your shelves look good and last long.
Cleaning and Sanitising Old Wood
Reclaimed wood often has dirt, grime, and sometimes mould or mildew. Cleaning and sanitising are crucial to get rid of these. Use soap and water or a wood cleaner to clean the wood. For hard-to-remove grime, a pressure washer on a low setting works, but be careful not to harm the wood.
Removing Nails, Staples, and Hardware
Old wood usually has nails, staples, or other hardware that need to be taken out. Use a claw hammer or pliers to pull out these metal pieces. For nails that won’t come out easily, a nail puller or a reciprocating saw can help.
Techniques for Straightening Warped Boards
Warped boards can be tricky, but there are ways to fix them. One method is to wet the concave side of the warp and clamp it to a straight edge. Another way is to use heat on the convex side to relax the wood fibers and straighten it.
Initial Rough Planing and Dimensioning
After cleaning and removing hardware, it’s time for the initial rough planing. This involves using a planer to smooth out the wood and get the right thickness. Also, make sure to dimension the wood to the right size for your project.
| Preparation Step | Purpose | Tools Needed |
|---|---|---|
| Soap, water, and wood cleaner | Remove dirt and contaminants | Soap, water, wood cleaner |
| Removing Hardware | Eliminate nails, staples, and other metal pieces | Claw hammer, pliers, nail puller |
| Straightening Warped Boards | Correct warps and bends in the wood | Moisture, clamps, heat gun |
| Initial Rough Planing | Smooth out wood surfaces and achieve uniform thickness | Planer |
By following these steps, you’ll be on your way to making stunning, rustic DIY wooden shelves from reclaimed wood. Proper preparation is essential for a great project.
“The art of woodworking lies not just in the final product, but in the journey of transforming raw, reclaimed wood into something beautiful and functional.”
— Woodworking Expert
Designing Your Rustic DIY Wooden Shelves Using Reclaimed Wood Tutorial

Before you start building, it’s key to design your rustic DIY wooden shelves. Think about how they’ll look and work. This step makes sure your shelves are both beautiful and useful.
Determining Shelf Dimensions and Weight Capacity
First, figure out the size of your shelves. Measure the spot where they’ll go. Choose a size that fits the items you’ll store. Remember, the shelves must hold the weight without breaking.
Sketching Your Design and Making Templates
Sketching your design lets you see your wooden shelf ideas come to life. Include the reclaimed wood type and any decorations. Making templates helps you build accurately and smoothly.
Planning for Wall Mounting and Support
Wall mounting and support are crucial for shelf stability and safety. Pick the right mounting hardware for your wall type. Think about how the weight will be spread out to avoid tipping.
Considering the Room’s Style and Functionality
Your reclaimed wood projects should match the room’s style and improve its use. Think about the room’s colors, furniture, and feel. Your shelves should add storage and enhance the room’s mood.
Measuring and Cutting the Reclaimed Wood Pieces
Starting your rustic DIY wooden shelves means measuring and cutting the wood correctly. This step is key to a successful, easy woodworking project. It makes sure your shelves look good and work well.
Proper Measuring Techniques for Accuracy
Using the right tools is crucial for accuracy. A digital calliper or a good tape measure is essential. Always double-check your measurements to avoid mistakes.
| Measuring Tool | Accuracy Level | Best Use Case |
|---|---|---|
| Digital Caliper | High | Precise measurements for small pieces |
| Tape Measure | Medium | General measurements for larger pieces |
| Combination Square | High | Checking squareness and making precise markings |
Safe Cutting Practices for Different Wood Types
Different woods need different cutting methods. Hardwoods like oak need sharp blades and more power. Softwoods like pine are easier to cut. Always wear safety glasses and a dust mask when cutting.
Common Cutting Mistakes and How to Avoid Them
One mistake is forgetting the saw blade’s width, or kerf. Always add the kerf to your measurements. Cutting too fast can also cause mistakes. Take your time and make steady cuts.
Creating Custom Edge Profiles and Details
Custom edge profiles can make your DIY wooden shelving stand out. Use a router or a plane to create unique edges. Try different profiles to match your design.
By following these tips, you can cut your reclaimed wood accurately. This will lead to a beautiful and useful handmade rustic furniture piece.
Sanding and Preparing the Wood Surface
To get a smooth surface and keep the wood’s character, sanding is key. This step makes your rustic DIY wooden shelves look better and gets the wood ready for finishing.
Choosing the Right Sandpaper Grit Progression
Choosing the right grit is important for sanding. Start with a coarse grit (about 80-100) to remove old finishes and flaws. Then, move to finer grits (120-150 and up) for a smoother finish.
Hand Sanding vs. Power Sanding Techniques
Hand sanding and power sanding each have their own benefits. Hand sanding gives you control and is great for small, detailed areas. Power sanding is faster and better for big surfaces. Using both can give the best results.
| Sanding Method | Advantages | Best Use |
|---|---|---|
| Hand Sanding | Control, detail work | Small, intricate areas |
| Power Sanding | Speed, efficiency | Large surfaces |
Preserving Character While Creating a Usable Surface
It’s important to balance removing flaws with keeping the wood’s character. Don’t over-sand, as it can remove the wood’s unique look.
Dust Collection and Clean-up Strategies
Good dust collection is crucial for safe and efficient sanding. Use a dust collector or vacuum attachment. Also, clean your workspace well between sanding stages.
Applying Finishes to Enhance and Protect Your Shelves
The last step in making your rustic DIY wooden shelves is to apply a finish. This step protects the wood and makes it look even better. It keeps the reclaimed wood safe from damage and wear.
Natural Oils and Waxes for a Subtle Finish
For a natural look, oils and waxes are great. They go into the woods, making the grain and color pop. Linseed oil and beeswax give a warm, rustic feel.
Stains and Varnishes for Enhanced Protection
Stains and varnishes offer more protection. Stains add color and depth, while varnishes create a strong surface. Pick a stain or varnish that fits your wood and the look you want.
Distressing Techniques for Extra Rustic Appeal
To make your shelves more rustic, try distressing. Use a wire brush to roughen the wood or sand edges gently. This adds to the rustic charm of your shelves.
Proper Application Methods and Drying Times
How you apply your finish is important. Always read the instructions for how to apply and how long to wait before the next coat. Some finishes need more than one coat, with time to dry in between.
| Finish Type | Application Method | Drying Time |
|---|---|---|
| Natural Oils | Cloth or Brush | 2-4 hours |
| Waxes | Cloth | 30 minutes to 1 hour |
| Stains | Brush | 4-6 hours |
| Varnishes | Brush | 6-8 hours |
Choosing and applying the right finish is key. It keeps your reclaimed wood projects looking great and lasting for years.
Assembling and Installing Your Wooden Shelves
Now that you have your reclaimed wood, it’s time to put your shelves together. This step is key to making sure your DIY wooden shelving works well and looks great.
Joining Wood Pieces Together
Connecting the wood pieces is a vital step. You can choose from many joinery methods, based on your skill level and tools.
Using Pocket Holes for Hidden Joinery
Pocket holes are a modern way to join wood without visible fasteners. This method is perfect for a clean look in your easy woodworking projects.
Traditional Joinery Methods for an Authentic Look
For a rustic feel, try traditional joinery like mortise and tenon or dovetail joints. These add charm to your handmade rustic furniture.
Metal Brackets and Modern Alternatives
For a modern look or extra support, metal brackets are a stylish choice. They come in many designs to match your decor.
Wall Mounting Options
It’s important to attach your shelves to the wall for safety and stability. The method you pick depends on the wall type and shelf weight.
Finding and Marking Wall Studs
Use a stud finder to find wall studs. Mark their spots for accurate drilling and screwing.
Using the Right Anchors and Hardware
Choosing the right anchors and hardware is key to a solid mount. Consider the weight and wall type when selecting.
Installing Floating Shelf Hardware
For a sleek look, use specialised hardware for floating shelves. Make sure it can hold the weight of your shelves.
Ensuring Level and Secure Installation
A level and secure installation is crucial for safety and function. Focus on levelling and weight distribution.
Using Proper Levelling Tools
Use a quality level to ensure your shelves are perfectly horizontal. This prevents items from falling off.
Weight Distribution Considerations
Spread weight evenly on your shelves to avoid warping or detachment. Remember the maximum weight your shelves can hold.
By carefully assembling and installing your wooden shelves, you’ll create a beautiful and useful piece of handmade rustic furniture that improves your home’s look.
Troubleshooting Common Issues in DIY Wooden Shelf Projects
Working on your rustic DIY wooden shelves might bring up some common problems. But with the right troubleshooting, you can fix them easily. Knowing how to solve these issues is crucial for a successful project. Let’s look at some common problems and how to fix them.
Fixing Uneven or Wobbly Shelves
Uneven or wobbly shelves can ruin your DIY wooden shelves’ look and function. First, make sure the shelf is aligned with the wall and the floor is level. Adjusting the shelf or using shims can help it stay stable.
Addressing Wood Splitting or Cracking
Wood splitting or cracking can happen due to humidity changes or mishandling. Use wood glue to fill in the cracks and clamp until it dries. For bigger splits, you might need to add more hardware.
Solutions for Inadequate Wall Support
Shelves without enough wall support can be unstable and unsafe. Make sure to use the right wall anchors for your wall type. If shelves are still unstable, add more support brackets or get professional advice.
Repairing Finish Imperfections
Finish imperfections, like uneven stain or varnish, can spoil your shelves’ look. Lightly sand the area and reapply the finish. Follow the manufacturer’s guide for application and drying times.
By tackling these common problems, your rustic DIY wooden shelves will be both functional and beautiful. They’ll add warmth and character to your space.
🪵 Turn Your DIY Passion Into Masterpieces!

Ready to take your woodworking skills to the next level?
Discover Ted’s Woodworking — the world’s largest collection of step-by-step woodworking plans trusted by 50,000+ creators worldwide.
✅ Here’s what you’ll get:
- 16,000+ “Done-for-You” woodworking plans for every project imaginable
- Clear step-by-step instructions and detailed blueprints — no guesswork
- Perfect for beginners and pros — build confidently, even with basic tools
- Lifetime access with free monthly plan updates
- Free bonuses: CAD viewer, 150+ pro videos, business startup guide & more
- One-time payment — no hidden fees or subscriptions
👉 Start Building Like a Pro Today — Get Instant Access to Ted’s Woodworking »
Conclusion
Building rustic DIY wooden shelves from reclaimed wood is rewarding. It adds character and function to your home. This rustic diy wooden shelves reclaimed wood tutorial shows how to turn old wood into beautiful pieces.
These wooden shelf ideas bring rustic charm to any room. Reclaimed wood projects like this reduce waste and add a unique story to your space. Displaying your favourite items on these shelves shows off your creativity.
Now, you can try more reclaimed wood projects to make your home even more special. The skills you’ve learned will help you in future DIY projects. You’ll create a space that shows off your personal style.
FAQ
What is reclaimed wood, and why is it a good choice for DIY wooden shelves?
Reclaimed wood comes from old buildings and structures. It’s perfect for DIY shelves because it’s eco-friendly and has a unique look. Plus, it’s often cheaper than new wood.
Where can I find reclaimed wood for my project?
Look for reclaimed wood at salvage yards, demolition sites, and antique stores. You can also find it online. Always check the wood’s quality and condition before buying.
How do I prepare reclaimed wood for my DIY wooden shelves?
First, clean and sanitize the wood. Then, remove any nails or hardware. Next, straighten warped boards and do some initial planning and measuring.
What safety equipment do I need when working with reclaimed wood?
Wear safety goggles, a dust mask, and gloves. This protects you from debris and health risks when working with reclaimed wood.
How do I determine the shelf dimensions and weight capacity for my DIY wooden shelves?
Think about the space, the items you’ll store, and the wall mounting. This helps you figure out the right size and strength for your shelves.
What are some common mistakes to avoid when cutting reclaimed wood?
Don’t make mistakes like wrong measuring or using the wrong saw blade. Also, remember the wood’s natural texture and grain.
How do I achieve a smooth finish on my reclaimed wood shelves?
Start with coarse sandpaper and move to finer grits. You can also use hand or power sanding for different finishes.
What finishing options are available for reclaimed wood shelves?
You can use natural oils, stains, varnishes, or distressing. These options enhance and protect your shelves.
How do I ensure a level and secure installation for my DIY wooden shelves?
Use the right tools for levelling and think about weight distribution. Choose the best wall mounting options for stability.
What are some common issues that can arise during DIY wooden shelf projects, and how can I troubleshoot them?
Issues like uneven shelves or wood damage can happen. To fix them, find the problem and apply the right solution. This might mean adjusting supports or fixing the finish.
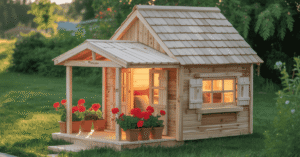
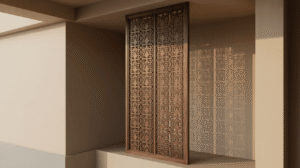
Can I use reclaimed wood for other DIY projects besides shelving?
Yes, reclaimed wood is great for many projects. You can make tables, headboards, or wall art. Its unique look and eco-friendliness make it versatile.
How can I preserve the character of the reclaimed wood while creating a usable surface?
Use gentle sanding and avoid over-sanding. Choose a finish that highlights the wood’s natural texture and patina.
