As a cat owner, you know how crucial it is to give your cat a comfy spot. With the rise of pet humanisation, making a special place for your cat is more than a luxury. It’s a way to make their life better.
You can make a cosy spot that shows off your style and meets your cat’s needs. This article will show you 10 cool DIY wooden cat house plans. They are easy to make, stylish, and won’t take up too much space.
Key Takeaways
- 10 unique DIY cat house plans to suit various indoor spaces
- Easy-to-follow instructions for a stress-free DIY experience
- Stylish designs that complement your home decor
- Space-saving solutions for cat owners with limited space
- Practical tips for creating a cosy retreat for your cat
Why Build a DIY Wooden Cat House for Your Indoor Cat
A DIY wooden cat house is more than just a shelter. It’s a cosy haven made just for your cat. By making a homemade cat house, you give your indoor cat a safe and warm place. This improves their happiness and well-being.
Benefits for Your Cat’s Well-being
Creating a DIY cat house offers many benefits for your cat. It gives them a quiet, comfy spot to rest and hide. Cats love having their own space, and a DIY house is perfect for that.
Some key benefits include:
- Reduced stress and anxiety
- Increased sense of security
- Improved overall happiness
Advantages Over Store-Bought Options
Store-bought cat houses can’t match the personal touch of a DIY project. By making your own indoor cat house DIY, you can pick the design and materials. This ensures it fits your cat’s needs and your home’s style.
| Feature | DIY Cat House | Store-Bought Cat House |
|---|---|---|
| Customization | High | Limited |
| Cost | Variable | Fixed |
| Material Choice | Flexible | Restricted to manufacturer’s choice |
Essential Tools and Materials for DIY Wooden Cat House Projects
Starting a DIY wooden cat house project requires the right tools and materials. To build your own cat house that looks good and keeps your cat safe, pick the right tools and materials.
Basic Woodworking Tools You’ll Need
First, get basic woodworking tools like a saw, drill, sandpaper, and a hammer. These tools will help you cut, put together, and finish your wooden cat shelter plans well.
Recommended Wood Types and Materials
For the cat house, use durable and safe materials like pine or cedar wood. You can also use wood pallets or scrap plywood for a unique and green cat house.
Safety Considerations When Building DIY Wooden Cat House Indoor Designs
When you build a DIY wooden cat house, safety is key. You want your cat to have a cosy and safe spot. It’s important to pick the right materials and design to avoid dangers.
Cat-Safe Materials and Finishes
Choose materials that are safe for your cat. Stay away from toxic stuff that could hurt them. Go for non-toxic paints and finishes.
Safe options include natural wax and water-based stains. Make sure any fabric or carpet is tough and won’t fall apart easily.
Structural Stability and Design Safety
Your cat house needs to be strong and stable. This prevents accidents and keeps your cat safe. Make sure it can hold your cat’s weight.
Don’t make the cat house with sharp edges or small parts that can fall off. Think about your cat’s size and weight when designing. The cat house should be steady and secure.
| Safety Feature | Description | Importance Level |
|---|---|---|
| Non-Toxic Materials | Using materials that are safe for your cat to ingest or come into contact with. | High |
| Structural Stability | Ensuring the cat house is sturdy and won’t topple or collapse. | High |
| Safe Design | Avoiding sharp edges, points, or small detachable parts. | High |
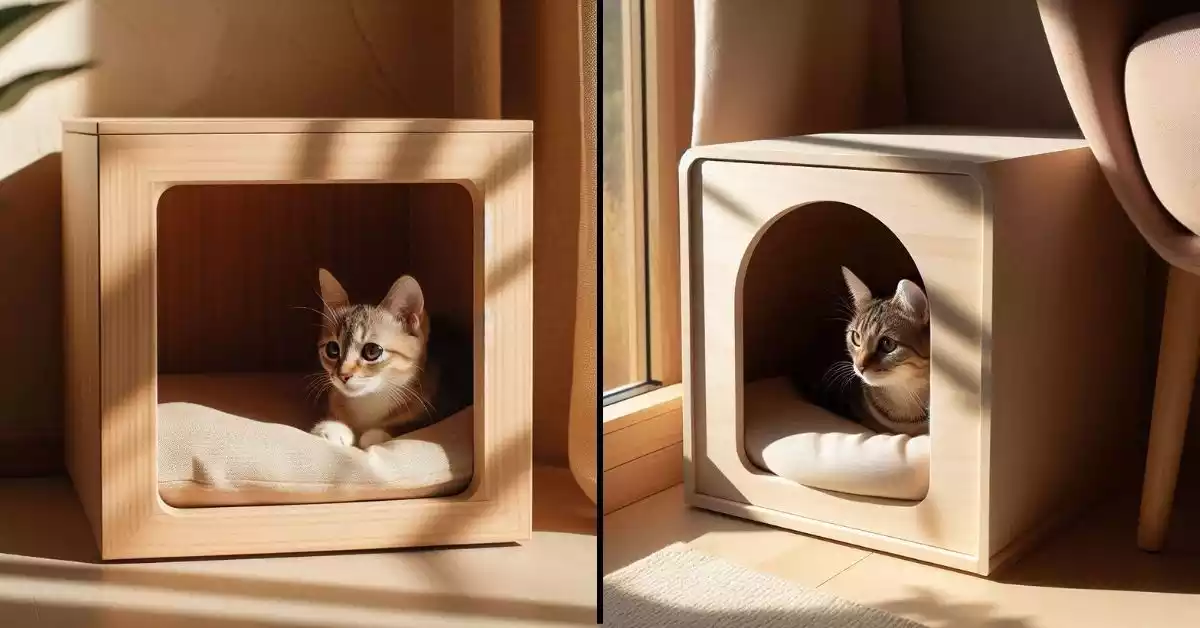
Simple Cube Wooden Cat House
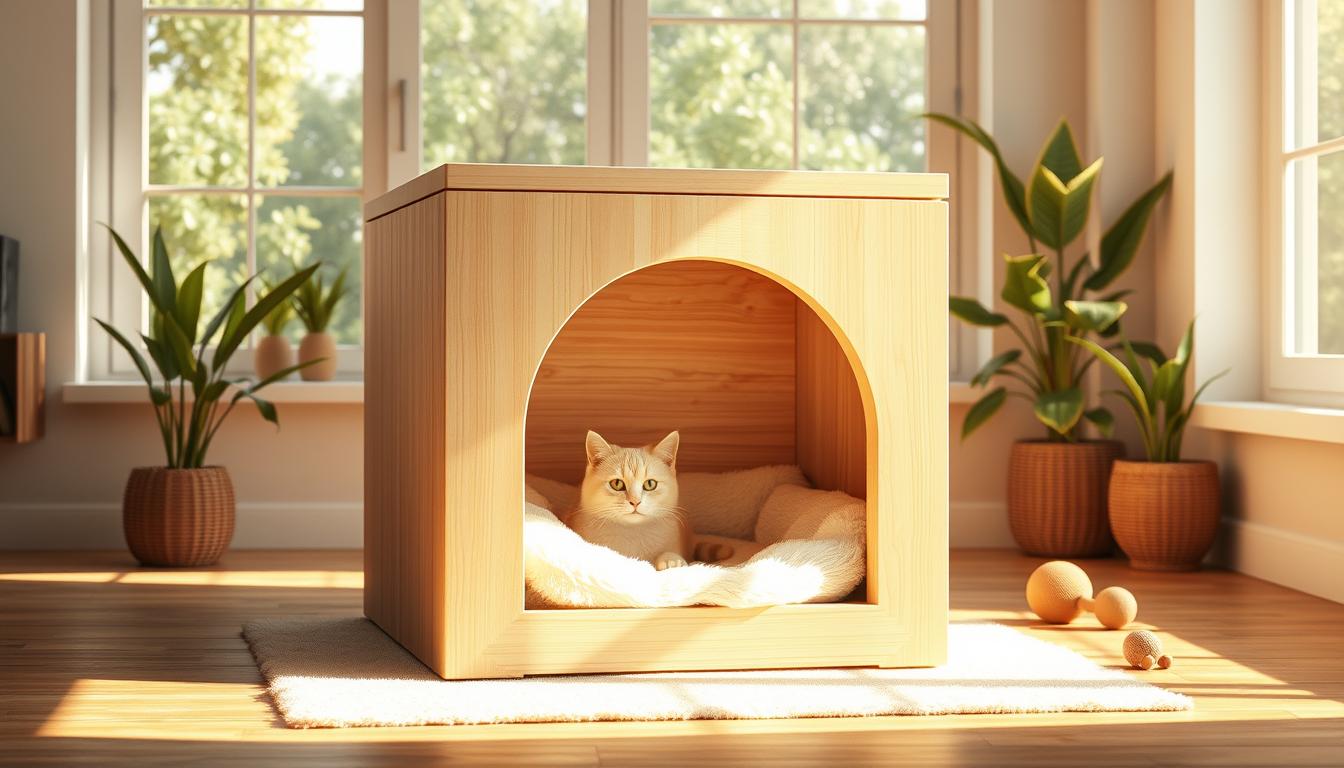
A simple cube design is a great choice for your DIY wooden cat house indoor project. It’s easy to build and offers a cosy spot for your cat. The cube shape is perfect for indoor spaces because it uses space well.
Materials and Measurements
To make a simple wooden cube cat house, you’ll need:
- Wooden planks (e.g., pine or cedar)
- Nails or screws
- Hinges (for the roof)
- A saw
- A drill
The size can vary based on your cat’s size. But a typical cube is about 18 inches on each side.
Step-by-Step Building Instructions
Here’s a simple guide:
- Cut the wooden planks to your measurements.
- Build the cube shape with nails or screws.
- Add hinges to the roof for easy access.
- Sand the edges to make them safe for your cat.
You can add bedding or toys inside to make it cosy.
Customization Options
You can make your cube cat house unique. Add windows, use different wood, or a personalised nameplate. Think about what your cat likes and your home’s style when customising.
Multi-Level Cat Tower with Hideaway
A multi-level cat tower with a hideaway is a great addition to any home. It gives cats a place to play, rest, and watch their surroundings. This indoor cat house diy project makes your home more interesting and provides a fun space for your cat.
Materials and Measurements
To make a multi-level cat tower, you’ll need wooden planks, carpet or sisal rope, and a strong base. The size depends on your cat and the space you have. Towers can be 3 to 6 feet tall.
Step-by-Step Building Instructions
Begin with a stable base. Then, build the tower’s frame using wooden planks. Make sure each level is secure. Use carpet or sisal rope for scratching surfaces.
Add hideaways or enclosures at different levels. Place the tower where your cat likes to be.
Customization Options
You can make your cat tower unique by adding different textures and colors. Consider your cat’s likes when designing the hideaways and scratching posts. This way, they’ll find it appealing and comfy.
Window-Mounted Cat Perch House
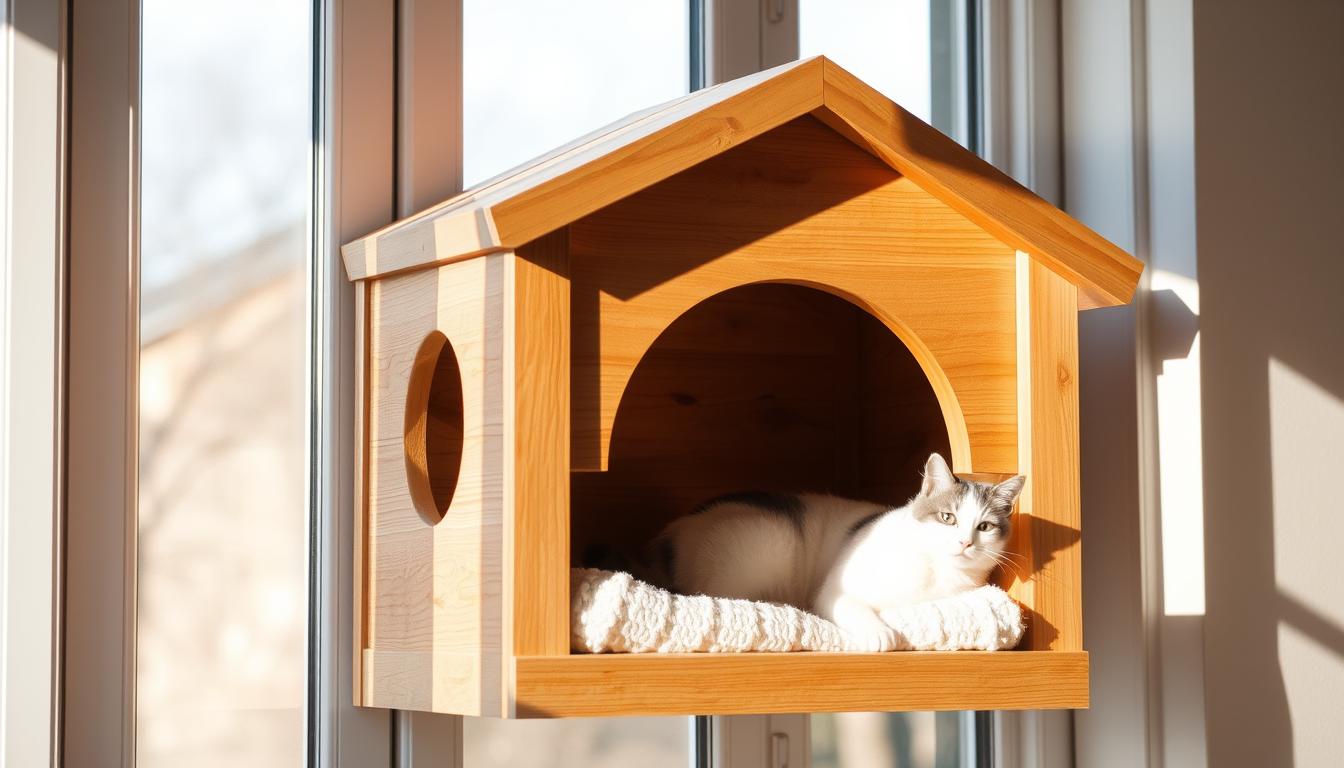
If you’re looking for a space-saving DIY cat house design, a window-mounted cat perch house is perfect. It saves floor space and gives your cat a cosy spot to watch the outdoors.
Materials and Measurements
To build a window-mounted cat perch house, you’ll need:
- A wooden plank or plywood for the base and shelves
- Support brackets or corbels
- Screws and a drill
- Wood glue
- A saw for cutting wood
- Sandpaper for smoothing the surfaces
The size of your window and the space for your cat’s perch will determine the measurements. A typical design has a base that’s 12 inches wide and 18 inches deep. The height can be adjusted to fit your windowsill.
| Material | Quantity | Dimensions |
|---|---|---|
| Wooden Plank | 1 | 12″ x 18″ |
| Support Brackets | 2 | Varies |
| Screws | 6-8 | 1.5″ long |
Step-by-Step Building Instructions
Building a window-mounted cat perch house is easy:
- Measure your window area to find the perfect size for your cat perch.
- Cut the wooden plank to your measurements.
- Put the perch together by attaching the support brackets under the base.
- Sand the surfaces to make them smooth.
- Mount the perch to the windowsill or wall using screws.
Tip: Make sure the perch is sturdy and well-attached to hold your cat’s weight.
Customization Options
You can make your window-mounted cat perch house even better by adding:
- A soft cushion or bedding for comfort
- Toys or dangling objects for fun
- A canopy or roof for shade
Building a window-mounted cat perch house gives your cat a new favourite spot. It also makes your home more appealing with a DIY project.
Space-Saving Corner Cat House
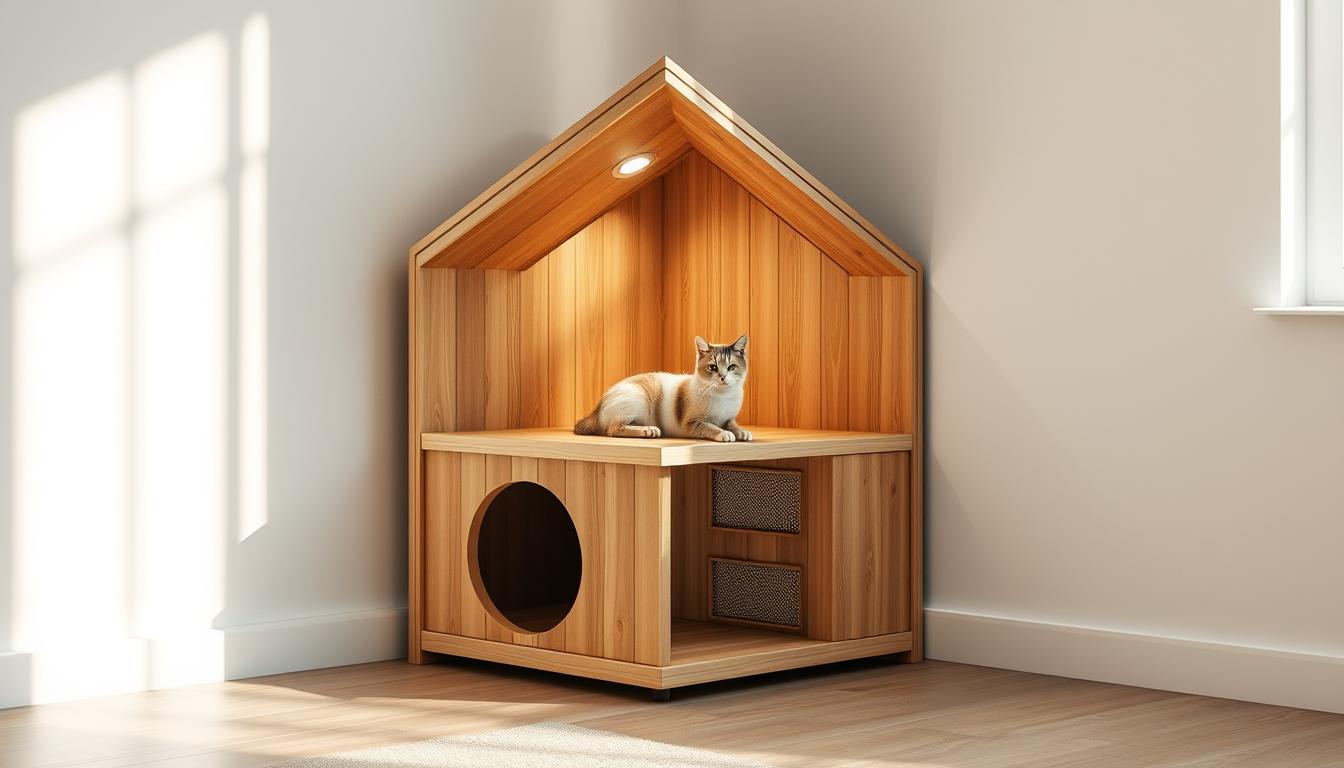
Looking for a cosy spot for your indoor cat? A space-saving corner cat house is a great DIY project. It’s perfect for those who want to save space while giving their cat a comfy place to rest.
Materials and Measurements
You’ll need basic tools and materials like plywood and wooden planks. The size depends on your corner. A typical corner cat house has a triangular base, 20 to 30 inches on each side.
Step-by-Step Building Instructions
Start by cutting the wood to size. Build the triangular base and attach the sides. Make sure it’s sturdy and secure. You can add a roof and features like a cushion or window.
One cat owner said, “My cat loves hiding in corners; this DIY corner cat house is her new favourite spot!”
Customization Options
Customise your cat house with different textures and colors. You can also add it to other DIY cat furniture ideas. Think about a removable roof for cleaning or a carpeted inside for comfort.
Building a corner cat house is a fun DIY pet project. It creates a cosy spot for your cat and is rewarding to make.
Stylish Furniture-Integrated DIY Wooden Cat House Indoor Designs
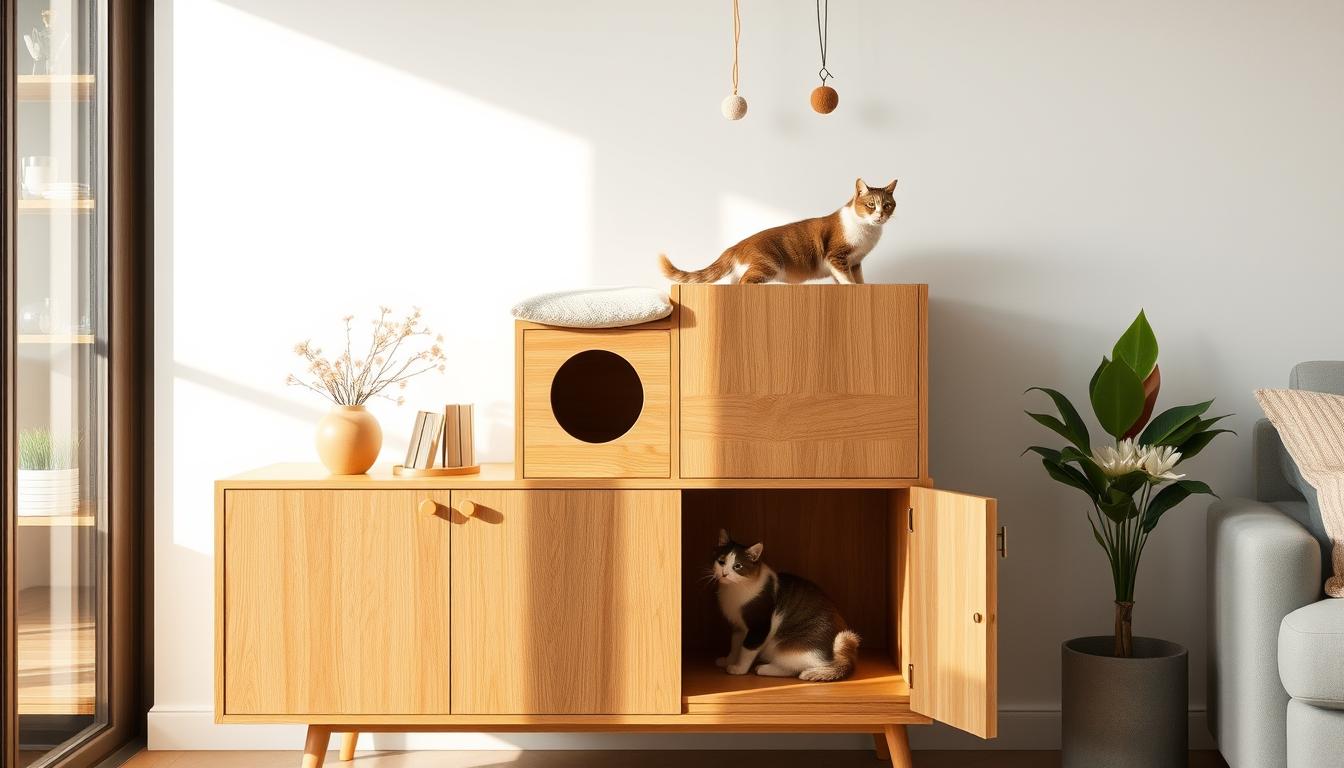
Building furniture-integrated cat houses can make your home look better and give your cat a cozy spot. These designs save space and add elegance to your home. We’ll look at stylish DIY wooden cat house designs that also serve as furniture.
Side Table Cat House
A side table cat house is both useful and comfy for your cat. It’s a place for your cat to rest and a spot for you to put drinks or decorations.
Materials and Measurements
To make a side table cat house, you’ll need:
- 3/4 inch plywood for the tabletop and cat house structure
- 1×2 lumber for the frame
- Wood screws and nails
- Sandpaper and wood finish
The size of your side table and cat house depends on what you prefer. A good size is a tabletop of 18 inches by 12 inches and a cat house of 12 inches by 12 inches by 18 inches tall.
Step-by-Step Building Instructions
- Cut the 1×2 lumber to make the frame for the side table and cat house.
- Put the frame together with wood screws.
- Cut the 3/4 inch plywood to the right size for the table top and cat house walls.
- Attach the plywood to the frame, making sure the cat house is closed.
- Sand and finish the wood to protect it and make it look good.
Customization Options
You can make your side table cat house of your own. Add cushions or soft bedding inside the cat compartment. Or paint the outside to match your home.
Bookshelf Cat House
A bookshelf cat house fits well in any home library or living room. It gives your cat a cosy place to hide among the books.
Materials and Measurements
For a bookshelf cat house, you’ll need:
- 3/4 inch plywood for the bookshelf and cat house structure
- 1×2 lumber for the frame
- Wood screws and nails
- Bookshelf brackets
The size of your bookshelf cat house can vary. Make sure the cat house is big enough for your cat.
Step-by-Step Building Instructions
- Plan and cut the plywood for the bookshelf and cat house.
- Build the bookshelf frame and attach the plywood.
- Make a space in the bookshelf for the cat house.
- Put in bookshelf brackets for stability.
Customization Options
You can add a curtain or door to the cat house for privacy. Or decorate the bookshelf with plants and items.
TV Stand with Cat Compartment
A TV stand with a cat compartment is both useful and cosy for your cat. It holds your TV and gives your cat a place to rest.
Materials and Measurements
You’ll need:
- 3/4 inch plywood for the TV stand and cat compartment
- 1×2 lumber for the frame
- TV stand brackets
- Wood screws and nails
The size depends on your TV and the space you have.
Step-by-Step Building Instructions
- Cut the lumber and plywood to the right size.
- Build the TV stand frame and attach the plywood.
- Make a space for the cat house in the TV stand.
- Install TV stand brackets and make sure it’s stable.
Customization Options
You can add ventilation to the cat compartment. Or design the outside to match your living room.
Under-Stair Cat Hideaway
An under-stair cat hideaway is great for homes with stairs. It uses dead space and gives your cat a quiet place to hide.
Materials and Measurements
You’ll need:
- 3/4 inch plywood for the cat hideaway structure
- 1×2 lumber for framing
- Wood screws and nails
The size depends on the space under your stairs.
Step-by-Step Building Instructions
- Measure the space under your stairs.
- Cut the lumber and plywood to fit this space.
- Build the frame and attach the plywood to make the cat hideaway.
- Add a door or a curtain for access.
Customization Options
You can make the under-stair cat hideaway more inviting. Add lighting or soft bedding.
| Design | Materials Needed | Customization Ideas |
|---|---|---|
| Side Table Cat House | 3/4 inch plywood, 1×2 lumber, wood screws, nails | Add cushions, paint to match decor |
| Bookshelf Cat House | 3/4 inch plywood, 1×2 lumber, bookshelf brackets | Add a curtain or a door, decorative items |
| TV Stand with Cat Compartment | 3/4 inch plywood, 1×2 lumber, TV stand brackets | Add ventilation, design to match living room furniture |
| Under-Stair Cat Hideaway | 3/4 inch plywood, 1×2 lumber | Add lighting, soft bedding |
Maintenance and Cleaning Tips for Wooden Cat Houses
To keep your DIY wooden cat house clean and durable, regular maintenance is key. A clean cat house keeps your cat healthy and happy. It also makes the house last longer.
Regular Cleaning Routine
Set up a regular cleaning schedule to keep your cat’s house clean. Use a soft-bristled brush to remove hair and debris. Then, use a damp cloth to wipe down surfaces.
For tough stains, a mild detergent solution works well. Make sure all surfaces are dry after cleaning to avoid moisture damage.
Extending the Lifespan of Your DIY Cat House
To make your DIY cat house last longer, check it often for wear and tear. Fix any problems quickly to avoid bigger issues. Applying a pet-safe wood finish can also protect the wood from moisture and scratches.
By following these tips, your DIY cat furniture will stay beautiful and functional for years.
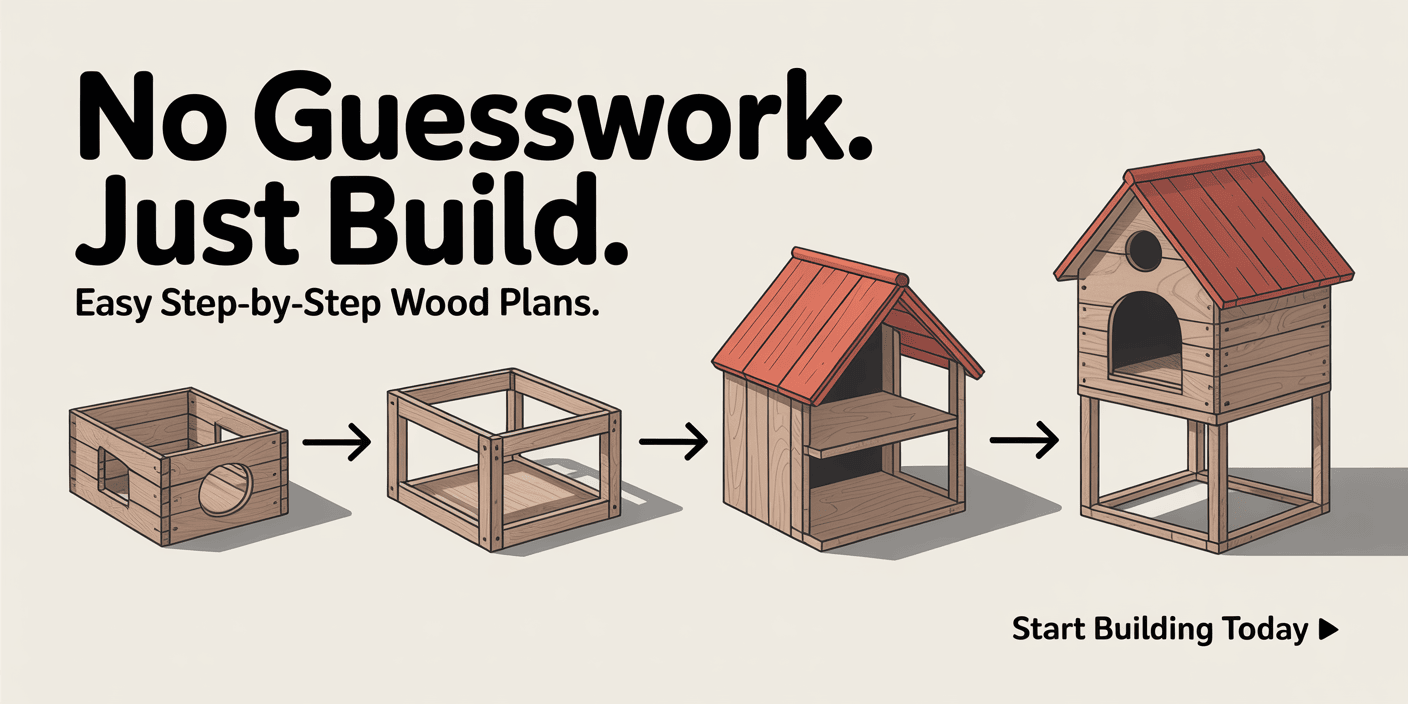
🚀 Build the Purr-fect Cat House with Pro-Grade Plans!

Why stress over DIY guesswork when Ted’s Woodworking gives you 16,000+ foolproof blueprints?
👉 Get Instant Access to 16,000 Woodworking Plans NOW! 👈
Here’s Why Cat Lovers & DIYers Love Ted’s Plans:
✅ Step-by-Step Cat House Blueprints – From cosy cabins to luxury feline forts, build with exact measurements and no guesswork.
✅ Beginner-Friendly – No fancy tools or skills needed! Perfect for first-time builders.
✅ Save $$$ – Skip retail markups (a custom cat house costs 200+;buildyoursforunder200+;buildyoursforunder30!).
✅ Lifetime Access – Get free monthly plan updates + request custom designs (like cat trees or scratching posts!).
✅ 4 FREE Bonuses – CAD software, 150+ video tutorials, and a Woodworking Business Guide (sell your creations!).
🔥 Limited-Time Deal: **One-time 67∗∗(Normally67∗∗(Normally297!) – Ends Soon!
📌 P.S. Love it or get a full 60-day refund – no questions asked!
Conclusion: Creating the Perfect Wooden Cat House for Your Indoor Feline
Building a DIY wooden cat house is a great way to give your indoor cat a cosy spot. There are many designs and plans to choose from. This lets you create a space that’s both unique and functional for your cat.
By following the plans and tips in this article, you can make a safe and beautiful haven for your cat. You can pick from simple designs or more complex cat towers. The most important thing is to choose something that fits your cat’s personality and your home’s style. You can also add your personal touch with homemade ideas.
With a bit of creativity and basic woodworking skills, you can make a wooden cat house that your cat will adore. So, why not start your DIY project today? Give your indoor cat the gift of a cosy and comfortable retreat.
FAQ
What are the benefits of building a DIY wooden cat house for my indoor cat?
A DIY wooden cat house gives your cat a cosy, stylish spot. It lets you tailor the design to your cat’s preferences and your home’s look.
What type of wood is recommended for building a DIY wooden cat house?
Pine, cedar, and reclaimed wood are top picks. They’re strong and safe for cats.
How do I ensure the structural stability and design safety of my DIY cat house?
For stability and safety, pick solid materials. Make sure all corners and joints are tight. Also, avoid any sharp edges that could hurt your cat.
Can I customise my DIY wooden cat house to fit my home decor?
Yes, you can make your cat house match your home’s style. Choose from various woods, stains, and designs.
How do I maintain and clean my wooden cat house?
Keep your cat house clean by dusting and vacuuming regularly. Use a damp cloth for surfaces. Pick a cat-safe cleaner.
What are some space-saving DIY wooden cat house designs?
For saving space, try corner houses, window perches, or side table houses. Under-stair hideaways are also great.
Can I build a DIY cat tower with multiple levels?
Yes, you can create a multi-level cat tower. Use wooden planks and strong supports for a fun climbing spot.
How do I choose the right materials for my DIY cat house project?
Choose materials that are safe for cats, durable, and suitable for indoor use. Solid woods and non-toxic finishes are best.
