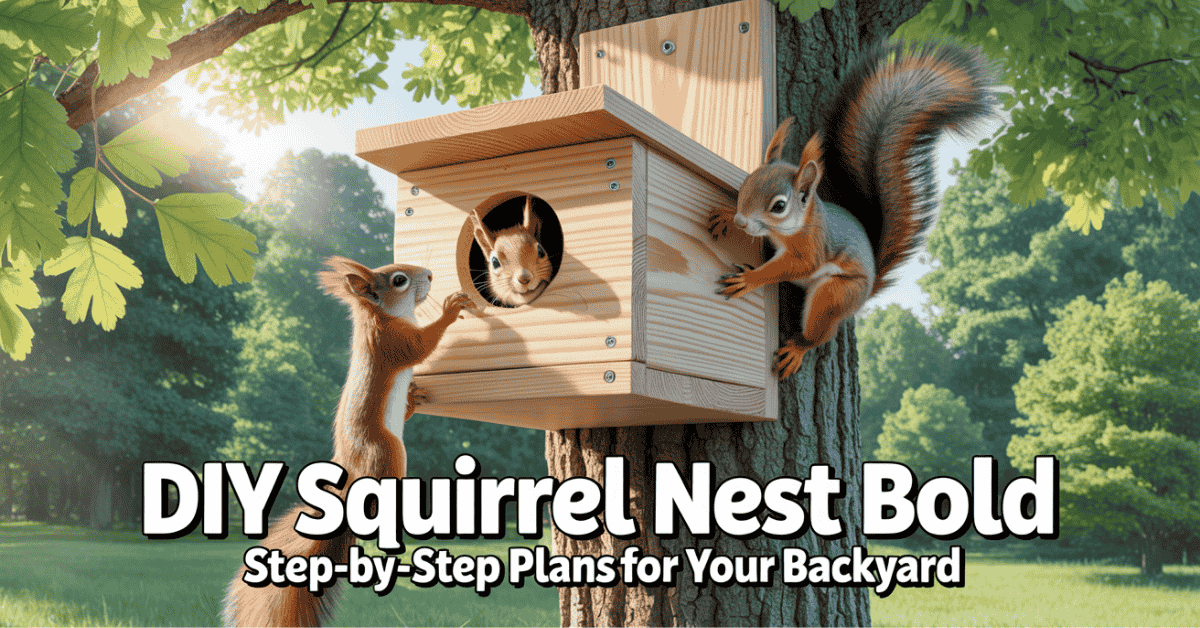
Wildlife agencies say suburban yards now have more grey squirrels than many forests. This is because of feeders and tree cover. You can build a safe shelter for them in just a weekend.
This guide will teach you to make a squirrel box using basic tools and sizes. It’s easy to follow and fits most trees. Additionally, it’s budget-friendly and helps keep predators away.
If you’re new to woodworking, don’t worry. You’ll learn about screws lasting longer than nails and why a 3-inch entrance is safer. You’ll also find out how a sloped roof keeps rain out. You’ll use common tools like a saw and sandpaper, and materials from Home Depot or your scrap pile.
By the end, you’ll know the optimal panel sizes and how to assemble the box quickly and easily. You’ll also learn how to safely mount it 10–30 feet high without harming the tree. Are you ready to start?
Key Takeaways
- Build a compact, rain-shedding box with a sloped roof and a 3-inch side entrance.
- Use screws instead of nails for stronger joints and long-term durability.
- Choose untreated lumber or exterior-grade plywood; avoid toxic finishes.
- Follow a clear cutting and assembly order to keep corners square and sturdy.
- Mount 10–30 feet high on a suitable tree, using methods that protect bark and cambium.
- Perfect for beginners: basic tools, modest cost, and a weekend timeline.
Why Build a DIY Squirrel House for Your Backyard
Building a DIY squirrel house is a great way to help local wildlife. It provides a safe place for tree squirrels when old trees are hard to find. By making a squirrel nest box, you improve their habitat and learn new skills while saving money.
Tip: Hang the house 10–30 feet high where squirrels often pass by. A small interior, with a front panel at 17 inches and a back at 18 inches, looks like a natural hollow. This makes it more likely for squirrels to use it right away.
Benefits for backyard wildlife and squirrel conservation efforts
Adding a safe shelter to your yard helps many animals, not just squirrels. It gives them a place to hide during storms and cold weather. This helps with squirrel conservation without changing their natural behavior.
Having more than one box helps prevent overcrowding. It also reduces the pressure on older trees that are already home to woodpeckers and owls.

Encouraging natural behaviors and safe shelter
A good-sized cavity encourages squirrels to cache, nest, and play. The slanted sides and tight interior keep warmth in and protect against wind and predators. By placing the nest box along their usual paths, you help them live like they do in mature forests.
Place a feeder nearby to keep squirrels from relying on handouts. Offer berries, sunflower seeds, nuts, or a small amount of pet food to attract them. This keeps the house clean and safe for the squirrels.
Beginner-friendly, affordable squirrel shelters
With scrap lumber and basic tools, you can make affordable squirrel shelters. You’ll need a saw, an electric screwdriver, a measuring tape, and sandpaper. Plus, 3–4 dozen screws for strong joints.
You can finish a DIY squirrel house in just an afternoon. Use untreated offcuts to save money. If you see squirrels visiting often, add more boxes. This small effort supports biodiversity and squirrel conservation in your backyard.
Best Materials for Squirrel Nest Box and Safe Finishes

Build a squirrel nest box that’s tough and weather-resistant. Use dense wood to keep it dry and cozy. This is key for hot summers and cold snaps.
Untreated scrap lumber vs. exterior-grade plywood
Untreated scrap lumber is the best choice. It breathes and insulates well, without chemicals. Use two 12 x 12-inch boards for the floor and roof.
For the sides, use two 35 x 6-inch boards. Adjust the width to 6–10 inches for red or grey squirrels.
Exterior-grade plywood is okay, but squirrels might fray it. If using plywood, seal edges from rain and avoid thin panels. Solid boards are still the best for durability.
Why do screws hold better than nails for durability
Screws grip wood fibers well and resist pullout. Use 4–7 screws at each corner to keep the frame square. This is crucial for a sturdy nest box.
If you only have a hammer, nails will work. But expect more movement at joints. Use a driver from brands like DeWalt or Milwaukee for better results.
Non-toxic finishes and whether to treat wood
Leave the wood bare for the safest option. Bare wood dries fast and avoids harmful fumes. If sealing, use non-toxic options like dewaxed shellac applied thin and fully cured.
Don’t add vent holes; the side entrance provides enough airflow. With the right materials and fastening, your nest box will be sturdy, safe, and welcoming.
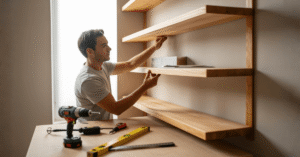
Essential Tools and Safety Prep for Beginners
You can start this squirrel box tutorial with a lean kit and still get pro results. Keep the steps simple, pace your cuts, and treat this as one of your most rewarding beginner woodworking projects. These basics will also carry through any step-by-step squirrel nest box guide you follow later.
Core tools: saw, electric screwdriver, measuring tape, sandpaper
Start with a saw, preferably a jigsaw for curves and clean corners. Also, have an electric screwdriver ready. Don’t forget a 25-foot measuring tape, a sharp pencil, and paper for layout lines.
Finish with medium and fine sandpaper to smooth edges. This makes it easier for squirrels to move around without snagging their fur or paws.
Mark twice before you cut. Light passes through the saw to reduce chip-out and keep panels square for your step-by-step squirrel nest box guide.
Fasteners and quantities you’ll need
Have 3–4 dozen exterior screws ready. Use 4–7 fasteners at each corner, then 3–4 per side when you secure the floor. Screws outlast nails by gripping fibers better, which helps the box stand up to weather and movement.
If you only have nails, they will work, but drive them with care and check them seasonally. This count supports a sturdy build in any squirrel box tutorial while keeping the weight reasonable for mounting.
Personal safety: first aid kit, stable workspace, careful cutting
Place a stocked first aid kit within reach. Work on a stable, level bench or sawhorses so parts do not shift as you drill or cut. Clamp panels before driving fasteners, and keep fingers clear of the blade path.
Run the driver slowly to prevent splitting or stripping. Align edges, pre-drill near ends, and take breaks. These habits make beginner woodworking projects feel calm, precise, and enjoyable.
Easy Squirrel Nest Box Plans and Dimensions That Work

You can make easy squirrel nest boxes that are cozy and weatherproof. These boxes have snug interiors to keep warmth in and drafts out. They also use common boards, making them simple to build.
Recommended panel sizes for floor, roof, front, back, and sides
For the floor and roof, use two 12 x 12-inch boards. Cut the front panel to 17 inches tall and the back to 18 inches. This sets the roof’s slope.
Shape two side panels with a slant: 18 inches on one edge, 17 inches on the other. This makes the sides and keeps the build simple.
Two boards around 35 x 6 inches can make the slanted sides and trim. This design keeps the build light and quiet, perfect for DIY projects.
Adjusting the width for larger species while keeping a compact interior
Start with a 6-inch interior width. If you have bigger tree squirrels, scale up to 8–10 inches. This makes the space safe yet roomy for bedding.
When you widen, adjust the floor and roof width to match. Keep the 12-inch depth for nesting, heat, and durability.
Creating the sloped roof with front and back panel height
The 18-inch back and 17-inch front create a gentle slope. This sheds rain well. Let the 12 x 12 roof extend forward for a modest overhang.
Cut a 3-inch doorway in one side panel near the higher back edge. This placement helps with drainage and keeps larger animals out, following DIY best practices.
How to make a squirrel nest box

You can start with scrap lumber or exterior-grade plywood and a simple kit of tools. For this wildlife nesting box tutorial, gather a saw, an electric screwdriver, a measuring tape, a pencil, and sandpaper, plus 3–4 dozen exterior screws. This approach keeps your squirrel nest box diy project sturdy and beginner-friendly.
Measure and cut the front panel to 17 inches and the back panel to 18 inches to form a sloped roof. For the sides, mark 18 inches on one edge and 17 inches on the other, then connect the marks and cut along the line for a clean angle. This setup is the core of how to make squirrel nest box pieces fit tight and true.
Drill a roughly 3-inch entrance hole in one side panel, about 3 inches down from the 18-inch edge. The hole trims the pointed end and gives safe access. Lightly sand all cut edges so wildlife won’t snag fur or skin during use.
Dry-fit the parts first. Fasten the front (17 inches) to one side, then attach that side to the back (18 inches). Add the second side and use 4–7 screws per corner for strong, square joints. This step-by-step rhythm mirrors any clear wildlife nesting box tutorial while keeping the squirrel nest box diy approach simple.
Center a 12 x 12-inch floor under the frame. Drive 3–4 screws per side into the lower edges of the walls. If you want more enrichment, add an interior divider with a 3-inch opening to create two levels for rest and play, then place dried moss or other soft, safe filler inside.
Finish by aligning a 12 x 12-inch roof with the taller back so it overhangs the front. The slope sheds water, and the overhang shields the entrance from wind and rain. With these steps, you’ve mastered how to make a squirrel nest box basics while following a practical squirrel nest box diy path from start to finish.
Step-by-Step Squirrel Nest Box Guide: Cutting and Assembly

Now, it’s time to make your squirrel home. This guide makes cutting and joining easy. It’s perfect for beginners and keeps your box safe and strong.
Cutting front and back panels to create a roof overhang
Cut the back panel to 18 inches and the front to 17 inches. This slope protects the roof. Make sure the edges are smooth for a tight fit.
Measuring and cutting slanted sidewalls
Mark 18 inches on one edge and 17 inches on the other of each sidewall. Draw a line between them and cut. This ensures the roof fits perfectly.
Drilling a 3-inch entrance on the side for proper access
Measure 3 inches from the 18-inch side of a panel. Drill a 3-inch hole there. This size fits squirrels and keeps out bigger animals.
Attaching walls for square, sturdy corners
First, fit all panels together. Attach the 17-inch front to a side with screws. Then, join it to the 18-inch back, and add the second side. Use steady pressure to avoid damaging the wood. This makes strong, square corners.
| Task | Measurement | Key Tip | Why It Matters | Back panel cut |
|---|---|---|---|---|
| 18 in | Keep edges straight | Aligns with front/back for a clean pitch | ||
| Front panel cut | ||||
| 17 in | Creates a front overhang for rain shed | Match the width to the back | ||
| Sidewall slope | ||||
| 18 in to 17 in | Connect marks with a straight line | Centre 3 in from 18-in edge | ||
| Entrance hole | ||||
| 3 in diameter | Center 3 in from 18-in edge | Fits squirrels, discourages larger animals | ||
| Assembly order | ||||
| Front → Side → Back → Side | 4–7 screws per corner | Keeps corners square and secure | ||
| Driver control | ||||
| N/A | Slow, steady pressure | Prevents stripping and wood damage |
Floor, Interior Comfort, and Roof Installation
Your homemade squirrel nest box should feel sturdy, dry, and cozy. These steps keep the build simple. They follow easy squirrel nest box plans for a simple backyard DIY project. Work methodically so each part fits clean and tight.
Centring and fastening the floor to the frame
Use a 12 x 12-inch board as the floor. Set the assembled frame on the board and align the 18-inch back with the rear edge. Mark the corners, flip the box, and drive 3–4 screws per side into the frame.
This keeps the floor centred and square. The firm base supports bedding and reduces drafts in your homemade squirrel nest box.
Optional interior divider for two-story play and nesting
Measure the interior, then cut a divider panel to fit. Drill a 3-inch opening in the divider, matching the entrance size. With a helper holding it inside, secure the panel from the exterior.
Minor gaps are fine for air flow and drainage. This upgrade pairs well with easy squirrel nest box plans when you want more space without adding bulk.
Safe bedding ideas: dried moss and soft filler
Add dried moss from outdoors or craft stores, or a soft filler like pillow fluff. Keep it dry and loose so squirrels can shape it to their liking.
Refresh bedding as needed to avoid dampness and odors. This simple backyard wildlife DIY detail boosts comfort right away.
Fitting the roof with a protective front overhang
Install a 12 x 12-inch roof panel. Align it with the 18-inch back and fasten so it overhangs the front. The extra lip sheds rain and shields the entrance from wind.
Check that the screws bite into solid wood without splitting. A clean overhang completes the weather seal on your homemade squirrel nest box.
| Component | Size/Spec | Key Steps | Purpose |
|---|---|---|---|
| Floor Board | 12 x 12 in | Align to 18-in back; 3–4 screws per side | Square base and stable footing |
| Interior Divider | Cut to interior width/height | Create a two-story layout and airflow | Simple backyard wildlife DIY steps |
| Bedding | Dried moss, pillow fluff | Place loosely; keep dry | Warmth, cushioning, nesting shape |
| Roof Panel | 12 x 12 in | Align to back; overhang front; fasten securely | Rain shed and entrance protection |
| Build Approach | easy squirrel nest box plans | simple backyard wildlife DIY steps | Efficient assembly and reliable results |
Mounting Your Homemade Squirrel Nest Box Safely
You’re ready to build a squirrel nest box in your backyard. But mounting it safely is just as important as the design. Follow this quick guide to find the right spot, secure the box, and protect the tree. You’ll also learn about squirrel shelter ideas that are effective.
Scouting the best tree and height (10–30 feet)
Watch where squirrels go each morning. Find a sturdy tree near their path, with branches that block the wind. Place the box 10–30 feet high to attract more squirrels and keep the ground quiet.
Use a sturdy ladder and have someone watch you. Clear the area below and tie off tools to avoid accidents while building your squirrel nest box.
Creating a stable grip and snug fit on the trunk
For a snug fit, use two large nails as a cradle. Drive the first nail, leaving 1 inch exposed. Then, set a second nail 8 inches away, also leaving 1 inch exposed. Slide the box between them and check it’s firm.
Test the fit by gently pulling it forward and side to side. This method is easy to add to your wildlife nesting box tutorial. But make sure it doesn’t wobble in storms.
Securing with heavy-gauge wire and why it’s controversial
Another method is to wrap heavy-gauge wire around the box and trunk. Many stores sell wire that you can tighten with a loop. It’s strong and doesn’t drill into the box.
But, the wire can harm the bark as the tree grows. Use a rubber strip under the wire and check it every year. If you want to avoid harming the tree, plan to adjust the wire yearly.
Reader-informed cautions about nails and tree health
Nails can spread disease and stress the tree. Wire can also damage the bark or limit growth. Think about the tree’s health, species, age, and strength before mounting.
Choose your method to build a squirrel nest box carefully. Keep hardware to a minimum, check often, and use gentle pressure. These steps follow a careful wildlife nesting box tutorial and support humane squirrel shelter ideas.
Alternative Squirrel Shelter Ideas and Feeder Add-ons
Even with a tight budget, you can create a cozy space for squirrels. If you’ve built a DIY squirrel house before, this is a great way to add more. Just use the same steps from any squirrel box tutorial and adapt them to what you have.
Upcycling a birdhouse with plywood shelves and cleats
Transform a birdhouse into a cozy shelter by adding levels inside. Cut a side hole that fits local squirrels. Then, attach wooden cleats inside to hold shelves.
Slide in plywood shelves to make perches and a lofted nook. This method recycles materials and keeps the shelter light. It also uses the same steps as a squirrel box tutorial, making it familiar.
Adding a front platform and dowel lip for a mason jar feeder
To add food and shelter, attach a wooden L-bracket under the front. Place a plywood platform on it. Glue a dowel along the front edge as a lip, then fit a mason jar.
The jar keeps snacks dry and lets you see when it needs refilling. This feeder add-on works well with a DIY squirrel house and keeps the entrance organized.
Placing fruit, nuts, and seeds to attract occupants
Fill the jar with a mix of fresh berries, sunflower seeds, and nuts. Add a bit of dry pet food for extra protein. Place a few treats on the platform to attract squirrels, then fill the jar with more food.
Change the food every few days and clean up leftovers. These habits keep your setup clean and follow any squirrel box tutorial while you try new ideas.
| Add-on | Main Materials | Function | Fits With | Pro Tip |
|---|---|---|---|---|
| Interior Shelves | Plywood, wood cleats, exterior screws | Creates multi-level resting and stash zones | Upcycled birdhouse or DIY squirrel house | Sand edges to prevent snagging tails and paws |
| Front Platform | Wooden L-bracket, plywood | Stable landing for entry and feeding | Any front-access shelter | Leave a slight drip gap to shed rain |
| Dowel Lip | Hardwood dowel, wood glue | Squirrel shelter ideas with a front platform | Platform-mounted feeder | Round over the dowel to reduce chewing damage |
| Mason Jar Feeder | Glass jar with metal ring | Keeps food dry and visible | Align the mouth with access hole for easy reach | Align the mouth with the access hole for easy reach |
| Attractant Mix | Berries, sunflower seeds, nuts, dry pet food | Encourages regular visits and occupancy | All shelter types | Rotate foods seasonally to maintain interest |
Placement, Maintenance, and Seasonal Care
Place your box along a path at 10–30 feet. Make sure the entrance faces away from strong winds and direct sun. A snug fit against the trunk helps keep it stable and quiet inside.
Mount it carefully. Avoid using heavy wire that can harm the bark or slow down growth. If nails are needed, use them lightly and space them out. Always check the mount after storms and during cold weather.
Check the fasteners every month in winter and spring. Tighten them as needed because wood expands and contracts. Make sure the roof sheds water away from the entrance to keep the bedding dry.
Use the best materials for the squirrel nest box’s durability. Cedar or pine without treatment works well. A thin, non-toxic finish is okay if needed. Vent holes are not needed because the side entrance provides enough air.
Update the bedding with dried moss or soft plant fibers as it gets compacted. Add seasonal food like berries, sunflower seeds, or nuts to attract squirrels. Use a separate feeder to avoid overloading your design with affordable squirrel shelters.
Space boxes to prevent overcrowding. If your yard is always busy, add more squirrel house plans across trees. This reduces competition and stress.
| Task | When to Do It | What to Check | Why It Matters | Height & Placement |
|---|---|---|---|---|
| Initial install | 10–30 ft, route visibility, wind exposure | Encourages use and protects from predators | ||
| Mount Integrity | ||||
| Berries, nuts, and sunflower seeds in a feeder | Snug fit, no bark damage, hardware tightness | Prevents slips, avoids harm to the tree | ||
| Roof & Drainage | ||||
| Quarterly | Overhang angle, runoff path, dry interior | Aligns with the best materials for squirrel nest box | ||
| Material Health | ||||
| Twice a year | Untreated wood condition, safe finish | Seasonally, after storms | ||
| Bedding Refresh | ||||
| As needed; peak in spring/fall | Dried moss level, odor, pests | Improves comfort and occupancy rates | ||
| Food Support | ||||
| Seasonal | Berries, nuts, sunflower seeds in a feeder | Attracts residents without crowding entrances | ||
| Capacity Planning | ||||
| When activity grows | More boxes per your squirrel house plans | Builds affordable squirrel shelters and reduces conflict |
🔨 Ready to Build More Amazing Projects?
Loved making this squirrel nest box? Get access to 16,000+ professional woodworking plans!
Why Ted’s Woodworking Works for Beginners:
• 16,000+ Step-by-Step Plans – Simple crafts to furniture & outdoor projects • Beginner-Friendly Instructions – Detailed A-Z guidance, no guesswork • Exact Materials Lists – Never waste money on wrong materials
• No Expensive Tools Required – Works with basic hand tools • Lifetime Access – Pay once, build forever • 60-Day Money-Back Guarantee – Completely risk-free
🎁 FREE Bonuses Today:
• 150 Video Tutorials – Learn from master woodworkers • CAD Plan Viewer – Edit and customize plans • Monthly New Plans – Fresh ideas delivered for life
🚀 Special Offer: Just $67 (Normally $297)
⚡ Discount ends June 19, 2025
👉 GET INSTANT ACCESS – CLICK HERE
Plans so detailed, they practically build themselves!
Conclusion
You now know how to make squirrel nest boxes that last. You just need a saw, a drill, and basic screws. These tools can turn old lumber into a safe home for squirrels.
Start by cutting the back panel to 18 inches and the front to 17 inches. This creates a sloped roof that keeps rain out. Use a drill to make a 3-inch entrance on the side for easy access.
Secure the parts with screws for stronger joints. This makes your box more durable and less likely to need repairs.
Place a 12 x 12-inch floor in the center to keep the box square. You can add a divider for a second level. Line it with dried moss or soft filler for comfort.
Top it off with a 12 x 12-inch roof. Make sure it’s aligned flush at the back and has a protective overhang in front. This design is compact, sturdy, and easy for beginners.
Hang your box 10–30 feet high in a busy tree route. Use a snug mount and choose between nails or heavy-gauge wire. Tree health is important.
If you want more, you can adapt a birdhouse or add a platform with an L-bracket. You can even attach a mason jar feeder. Offer berries, sunflower seeds, nuts, and a little pet food to attract visitors.
By following this guide, you create a safe, dry home for local squirrels. This simple plan and careful mounting make your build reliable. You can repeat, refine, and share your project. Keep notes, observe visitors, and improve your next squirrel nest box project.
FAQ
What are the best materials for a squirrel nest box?
Use untreated scrap lumber or exterior-grade plywood. Solid lumber is tougher and resists chewing better than plywood. If you choose plywood for cost or availability, pick exterior-grade and plan to monitor for wear. Avoid pressure-treated wood and toxic finishes.
What are the ideal dimensions for a beginner-friendly squirrel house?
A proven plan uses two 12 x 12-inch boards for the floor and roof, a 17-inch front panel, an 18-inch back panel for a sloped roof, and sides cut with tops slanted from 18 inches to 17 inches. Keep the interior compact; squirrels prefer snug spaces for warmth and safety.
How big should the entrance hole be, and where should it go?
Drill a round entrance about 3 inches in diameter on one side panel. Place it near the higher edge of the sloped side (the 18-inch back side). This size fits squirrels and helps exclude larger animals.
Why are screws better than nails for a squirrel nest box?
Screws bite deeper and resist loosening over time, especially in outdoor wood that expands and contracts. They help keep corners square and joints tight. Plan on 4–7 screws per corner and 3–4 per side when fastening the floor.
What tools do you need to build a homemade squirrel nest box?
Gather a saw (a jigsaw if you have one), an electric screwdriver, measuring tape, pencil, paper for marking, and sandpaper. Have 3–4 dozen wood screws ready. Keep a first aid kit nearby and work on a stable, level surface.
How do you cut the panels to create a sloped, overhanging roof?
Cut the back to 18 inches and the front to 17 inches. For the sides, mark 18 inches on one edge and 17 on the other, connect the marks, and cut along that line. Set the 12 x 12-inch roof so it aligns with the back and overhangs the front to shed rain.
Can you share a step-by-step squirrel nest box guide for assembly?
Dry-fit pieces first. Attach the 17-inch front to one side, then fasten that side to the 18-inch back, then add the second side. Square each corner and use 4–7 screws per corner. Center the 12 x 12-inch floor under the frame and drive 3–4 screws per side. Add the roof last with a front overhang.
Where should you mount the box, and how high?
Choose an active squirrel route and mount the box 10–30 feet up a sturdy tree. Face the entrance away from prevailing winds and give squirrels a clear approach. Height in that range increases occupancy and safety.
Is it safe to use nails and heavy-gauge wire to mount the box?
Some builders use two nails as a grip and a wire strap to secure the box. However, puncturing bark can invite disease, and tight wire may girdle the trunk. Weigh these concerns and check fasteners often if you use them. Consider tree-friendly straps or lag screws with spacers where permitted.
Do you need to treat or paint the wood?
It’s best to leave wood untreated. If you must seal, use only non-toxic finishes like shellac. Avoid anything that off-gasses or leaches chemicals. Extra vent holes aren’t required; the side entrance provides adequate airflow.
What interior comforts should you add?
Sand sharp edges and add safe bedding such as dried moss or soft filler. An optional interior divider with a 3-inch opening can create a two-story layout that encourages play and nesting while keeping the space compact.
What should you feed squirrels near the shelter?
Offer fruit like berries, sunflower seeds, and nuts. Some people use a little pet food. Place food in a separate feeder so squirrels don’t rely on handouts at the entrance. A mason jar feeder on a front platform works well.
Can you adapt a birdhouse into a squirrel shelter?
Yes. Add a side access hole, glue in cleats, and fit plywood shelves for more interior space. Create a front platform with an L-bracket, add a dowel lip, and seat a mason jar feeder so the mouth aligns with the hole. Adjust to your birdhouse size.
How do you make a squirrel nest box if you only have basic tools?
Measure carefully, mark cuts with a pencil, and use a hand saw or jigsaw. Pre-drill to prevent splitting. Drive screws slowly with an electric screwdriver. Even with minimal tools, the simple plan—12 x 12 floor and roof, 17-inch front, 18-inch back, slanted sides—builds a sturdy box.
Are ventilation holes necessary?
No. The 3-inch side entrance provides sufficient airflow. Focus on a snug, weather-shedding build with a roof overhang and tight joints to keep the interior dry and warm.
How wide should the box be for different squirrel species?
Start with 6 inches wide and go up to 10 inches for larger red or grey squirrels. Keep interiors on the compact side—cozy spaces feel safer and help with heat retention.
How do you ensure corners are square and sturdy?
Dry-fit, clamp if available, and check diagonals visually. Fasten in sequence—front to side, side to back, then add the second side. Use 4–7 screws per corner and avoid overdriving to prevent stripping.
What’s the safest way to work at height when mounting?
Use a tall, stable ladder on level ground and a spotter to hold it. Take your time, secure the box before letting go, and don’t overreach. Inspect the tree for rot or loose bark before you start.
How often should you maintain the squirrel house?
Inspect each season. Check fasteners after storms or freeze–thaw cycles, refresh bedding if it’s damp or dirty, and confirm the roof overhang still sheds water. Tighten or replace hardware as needed.
What are some squirrel shelter ideas beyond the standard box?
Try a two-chamber design with an interior divider, add shelves inside for play, or build a combined shelter-feeder with a front platform and a mason jar. These squirrel shelter ideas can boost use and viewing.
Is plywood too easy for squirrels to damage?
Exterior-grade plywood can work, but it’s easier to chew than solid lumber. If you use it, monitor edges and consider adding trim to high-wear spots. Solid boards remain the best material for squirrel nest box durability.
How does this project support squirrel conservation efforts?
By adding compact, secure nesting spaces in suburban areas, you increase safe shelter options, reduce competition for natural cavities, and encourage natural behaviors. Building multiple boxes and pairing them with feeders amplifies the impact.
Where can I find squirrel house plans I can trust?
Follow the step-by-step squirrel nest box guide outlined here: two 12 x 12-inch panels for floor and roof, 17-inch front, 18-inch back, slanted sides, and a 3-inch side entrance. These squirrel house plans are proven, simple, and budget-friendly.
Can beginners build a squirrel nest box DIY with good results?
Yes. With basic tools, careful measuring, and screws instead of nails, you can build a durable, weather-shedding box in an afternoon. Start small, follow the sequence, and you’ll have a reliable homemade squirrel nest box to hang in your backyard.
What’s the simplest way to learn how to make a squirrel nest box at home?
Start with the listed tools and cuts, pre-drill, and assemble in order. Mount 10–30 feet high on a well-travelled route. Keep finishes non-toxic and the interior compact. This straightforward approach keeps costs low and results strong.
