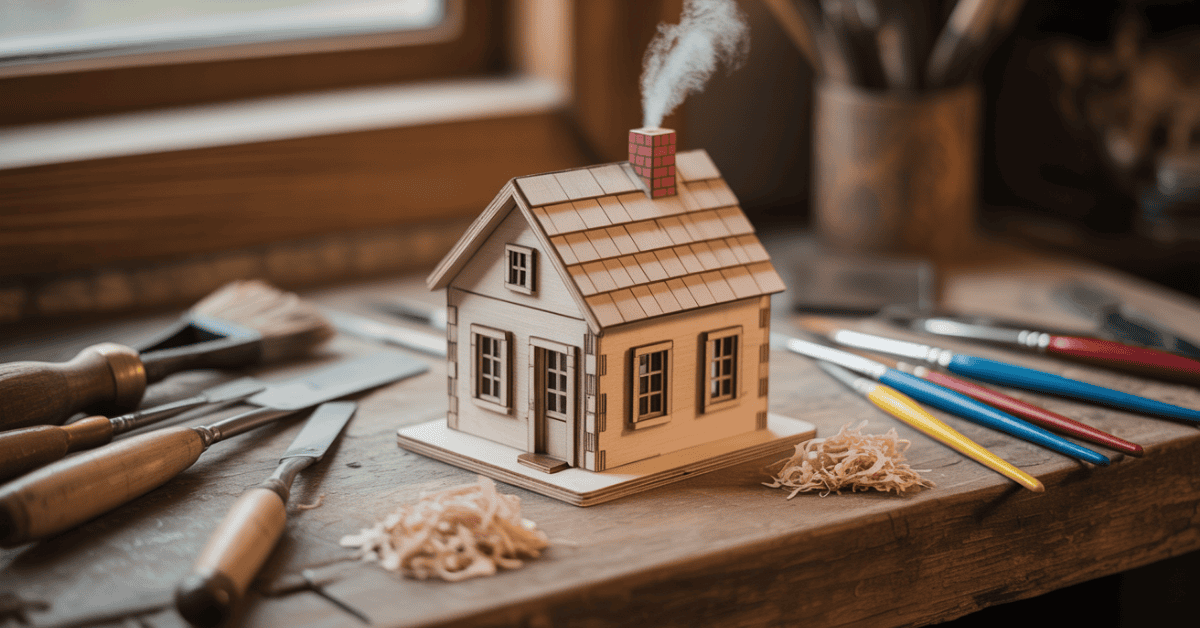
Over 430 million pins on Pinterest are about “little wooden houses.” This shows tiny timber décor is big in DIY today. If you want a calm, handmade look, this tutorial is for you. It uses simple tools and thrifted wood.
You’ll start by marking centers and rooflines on a 2×4. Then, cut clean angles, sand smooth, and add charming chimneys. Before painting or staining, you’ll have a minimalist look, thanks to Katrin at Northern Feeling.
Whether you use a miter saw or a scroll saw, you’ll learn from two real builds. We’ll compare cuts on scrap wood and pre-cut blanks. You’ll also learn how to add a vintage feel and style the set under glass.
This guide focuses on safety, speed, and a polished finish. You can finish it in an afternoon. Your work will look great next to twinkle lights or books.
Key Takeaways
- Learn a small wooden houses craft tutorial built on real workshop steps for clean, safe cuts.
- Follow wooden craft house diy methods using a miter saw, scroll saw, or band saw for control.
- Use diy miniature wooden houses tips: mark centers, sand to 200–220 grit, and add simple chimneys.
- Adopt tiny wooden house diy instructions for painting, distressing, and glitter snow accents.
- Style your village under a cloche with faux snow, bottle brush trees, and twinkle lights.
- Choose minimalist palettes—black, white, red, or natural stain—for year-round décor.
Overview: DIY Miniature Wooden Houses for Cozy Home Decor
You can make a charming scene from a single 2×4. It fits on a shelf, tray, or mantel. This guide shows how to turn scraps into art with neat cuts and paint.
Use these ideas to create a compact village. It looks great under a cloche or on a narrow ledge without taking up too much space.
Inspired by Katrin at Northern Feeling, the look is simple and warm. This tutorial helps you build pieces for any space. You’ll use straight lines, soft sanding, and paint that looks great in natural light.
Why tiny wooden houses make great shelf and mantel accents
These pieces add height and rhythm without blocking sightlines. You can group three to five forms for a tidy story. This leaves room for a candle or a frame.
They sit steady on mantels and fit into wall shelves, trays, and glass cloches. Their small size makes color and texture stand out. A matte black roof next to a white facade gives contrast. Natural stain adds warmth.

Project difficulty, timeline, and cost overview
This is a beginner-friendly build. You sketch simple roof angles, cut clean bodies, and sand smooth edges. Basic acrylics and a few brushes finish the job.
Plan one afternoon for trace, cut, sand, and paint, plus dry time. Costs are low with a single 2×4 or scrap wood, craft paints, and optional glitter. The guide uses tools many hobbyists already own, making it accessible.
Seasonal variations: snowy caps for Christmas displays or year-round neutrals
For winter, add glittered snowy caps and tuck the village under a glass cloche with faux snow and twinkle lights. It reads festive without taking much space.
For everyday style, choose black, white, and natural stain. Neutral roofs and clean lines let your pieces blend with books, candles, and framed art. Rotate a red door or a charcoal chimney for a subtle seasonal nod.
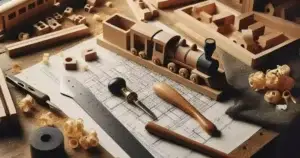
Tools and Materials You’ll Need

You can start a diy wooden house tutorial with basic shop gear and a few craft staples. Keep pieces small, simple, and safe to handle. These small wooden house construction tips prioritise control over speed, allowing for clean cuts and crisp paint lines, resulting in a polished village.
The list below supports both a quick wooden houses craft tutorial and a step-by-step wooden house craft tutorial. Choose what fits your space and budget, then build out details as your skills grow.
Wood sources: 2×4 board, scrap wood, or pre-cut blanks
A standard 2×4 from a home centre is a reliable and cost-effective option. Scrap wood keeps costs low and adds character from knots and grain. If you want to jump straight to painting, pick up pre-cut house blanks.
Check pieces for straight edges and avoid deep cracks. Use 200–220-grit sanding to prep any rough sides before layout.
Cutting tools: miter saw, scroll saw, or band saw options
A miter saw makes fast, repeatable roof angles. A scroll saw offers tight control over small parts and curved lines. A band saw handles quick ripping and consistent profiles when you batch-cut multiple houses.
Match the tool to the task: straight bodies on the miter saw, delicate trims on the scroll saw, and production runs on the band saw.
Detail tools and supplies: sanding block, acrylic paint, brushes, ruler, pencil
Use a sanding block to knock down splinters and ease edges. Acrylic paint dries fast and levels well on pine. Keep both a flat brush for siding and a pointed brush for windows and trim.
A sharp pencil and a metal ruler help you mark centers, door height, and window grids before the first stroke.
Adhesives and extras: wood glue, dowels, craft sticks, hacksaw, glitter, Mod Podge
Wood glue secures chimneys made from square dowels or craft sticks. A small hacksaw trims chimney pieces flush with the roof angles. Add snowy roofs with glitter set in Tacky Glue or Mod Podge for a winter scene.
Clamp light parts by hand or use painter’s tape as a gentle hold while the glue cures.
Optional display items: cloche, faux snow, bottle brush trees, twinkle lights
A glass cloche creates focus for a single cottage. Faux snow and bottle brush trees build depth and scale. Warm twinkle lights add a soft glow that highlights the paint texture and roof sparkle.
These accessories let you style a minimal neutral look or a festive village without changing the houses themselves.
| Item | Primary Use | Best For | Notes |
|---|---|---|---|
| 2×4 lumber | House bodies | Budget builds | Stable, easy to source, cuts clean angles |
| Scrap wood | Unique textures | Rustic styles | Free or low cost; inspect for cracks and nails |
| Pre-cut blanks | Paint-ready pieces | Fast starts | Saves time; limited shape variety |
| Miter saw | Straight cuts, roof angles | Repeatability | Ideal for consistent villages |
| Scroll saw | Precise detail cutting | Small parts | Great for arches and tiny trims |
| Band saw | Quick profiling | Batch work | Efficient for multiple houses |
| Sanding block (200–220 grit) | Edge smoothing | Paint prep | Improves adhesion and reduces splinters |
| Acrylic paint & brushes | Color and trim | Clean finishes | Use flat for siding, pointed for panes |
| Wood glue | Chimneys and add-ons | Strong bonds | Clamp or tape until set |
| Dowels & craft sticks | Chimney parts | Scaled details | Trim to fit roof angle |
| Hacksaw | Cutting small parts | Fine adjustments | Clean, controlled trims |
| Glitter + Mod Podge | Snowy roofs | Holiday scenes | Seal for sparkle that lasts |
| Cloche, faux snow, trees, lights | Display styling | Seasonal vignettes | Adds depth, glow, and atmosphere |
Safety and Prep: Smart Setup Before You Cut

Set up right, cut with confidence. This stage is crucial for accuracy and safety. It ensures your cuts are clear, your saw is ready, and your edges are smooth. These steps are essential for any tiny wooden house project.
Marking lines clearly: centers, roof angles, and house height
Start by finding the centerline on your 2×4. Then, draw a triangle roof by connecting two angled lines to that center point. Measure about 3 inches down from the top to mark the base. Vary the heights for a mixed village look. Clean layout marks improve control and support tiny wooden house diy instructions.
Miter saw safety: work from the long end of a 2×4 to keep fingers clear
Keep the board long while cutting roof angles and straight bodies. Avoid chopping the 2×4 into short blocks first. Working from the long end gives your hands space from the blade and keeps offcuts stable. This practice is a must for any wooden dollhouse building tutorial.
Choosing the right saw for control of small pieces
Use a miter saw for crisp, straight bodies and accurate roof angles. Switch to a scroll saw or band saw when silhouettes get tight or delicate. That extra control helps with curves and fine points, which is key in small wooden cabins, how to make guides and other tiny builds.
Sanding edges smooth to prevent splinters and improve paint adhesion
After cutting, knock down sharp edges with a sanding block or 200–220 grit paper. Light passes remove splinters and help paint or stain to lay evenly. Smooth surfaces make detail work cleaner for the tiny wooden house diy instructions and any wooden dollhouse building tutorial.
| Prep Step | Tool/Material | Why It Matters | Pro Tip |
|---|---|---|---|
| Centerline and roof layout | Pencil, ruler, square | Accurate cuts and balanced roof peaks | Mark 3 inches for a base, then vary heights for a layered look |
| Safe cutting stance | Miter saw on a stable bench | Hands stay clear; cleaner, straighter cuts | Keep the 2×4 long; clamp if the piece is narrow |
| Control on small shapes | Scroll saw or band saw | Precision on tight curves and tiny parts | Use a fine-tooth blade for minimal tear-out |
| Edge smoothing | Sanding block, 200–220 grit | No splinters; better paint adhesion | Light, even strokes to keep profiles crisp |
| Dust management | Vacuum, mask, safety glasses | Clear sight lines; healthier workspace | Vacuum between grits for a clean finish |
Cutting the House Shapes and Rooflines

It’s time to make your boards into sharp shapes. Keep your work area neat to ensure accurate cuts. Use a long 2×4 or straight wood to keep your hands free. This method helps you work smoothly and fits the spirit of making wooden mini houses.
Sketching simple silhouettes with clean lines and optional chimneys
Draw basic house shapes directly on the wood. Start with a center peak, then a triangle for the roof. Finish with a baseline at 3 inches. Add a small rectangle for a chimney on some pieces to add variety.
Using a miter saw for angled roofs and straight bodies
Set your miter saw for the roof angles. Cut the peak first, then the straight sides. Cut from the long end to keep each piece stable. This method gives you clean rooflines and consistent bodies for your mini houses.

Scroll saw or band saw tips for delicate, precise cuts
For narrow or angled cuts, use a scroll saw for control. A band saw is great for fast profiles and smooth curves. Both tools are perfect for making detailed mini houses.
Creating variety: tall, short, and narrow house profiles for a village
Vary your house profiles for a lively village. Cut tall and narrow houses, then add shorter, wider ones. Change roof pitches and chimney placement for interest. This variety makes your mini houses feel like a real village.
Adding Chimneys and Mini Details

Take your village to the next level with a few smart add-ons. This part of the tutorial focuses on small parts that look great on a shelf. Choose pieces that keep the minimalist vibe, like IKEA. These tips fit well with clean lines and quick builds.
Chimney options: square dowels, craft sticks, or a simple nail
For a modern look, use square wood dowels. For taller homes, laminate two craft sticks with wood glue and trim once dry. A single finish nail can also work as a tiny chimney. This keeps your village light and tidy while adding height for snow.
Measuring and marking angled cuts using the roofline as a guide
Hold the dowel or sticks along the roof pitch and mark the angle. Use a hacksaw for safe cuts. Dry-fit each piece to ensure a flush fit. These tips help keep your skyline consistent.
Glueing techniques for strong bonds on small parts
Apply wood glue sparingly to the mating face. Just a thin bead is enough. Press and wipe out excess right away. Use a mini clamp or hold by hand until it’s tacky. Then, paint or stain, and let the chimney highlight your roof.
Painting, Staining, and Finishing Techniques
You’re all set to make your wooden houses come alive. Color and finish are key, making sure lines are sharp. Follow these steps for a clean, durable, and stunning finish.
Base coats and color palettes: black, white, red, and natural stain
Begin with a clean, dry surface. Apply a base coat in black, white, or red for a bold look. Or, go for a clear or light natural stain to highlight the grain. Mix painted and stained pieces for a lively village.
This guide suggests thin coats for quick drying and less mess.
Sketching doors and windows in pencil before painting
Lightly sketch doors and windows with a sharp pencil. Mark centers and keeps margins even for perfect alignment. A quick sketch saves time and reduces touch-ups.
Clean lines with wide strokes; window panes with a pointed brush
Use a wide brush for doors, trim, and roof blocks. Pull long strokes for smooth coverage. For panes and grids, use a small, pointed brush to keep edges sharp.
Distressed look: light sanding for vintage, chippy charm
After paint dries, rub edges with 200–220-grit sandpaper. Focus on corners, roof peaks, and door frames. This adds texture and a vintage look, a favorite in crafting guides.
Optional sparkle: tacky glue or Mod Podge plus glitter on roofs
For snowy roofs, brush Tacky Glue or Mod Podge and sprinkle glitter. Let it set, then tap off excess. Seal lightly if your village will be handled often, keeping it bright and neat.
Display Ideas: Handmade Wooden Village Styling
Build a scene that feels cozy and put together. Mix painted cottages with natural wood, and soft light adds depth. Use your small wood decor ideas, crafting guide, and DIY instructions for scale and balance.
Tip: Stick to a simple color scheme to make the village look like one story. Use different heights and roof shapes for rhythm. Then, add texture like glass, snow, or plants to anchor it.
Under a glass cloche with faux snow and twinkle lights
Place two or three houses under a clear cloche. Sprinkle faux snow on the base and add warm twinkle lights behind for a glow. This idea is inspired by Katrin of Northern Feeling and fits your DIY instructions for scale.
For holidays, add glittered roofs and bottle brush trees. For all year, remove the snow and let the glass and lights set the mood. It’s a classy take on small wood decor ideas.
Tiered tray or small shelf vignette for seasonal decor
Use a tiered tray to create a mini street on each level. Mix tall and short houses, and add slim trees for height. A thrifted shelf also works well, echoing antique displays.
Change your display with the seasons. Your crafting guide helps keep everything balanced and clean.
Mix and match with bottle brush trees and stained wooden trees
Combine matte paint with a stained wooden tree for contrast. Add bottle brush trees for texture and scale. This mix of sheen and grain looks great in photos and follows most DIY instructions.
Use odd numbers for balance. Switch to darker stains in winter and lighter tones in spring for fresh decor ideas.
Holiday vs. everyday styling: snowy caps or minimalist neutrals
In December, go for sparkle. Use Mod Podge and glitter on roofs, and add heavy faux snow. Twinkle lights add depth under glass and on shelves.
For everyday, choose minimalist neutrals. Remove the snow, simplify, and let white, black, and wood lead. This keeps the village calm and modern, following your crafting guide.
small wooden houses craft tutorial: Step-by-Step Workflow
You can build a clean, charming village with simple tools. This tutorial ensures cuts are accurate, paint is crisp, and details are sturdy. It’s perfect for creating diy miniature wooden houses that look great on a shelf or mantel.
Begin by marking the center of your 2×4. Draw a triangle to meet that point and set a bottom line three inches down. For a looser look, sketch freehand silhouettes on scrap wood. Add space for optional chimneys to keep your project varied.
- Trace the house pattern, mark the roof and height lines
- Cut from a long 2×4 or scrap wood, then sand smooth
- Add chimneys with dowels or craft sticks; trim with a hacksaw
- Paint base colors, then doors, windows, and roof accents
- Finish with glitter snow (optional) and seal if desired
Use a miter saw for straight cuts and clean roof angles. Always cut from the long end of the board to keep your hands clear. For tight curves or tiny parts, a scroll saw or band saw is better. Sand every edge with a sanding block or 200–220 grit for a smooth finish.
Fit chimneys by measuring the roof angle and cutting small pieces with a hacksaw. Glue them with wood glue and let them set. A single finish nail can be used as a simple metal chimney for a modern look.
Paint base coats in black, white, red, or a light stain for grain. Sketch doors and windows in pencil first. Use wide strokes for clean edges and a pointed brush for panes. Add roof accents last to keep lines sharp.
For shimmer, spread Tacky Glue or Mod Podge on the roof and sprinkle fine glitter. Let it dry fully before handling. Seal for extra durability and a soft sheen, keeping your project neat from start to finish.
Style your village under a glass cloche with faux snow, bottle brush trees, and warm twinkle lights. Or line a tiered tray for everyday charm. This tutorial delivers a repeatable workflow you can finish in an afternoon.
✨ Build More Than Just Small Wooden Houses!

Unlock 16,000+ step-by-step woodworking plans for crafts, furniture, outdoor projects, and more. Perfect for beginners and pros alike — no expensive tools needed!
👉 Get Instant Access to Ted’s Woodworking for Just $67 and start creating today.
✨ Bring Your Wooden Projects to Life!
With Ted’s Woodworking, you’ll unlock:
✅ 16,000+ Ready-to-Build Plans
✅ Step-by-Step Instructions (perfect for beginners)
✅ Cutting & Materials Lists (save money & avoid mistakes)
✅ Detailed 3D Schematics (no guesswork, no confusion)
✅ Lifetime Free Updates + Custom Plans
👉 Get Instant Access Now for Just $67 – One-time payment, no recurring fees!
Conclusion
You now know how to build a small, stylish village from simple lumber. This guide shows you how to prepare, cut, and use tools safely. Start with a 2×4 or scrap wood, mark a center peak, and cut from the long end on a miter saw.
For tight profiles, use a scroll or band saw. Sand each piece with 200–220-grit sandpaper for smooth paint and stain. Add chimneys with square dowels, craft sticks, or a small nail for contrast.
Sketch doors and windows first, then paint them with steady, wide strokes and a pointed brush. Keep your palettes simple, distress lightly for age, and add sparkle with Tacky Glue or Mod Podge for a holiday look. The Pinterest-inspired, Northern Feeling–style lines keep the forms crisp and modern.
Style your diy miniature wooden houses under a glass cloche with faux snow and twinkle lights, or on a shelf or tiered tray. Mix bottle brush trees with stained wooden trees to build depth. This wooden craft house diy is budget-friendly, quick to learn, and easy to personalize—ideal for Christmas scenes or calm, neutral decor year-round.
With these steps, your small wooden houses craft becomes a repeatable weekend project. Build a few, vary the heights, and watch your village grow. Whether you follow the two featured builds or riff on them, you will have a polished result that fits your home and style.
FAQ
What makes tiny wooden houses ideal for shelves, mantels, and cloches?
They offer a big impact in a small space. These tiny homes fit neatly on narrow ledges and under glass cloches. Their clean lines, inspired by Katrin at Northern Feeling, create a cohesive look for Christmas or all year.
How beginner-friendly is this small wooden houses craft tutorial?
It’s very easy. You just draw straight lines, cut simple angles, and paint basic shapes. A miter saw makes roof cuts easy on a 2×4. You can trace, cut, sand, and paint in an afternoon. Just remember to let the paint and glue dry.
What’s the rough cost and timeline for a diy miniature wooden houses project?
The cost is low if you use a 2×4 or scrap wood. Acrylic craft paints and basic sandpaper are also affordable. Adding extras like a glass cloche or twinkle lights can make it festive. Plan a few hours plus drying time for a weekend project.
Which wood should you choose: a 2×4, scrap wood, or pre-cut blanks?
A 2×4 is cheap and sturdy for repeatable cuts. Scrap wood is cost-effective and adds character. Pre-cut blanks save time if you focus on painting and styling. Mix widths and heights for a varied village.
What cutting tool works best: miter saw, scroll saw, or band saw?
A miter saw is great for fast, straight cuts and angled roofs. A scroll saw is best for precise control of tiny shapes. A band saw is good for quick, repeatable cuts. Choose the tool that fits your comfort and the shape you need.
How do you mark centers and rooflines accurately?
Measure the board width and mark the centerline at the top. Draw angled lines down for the roof triangle. Mark the house height and vary it for rhythm. Clear pencil lines help make safe cuts.
What are the key miter saw safety tips for small wooden housecraft?
Always cut from the long end of the board to keep your hands away from the blade. Don’t pre-cut short blocks before making roof angles. Support the workpiece, keep fingers clear, and make controlled cuts.
How do you keep small parts from splintering?
Sand edges and faces with a sanding block or 200–220-grit paper right after cutting. This removes fuzz and prevents splinters. Light passes are better than heavy pressure on tiny surfaces.
What are good chimney options for a wooden miniature house crafting guide?
Try square wood dowels, two craft sticks laminated together for taller chimneys, or a single nail for a minimalist look. Dry-fit before glueing to confirm alignment and scale across your village.
How do you measure and cut chimneys to match roof angles?
Place the dowel or craft stick along the roof slope, mark the angle with a pencil, then trim the small piece with a hacksaw. Test-fit, adjust as needed, and glue with a tiny amount of wood glue for a clean bond.
What paints and finishes work best for a wooden dollhouse building tutorial look?
Acrylic craft paint is easy and fast-drying. Use black, white, and red for a minimalist look or stain for a natural wood finish. Mix painted and stained pieces for contrast. Optional: clear sealer if your display gets frequent handling.
How do you paint clean doors and windows on tiny wooden houses?
Sketch placements lightly in pencil first. Use a wide brush with long strokes for doors and larger blocks of color. Switch to a small pointed brush for window grids and fine lines so edges stay crisp.
Can you create a vintage or distressed finish?
Yes. After the paint dries, lightly sand edges with 200–220-grit to reveal wood or an underlayer for a chippy, timeworn effect. Go slow so you don’t remove too much color on small surfaces.
How do you add snowy glitter roofs with Tacky Glue or Mod Podge?
Brush a thin coat onto the roof, sprinkle glitter, and tap off the excess. Let it dry fully. For durability, add a light sealer over the glitter. This turns your village into a festive Christmas display.
What are smart display ideas for a handmade wooden village tutorial?
Style under a glass cloche with faux snow and twinkle lights for a glowing centrepiece. Arrange on a tiered tray or small shelf to build layered vignettes. Add bottle brush trees and a stained wooden tree for depth and texture.
How do you switch from holiday to year-round styling?
For Christmas, emphasize glittered roofs and heavier faux snow. For everyday decor, lean on neutral black, white, and wood tones, skip the snow, and keep accessories minimal. The clean lines fit farmhouse and modern interiors alike.
What’s the best step-by-step wooden house craft tutorial workflow?
Trace house shapes and roof peaks, cut from the long end of a 2×4 or use scrap wood, then sand smooth. Add chimneys from dowels or craft sticks and trim with a hacksaw. Paint base colors, detail the doors and windows, finish with optional glitter snow, and seal if needed.
Any small wooden house construction tips for building a balanced village?
Mix heights and widths, rotate roof pitches, and alternate paint and stain for contrast. Repeat a few elements—like a chimney style or a color—to keep the set cohesive while still varied.
Can you follow a tiny wooden house DIY instructions plan without power tools?
You can use pre-cut blanks and focus on sanding, glueing chimneys, and painting. If cutting by hand, a fine-tooth handsaw works on simple straight profiles, though it’s slower than a scroll saw or miter saw.
What extras elevate a wooden craft house DIY display under a cloche?
Layer faux snow, nestle a micro string of warm twinkle lights, and flank houses with bottle brush trees. Keep silhouettes simple so the glow and textures do the work—an approach popular on Pinterest boards for little wooden houses.
How do you keep paint lines crisp on small wood home decor ideas?
Use painter’s tape for large blocks, let base coats cure, and pull tape back on itself. For freehand edges, load minimal paint on the brush tip and make confident, single-pass strokes.
Where can you find inspiration for a handmade wooden village tutorial?
Browse Pinterest boards focused on “little wooden houses” and look to Katrin at Northern Feeling for minimalist silhouettes. Study simple rooflines, restrained palettes, and hand-drawn charm that translates well to wood.
What’s the best way to store and protect your diy wooden house tutorial pieces?
Wrap each house in tissue or bubble wrap if you added glitter. Store in a lidded bin away from moisture and heat. If you seal the paint, surfaces resist scuffs during seasonal swaps.
How many times should you repeat keywords like small wooden houses craft?
Keep repetition natural. Focus on clear instructions—trace, cut, sand, paint—and integrate phrases like small wooden houses craft tutorial, diy miniature wooden houses, and tiny wooden house diy instructions where they fit the reader’s questions.

