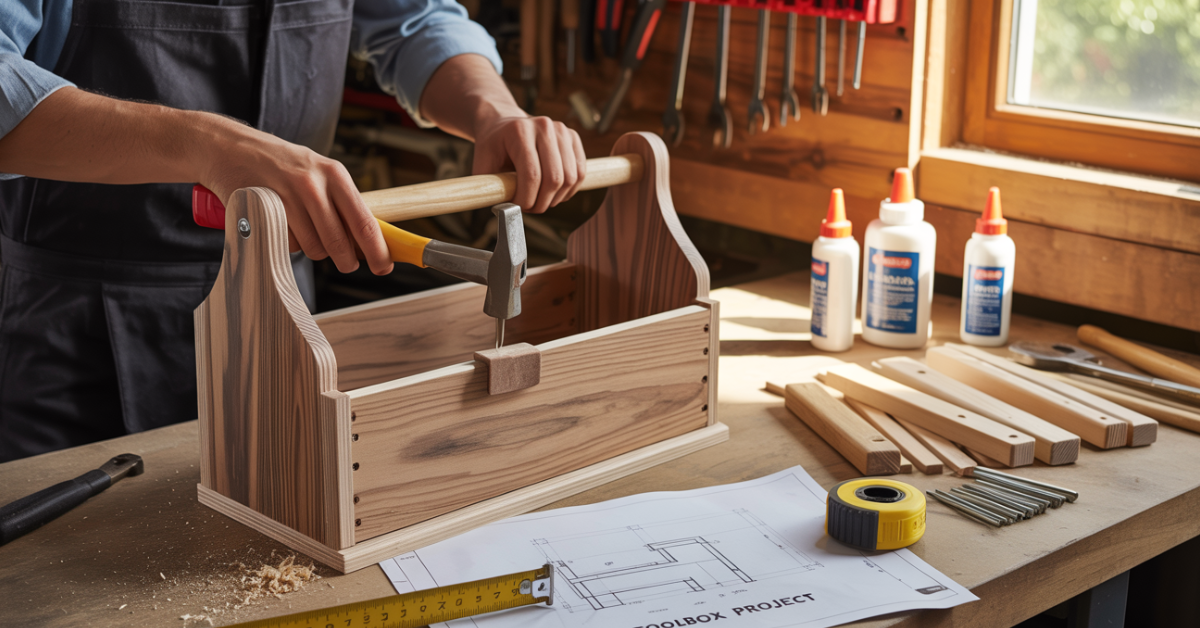
Are you tired of cluttered workspaces and wasted time searching for tools? Building a DIY tool box can change the game. It keeps you organized and gives you a sense of pride as a beginner.
You can make a storage solution that meets your needs. This step-by-step tutorial will help you start. You’ll build a tool box that makes your workspace neat and efficient.
Key Takeaways
- Learn the basics of building a DIY tool box as a beginner woodworking project.
- Understand the materials needed for the project.
- Follow a step-by-step guide to complete your tool box.
- Create a customized storage solution for your tools.
- Improve your workspace organization and efficiency.
Why Building a Wooden Tool Box Kit Is Perfect for Beginners
Building a wooden tool box kit is a great project for beginners. It teaches you the basics of woodworking. It’s perfect for those new to woodworking, as it introduces you to many techniques and tools.

Benefits of Starting with a Simple Woodworking Project
Starting with a simple project like a wooden tool box kit is great. It lets you learn essential woodworking skills without feeling too much pressure. You’ll get to know the basics of woodworking, like measuring, cutting, and putting things together.
Simple projects are less likely to have mistakes, making learning more fun. You can improve your skills without the stress of a big project.
Skills You’ll Develop Through This Project
Building a wooden tool box kit helps you learn many skills. You’ll get better at measuring and cutting wood, putting parts together, and using different tools and hardware. You’ll also learn about different types of wood and how to work with them.
These skills are useful not just for this project but for all your future woodworking projects. So, a wooden tool box kit is a fantastic starter woodworking kit.
Essential Materials for Your DIY Wooden Tool Box Kit
The quality of materials is key for a great DIY tool box kit. You need to pick the right wood, hardware, and fasteners. This ensures your project is both strong and useful.
Types of Wood Recommended for Beginners
Beginners should use woods like pine, plywood, or MDF for their tool box. These are affordable, easy to work with, and good for many woodworking projects.
- Pine: A softwood that’s easy to cut and shape, ideal for the box’s body.
- Plywood: Offers strength and stability, making it perfect for the bottom and sides.
- MDF: Great for the back panel or dividers due to its smooth surface.
Hardware and Fasteners You’ll Need
The hardware and fasteners you pick will make your tool box last longer and work better. You’ll need:
| Hardware | Purpose | Recommended Type |
|---|---|---|
| Hinges | For the lid to open and close | Brass or steel hinges |
| Nails/Screws | For assembling the box | Wood screws or finishing nails |
| Handle | For carrying the tool box | Wooden or metal handle |
Optional Materials for Customization
To make your DIY wooden tool box unique, add a finish or decorations. You can use:
- Wood stain or varnish to protect and enhance the wood.
- Decorative metal straps or corners for added durability and style.
- A lock to secure your tools.
By picking the right materials and focusing on details, you’ll make a handmade tool box. It will not only be useful but also show off your skills.
Tools Required for Building Your Wooden Tool Box Kit

Having the right tools is key to a successful wooden tool box kit project. As a beginner, start with the basics. Then, add more tools as you get better.
Basic Hand Tools for Beginners
You’ll need some basic hand tools to start. These include a tape measure, square, pencil, and clamps. They help you measure, mark, and hold wood in place.
- Tape measure
- Square
- Pencil
- Clamps
- Hammer
Power Tools That Make the Job Easier
Power tools can make your work easier. For this project, use a table saw or circular saw for cutting. A drill press is good for precise drilling, and a sander smooths surfaces.
Key power tools include:
- Table saw or circular saw
- Drill press
- Sander
Safety Equipment You Shouldn’t Skip
Safety is always first when using tools. Make sure you have safety glasses, ear protection, and a dust mask. They protect you from debris and noise.
With the right hand tools, power tools, and safety gear, you’re ready to start your project. You’ll work with confidence.
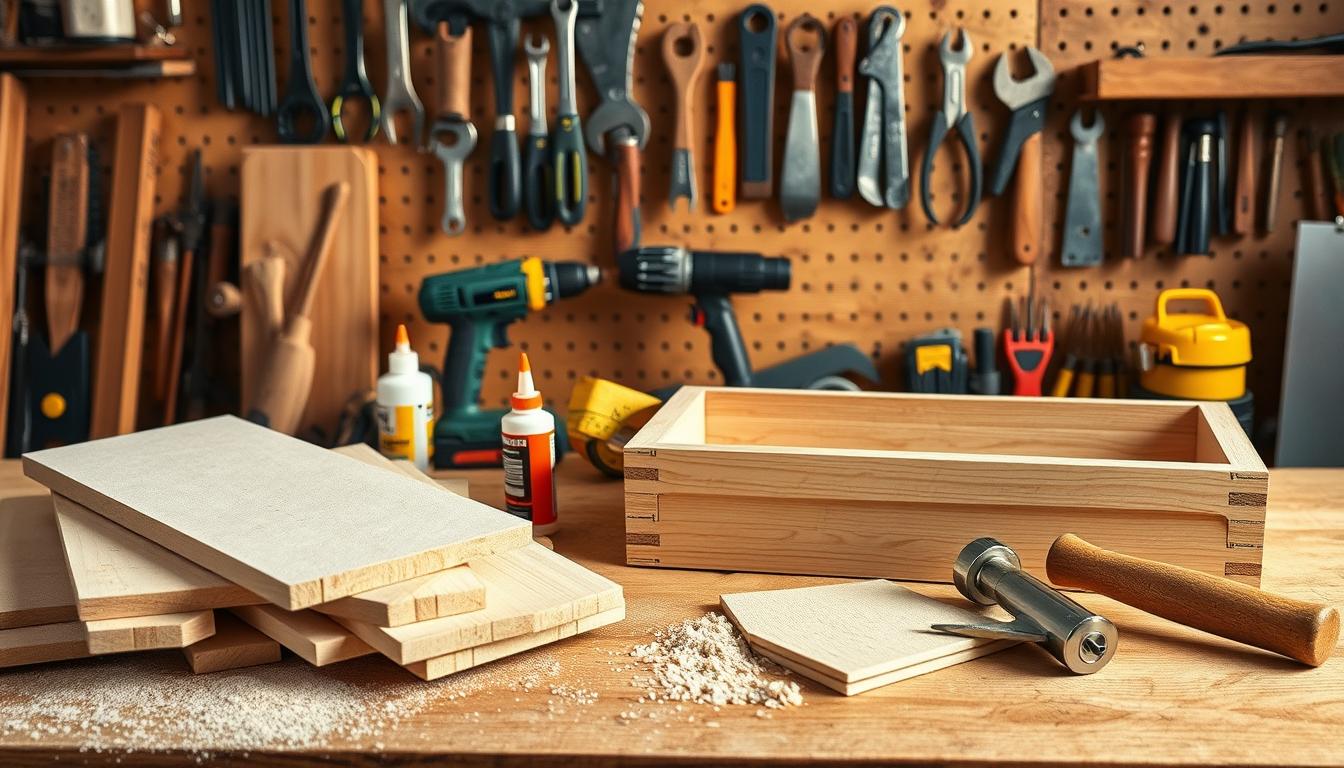
Preparing Your Workspace and Materials

A well-prepared workspace is key to a successful beginner woodworking project. Make sure your area is clear of clutter and hazards. This boosts safety and efficiency.
Setting Up a Safe and Efficient Work Area
To create a safe space, clean your work surface and organize tools. Good lighting and air are also important. “A cluttered workspace is a recipe for disaster,” experts warn.
A clean and organized workspace is crucial for safety and productivity.
Keep a fire extinguisher handy and avoid loose clothing.
Measuring and Marking Your Wood
Accurate measurements are vital in woodworking. Use a reliable tape measure and square to mark wood. Always double-check your measurements before cutting to avoid mistakes. Learning to measure precisely is a skill that will help in all projects.
Pre-cutting Tips for Success
Before cutting, check your wood for defects. Use a sharp saw blade for clean cuts. Following these
By following these steps, you’ll be well on your way to completing your wooden tool box kit successfully.
Complete Wooden Tool Box Kit Tutorial: Building the Base

The foundation of your DIY wooden tool box is key. It needs precision and patience. A sturdy base makes your tool box functional and durable.
Measuring and Cutting the Bottom Panel
Start by measuring and cutting the bottom panel. Accuracy is crucial for the right size. Use a sharp saw for a clean cut, then sand the edges.
Preparing the Side Panels
The side panels give your tool box its strength. Measure and cut them to match. Double-check your measurements to avoid errors.
Creating a Solid Foundation
Assemble the base by attaching the side panels to the bottom. Use the right fasteners. Make sure the corners are square and the base is strong.
Checking for Square Corners
To check if corners are square, measure the diagonals. If they’re equal, your corners are square. Adjust if needed.
| Component | Dimension | Material |
|---|---|---|
| Bottom Panel | 18″ x 12″ | 3/4″ Plywood |
| Side Panels | 18″ x 6″ | 3/4″ Plywood |
| Back Panel | 18″ x 12″ | 1/4″ Plywood |
By following these steps, you’ll have a solid base for your wooden tool box kit. This base will support the rest of the structure, making your tool box functional and durable.

Assembling the Box Structure
Now that you have all the parts ready, it’s time to put your wooden tool box together. This step is key as it combines all the parts you’ve prepared.
Attaching the Side Panels
Start by attaching the side panels to the bottom panel. Make sure they line up right to avoid any problems with the box’s shape. Use wood glue and wooden screws for a strong hold.
Reinforcing the Corners
It’s important to make the corners strong for your tool box’s durability. You can use corner brackets or extra wooden supports to keep the corners tight.
Adding Support Elements
Adding extra parts, like a middle divider or more slats, can make your box more stable. It also gives you more places to store things.
Troubleshooting Alignment Issues
If you run into problems with getting things to line up, check your measurements again. If needed, adjust them. Clamps can help keep things in place while you secure them.
| Common Issues | Solutions |
|---|---|
| Misaligned panels | Recheck measurements and adjust |
| Loose corners | Add corner brackets or supports |
| Insufficient support | Add middle dividers or additional slats |
By following these steps and tips, you’ll build the structure of your handmade tool box. This will prepare it for the final details.
Crafting and Installing the Handle
As you near the end of your handmade tool box, focus on the handle. A good handle makes your wooden tool box look better and is easy to carry.
Handle Design Options for Beginners
There are many handle designs for your DIY wooden tool box. You can pick simple or complex designs. Choose one that’s both useful and easy to make.
- Straight handle: Simple and easy to make, ideal for beginners.
- Curved handle: Provides a comfortable grip and can be more aesthetically pleasing.
- Ergonomic handle: Designed to fit comfortably in your hand, reducing strain.
Cutting and Shaping the Handle
After picking a design, cut and shape the handle. Use a saw to cut it to size, then sand it for smooth edges. For complex designs, a jigsaw or coping saw might be needed.
Secure Attachment Methods
It’s important to attach the handle securely to your wooden tool box kit. You can use screws, nails, or wood glue. Make sure it’s strong enough to hold the tools.
- Mark the attachment points on the box and handle.
- Drill pilot holes for screws or nails.
- Attach the handle using your chosen fastening method.
By following these steps, you’ll create a handle that fits your wooden tool box kit tutorial project perfectly. It will make your DIY wooden tool box complete and useful.
Adding Dividers and Compartments to Your Tool Box
The final touches to your DIY tool box kit involve adding dividers and compartments for better organization. Adding dividers and compartments to your tool box is a crucial step in enhancing its functionality. By doing so, you’ll be able to store your tools more efficiently, making it easier to find what you need when you need it. This step is part of the wooden craft project that not only provides a practical storage solution but also a sense of accomplishment.
Planning Your Internal Layout
Before you start cutting and installing dividers, take a moment to plan the internal layout of your tool box. Consider the types of tools you have and how you can best organize them. “A well-organized toolbox is the mark of a skilled craftsman,” as many woodworkers say. Think about the frequency of use and the size of your tools.
Measuring and Cutting Dividers
Once you have a plan, measure and cut the dividers according to your design. Ensure that your measurements are precise to avoid any gaps or overlaps. Use a table saw or a circular saw for accurate cuts. Remember, the goal is to create a snug fit that keeps your tools secure.
Installation Techniques for Beginners
Installing dividers can be straightforward if you follow the right techniques. Start by attaching the dividers to the sides of the tool box using screws or nails. Make sure they are evenly spaced and aligned properly. For added stability, you can also attach them to the bottom or the lid of the tool box.
By following these steps, you’ll be able to add dividers and compartments to your tool box effectively, making it a more functional and organized beginner woodworking project. This not only enhances your tool storage but also contributes to a more efficient workspace.
Sanding and Finishing Your DIY Wooden Tool Box
The final steps in making your DIY wooden tool box include careful sanding and a strong finish. Sanding makes the wood smooth, getting rid of any blemishes or splinters. The right finish keeps your tool box looking good for a long time.
Progressive Sanding Techniques
Begin with coarse-grit sandpaper (120-150 grit) and then move to finer grits (220-240 grit). This method gets rid of big imperfections first, then the small ones. You’ll end up with a very smooth surface.
Choosing the Right Finish for Durability
When it comes to a handmade tool box, durability is important. You can use a water-based or oil-based polyurethane finish. Water-based dries quickly and smells less, while oil-based is harder and lasts longer.
Application Methods for Best Results
Use a clean, lint-free cloth or foam brush to apply the finish. Apply thin coats, letting each dry before adding the next. This way, you get a smooth, professional finish.
Drying and Curing Times
Drying is when the finish is touch-dry, and curing is when it’s fully hardened. Drying times vary from a few hours to overnight. Curing can take days to a week, depending on the finish and environment.
By following these steps and picking the right materials, you’ll make your wooden tool box kit look great and last long. It will be a proud part of your woodworking collection.
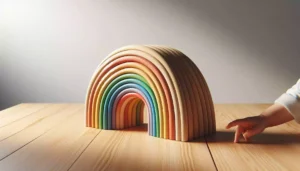
Adapting This Project as a Tool Box Kit for Kids
Getting kids involved in woodworking is a fantastic way to introduce them to this craft. This project can be tailored for various age groups. It’s perfect for families or educational settings.
Age-Appropriate Modifications
For kids’ tool box kits, making adjustments based on age is key. Younger kids can start with simpler designs and pre-cut wood. This makes assembly easier. Older kids can take on more tasks, like measuring and cutting wood themselves.
Safety Considerations for Young Woodworkers
When working with kids, safety is a top priority. Make sure they wear safety glasses and gloves. Teach them how to use tools safely. Always supervise them, even more so when using power tools.
Making It a Fun Learning Experience
To keep the project fun, let kids decorate their tool box. They can use paint, stickers, or other decorations. This adds a creative twist and teaches them about customization in woodworking.
Parent-Child Building Tips
Building a tool box kit together can strengthen your bond. Here are some tips for a successful project:
- Begin with simple tasks and gradually add complexity as your child grows more confident.
- Encourage your child to ask questions and learn from their mistakes.
- Always praise their efforts and achievements.
By tailoring the tool box kit project for kids, you can create a fun and educational woodworking experience. With the right adjustments and safety measures, it can be enjoyable for everyone in the family.
🧰 Build Smarter. Craft Better. Go Beyond Just a Toolbox!

Want more than one weekend project? Unlock 16,000+ woodworking plans and bring your workshop to life with Ted’s Woodworking—the #1 guide trusted by 50,000+ hobbyists and builders.
🎯 Perfect for Beginners & Weekend Warriors Alike!
🪚 What You’ll Get:
- ✅ Done-for-you plans with crystal-clear diagrams, cut lists & material breakdowns
- ✅ Step-by-step video tutorials and expert instructions
- ✅ Projects for every level—from rustic toolboxes to full furniture builds
- ✅ Mobile access + bonus DWG/CAD viewer for easy shop reference
- ✅ Lifetime updates + 60-day money-back guarantee
🎁 Bonus: Includes 150 premium videos, complete woodworking guides & business startup tips!
🔗 Click Here to Grab 16,000 Woodworking Plans Now
Build with confidence. Create without guesswork.
Conclusion: Your First Step Into the World of Woodworking
Finishing your wooden tool box kit is just the start. This project has given you hands-on experience and key skills for future projects.
By following the wooden tool box kit tutorial, you’ve learned to use different tools and techniques. You’ll find new ways to make useful and attractive items for your home or workshop as you keep exploring.
The skills you’ve gained will help you with more complex projects. This lets you grow your creativity and take on new challenges. So, keep practicing, and soon you’ll make intricate pieces easily.
Your wooden tool box kit is more than just a place to store things. It shows your growing skills and reminds you that every expert woodworker began with a simple project like this.
FAQ
What type of wood is best for a beginner’s wooden tool box kit?
Softwoods like pine or cedar are good for beginners. Hardwoods like poplar or birch are also easy to work with and affordable.
What are the essential tools required for building a wooden tool box kit?
You’ll need basic hand tools like a tape measure and square. Also, power tools like a table saw and drill press are necessary. Don’t forget safety gear like glasses and a dust mask.
How do I customize my wooden tool box kit?
Choose different woods and add trim or molding for a unique look. You can also add engravings or custom handles.
What safety precautions should I take when working with power tools?
Always wear safety glasses and a dust mask. Keep your clothes tight and work in a clean, well-lit area.
Can I adapt this wooden tool box kit project for kids?
Yes, make it simpler for kids. Use safe materials and add safety features. It’s a great way to teach them woodworking.
What are some common mistakes to avoid when building a wooden tool box kit?
Avoid bad measurements and cutting. Make sure to assemble it right. Follow a guide and double-check your work.
How do I ensure my wooden tool box kit is durable and long-lasting?
Use top-quality materials and finish it well. Pay attention to details like strong corners and a secure handle.
What are the benefits of building a wooden tool box kit as a beginner woodworking project?
It’s a great way to learn woodworking. It boosts your skills and confidence. Plus, it’s a useful place to store your tools.


Pingback: 10 Stylish Wood Tool Box Ideas for DIY Enthusiasts in 2025