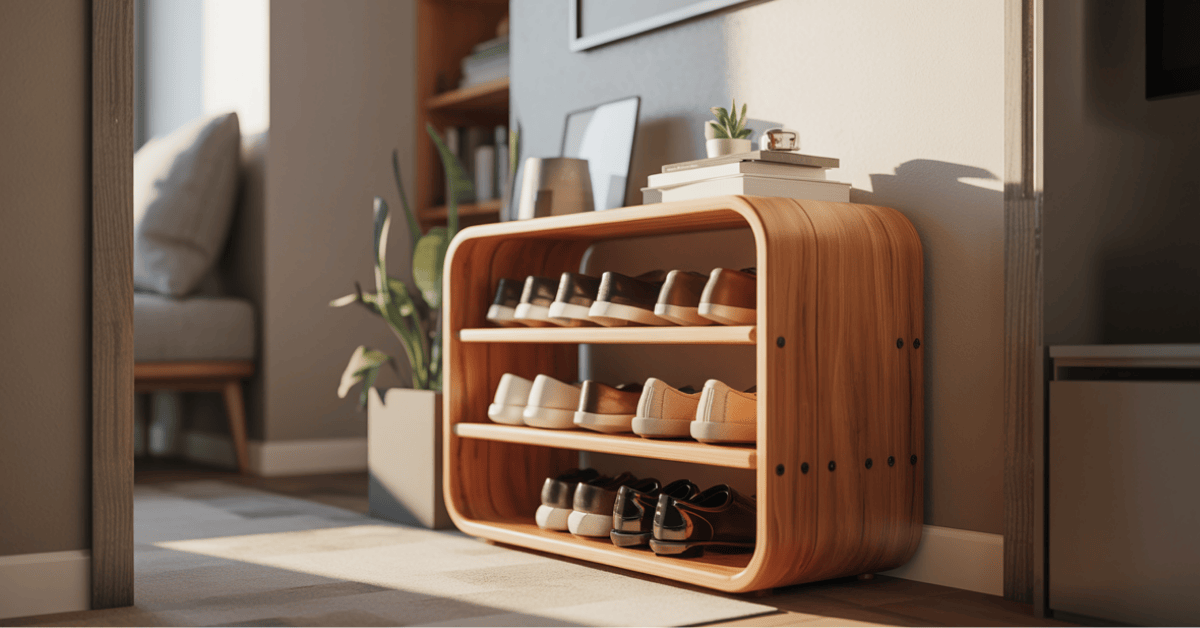
Have you ever tripped over a mountain of sneakers just trying to walk through your own front door? It is time to reclaim your entryway with a project that turns chaos into calm. This guide shows you how to build a custom solution for your home in just one weekend.
A vertical shoe rack is a brilliant way to maximise limited space in mudrooms or tight closets. For about $100, you can create a professional-grade storage piece that fits a narrow corner perfectly. This project delivers high-end results without a luxury price tag.
This diy task takes roughly 10 hours and eliminates the daily hunt for matching pairs. Follow our clear instructions to build a sturdy shoe rack that keeps footwear protected and easy to find.
You are not just building furniture; you are reclaiming your peace of mind. Transform your cluttered floor into an organised sanctuary. You will gain the confidence to tackle more projects while making your daily routine much smoother.
Key Takeaways
- Reclaim your entryway with a custom organisation system.
- Build a professional-grade unit for around $100 in materials.
- Complete the entire construction process in a single weekend.
- Optimise vertical areas in narrow mudrooms and tight closets.
- Follow precise measurements to eliminate assembly guesswork.
- Protect your footwear while simplifying your morning routine.
Why You Need a DIY Wooden Shoe Rack for Small Spaces
If you are tired of tripping over boots and sneakers the moment you walk through the door, you are not alone. A typical 6′ by 10′ mudroom can look cluttered 95% of the time when shoes aren’t properly organised. This chaos costs you time and sanity every single day as you hunt for a matching pair.
The Cluttered Entryway Problem Every Small Space Owner Faces
As families grow and kids get older, the number of shoes increases dramatically. Corner spaces often become dumping grounds for footwear when there is no proper system in place. This mess spreads across the home, making even the cleanest room feel disorganised and small.
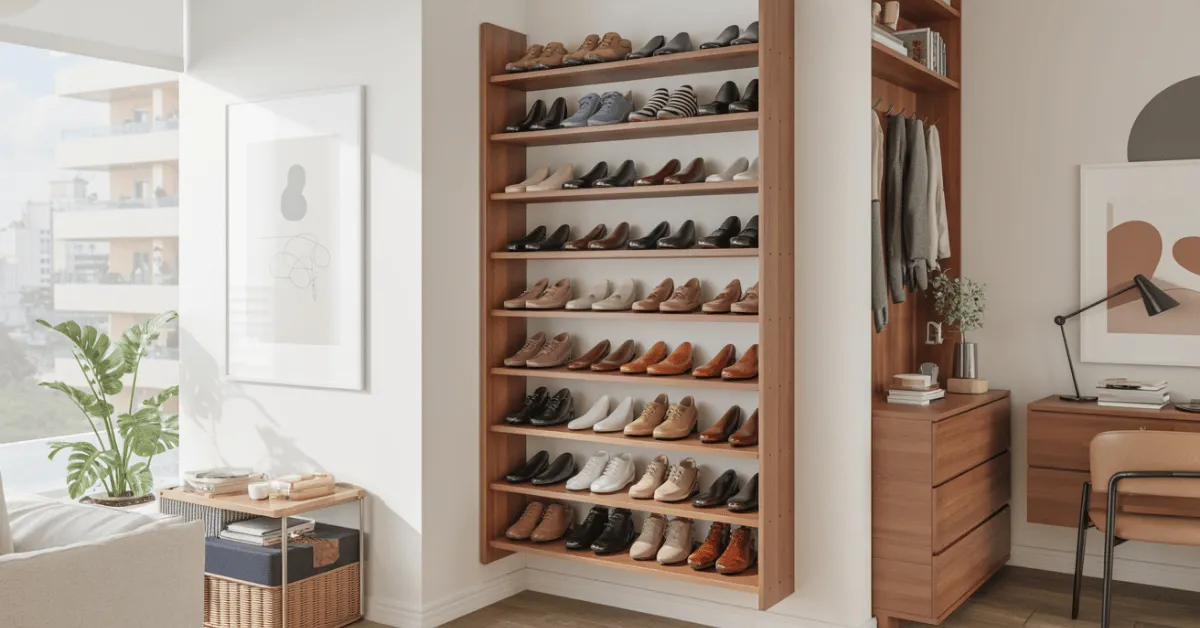
Space-Saving Design Solutions: Vertical Storage, Multi-Tier Racks, and Wall-Mounted Options
Vertical shoe storage specifically addresses space challenges by utilising wall height instead of floor area. Multi-tier racks maximise your storage by stacking items upward, giving you capacity for dozens of pairs. Wall-mounted options are total game-changers because they keep everything off the ground entirely.

| Feature | Store-Bought Rack | Custom DIY Rack |
|---|---|---|
| Fit | Standardized Sizes | Exact Dimensions |
| Capacity | Fixed Shelving | Adjustable Spacing |
| Cost | Expensive Retail | Budget-Friendly |
Custom vs. Store-Bought: Why DIY Wins for Small Spaces
Store-bought options often force you to compromise on size or price. Your diy shoe rack fits your exact measurements and accommodates your specific shoe types perfectly. Building a custom solution means you control the shelf spacing for adult boots or children’s sneakers.
A well-organized entryway sets the tone for the rest of your living environment by reducing daily stress and visual noise.
A custom rack costs a fraction of pre-made pieces and solves the shoe storage problem that generic brands can’t touch. You are creating a shoe rack that works with your floor plan instead of against it. This project gives you total control over the materials and finish of your furniture.
Tools, Materials, and Design Planning for Your Compact Shoe Rack
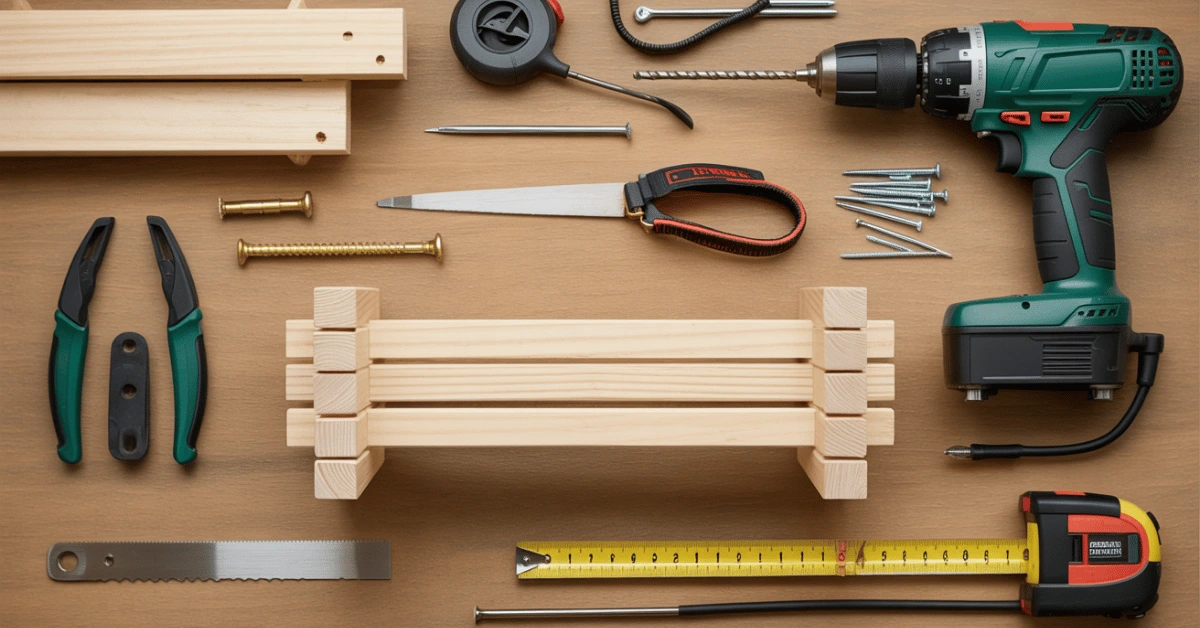
Building your own storage starts with gathering the right materials and mapping out your space. You deserve a setup that fits your home perfectly without costing a fortune. A little preparation ensures your project remains stress-free and professional.
Essential Tools You’ll Need for This Project
You don’t need a massive workshop to finish this job. Simply grab a compound saw, a measuring tape, and a cordless drill. Essential items like a speed square and a stud finder will keep your diy project straight and secure.
Don’t forget the smaller finishing tools. A putty knife, a small paintbrush, and some 120-grit sandpaper help create a smooth look. Having a level on hand ensures your organiser doesn’t lean once it is finished.
Complete Materials List with Exact Lumber Specifications
Your shopping list is simple and very budget-friendly. Purchase three 1″x4″x8′ pine boards and one 1″x12″x6′ rough pine board for the main frame. Use plywood for each shelf to ensure a smooth, clean finish.
You will also need wood glue, screws, and wall anchors to make the rack sturdy. Strong fasteners are the key to a long-lasting piece of furniture. Pick up some wood filler and a polycrylic finish to protect the wood from daily wear and tear.
Planning Your Design: Measurements Based on Your Space and Shoe Size
Measure your largest boots to determine the perfect size for your shoe rack. Cut your end pieces to 12 inches for larger footwear or 10 inches for smaller collections. This diy approach ensures every wood component fits your specific hallway dimensions perfectly.
Precise planning prevents wasted vertical space and saves you money on extra supplies. Typical cutting plans include 48-inch front boards, but you can adjust these for your specific wall. Always double-check your measurements before making the first cut to avoid frustration.
Step-by-Step Guide: How to Build a DIY Wooden Shoe Rack for Small Spaces
Taking control of your small space begins with these actionable instructions for your new wooden organiser. You will find that building a custom shoe rack is much easier than it looks. By following this guide, you can eliminate clutter and create a functional piece of furniture that fits your home perfectly.
Step 1: Measure Your Available Space and Create a Cutting Plan
You must start by measuring the height, width, and depth of your entryway or closet with precision. This accurate data serves as the foundation for your diy project. Your specific cutting plan determines how many pairs of shoes the unit will ultimately hold.
Determining Shelf Spacing for Different Shoe Types
Spacing is not a one-size-fits-all solution for footwear storage. You should place the bottom shelf 16 inches from the base for tall boots or skates. For sneakers and dress shoes, space the remaining shelves 7 inches apart to maximise vertical space.
Exact Cutting Measurements for Front, Back, and End Boards
The following table outlines the exact dimensions you need for a standard compact build. These measurements remove the guesswork and help you buy the right amount of lumber.
| Part Name | Quantity | Dimensions (Inches) |
|---|---|---|
| Front and Back Boards | 3 | 1x4x48 |
| End Boards | 2 | 1x3x12 |
| Upper Front Support | 1 | 1×1.5×48 |
Step 2: Cut All Wood Pieces According to Your Plan
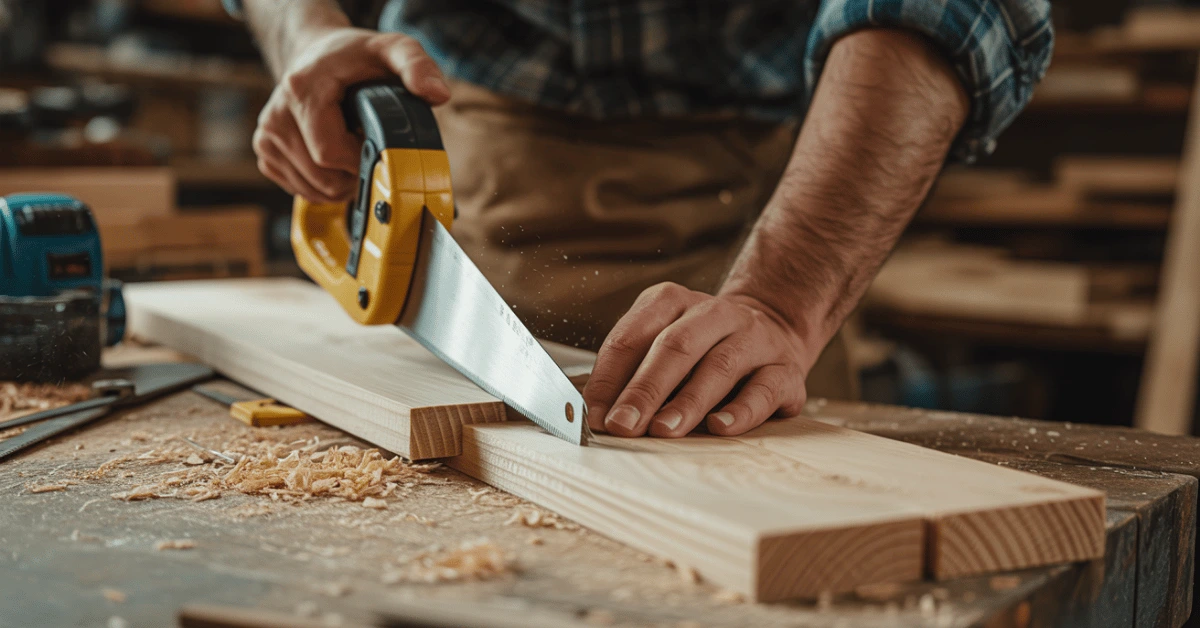
You will use a mitre saw or circular saw to cut all the wood pieces at once. Uniform measurements ensure that your assembly remains smooth and frustration-free. Always double-check your marks before making the actual cut to avoid wasting material.
Cutting the 48-Inch Front and Back Boards
Cut your main front back boards to exactly 48 inches for a standard compact rack. If you are building a larger family-sized unit, you might increase this length to 58.25 inches. Consistently measuring from the same side of the board helps maintain accuracy.
Cutting the 12-Inch End Boards (Adjustable for Shoe Sizes)
The 12-inch end pieces create the depth of your frame. You can reduce this to 10 inches if you only store smaller footwear. Maintaining a consistent angle during these cuts is vital for a square frame.
Step 3: Sand All Wooden Pieces Before Assembly
Sanding every piece before you start the assembly is a non-negotiable step for a professional finish. Use 120-grit sandpaper followed by 220-grit to remove all rough edges. This prevents splinters and ensures that your paint or stain adheres perfectly to the wood.
Step 4: Assemble the Bottom and Attach End Boards
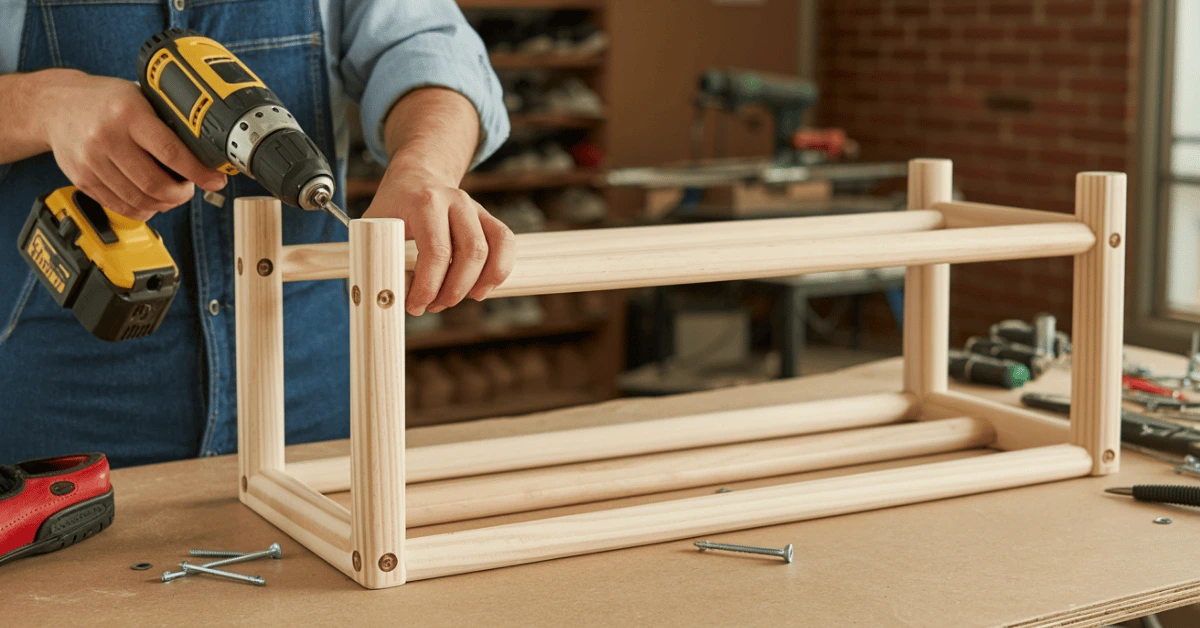
Begin the diy shoe project by joining the bottom board to your two side pieces. Apply wood glue to the joints before securing them to create a bond that lasts. This initial structure forms the base for the rest of your build.
Using Wood Glue and Fasteners for Strong Joints
Use two fasteners at each attachment point along with the glue. For larger designs, you should drill three pocket holes at each end for extra strength. This technique hides the screws from view while providing incredible stability.
Step 5: Attach Front Bottom Board and Back Support Boards
Attach the front bottom board so it sits flush with the front edge of your frame. Next, add the back support boards at the top and base of the unit. This creates a support system that can handle the weight of heavy winter boots.
Step 6: Add the Upper Support Board and Complete the Frame
Position the upper support board exactly 6 inches up from the bottom edge. This specific placement creates a slight angle that displays your shoe collection beautifully. Ensure the board is level before you drive in the final screws.
Step 7: Secure Your Rack to the Wall (For Wall-Mounted Designs)
A wall-mounted shoe rack offers the best safety for small spaces. This transformation from freestanding to permanent storage prevents the unit from tipping over. You will feel much more confident knowing your shelf is locked in place.
Locating Wall Studs for Maximum Stability
Use a stud finder to locate the wooden studs behind your drywall and mark them with tape. Drill pilot holes through the top backboard and secure the unit with 2.5-inch fasteners. For extra-heavy loads, you can attach metal angle brackets to the internal frame.
“A well-organized home starts with a clear entryway, and a custom-built rack is the smartest way to achieve it.”
Finishing, Safety Tips, and Common Beginner Mistakes to Avoid
Now that your structure is solid, it is time to transform raw wood into a beautiful piece of functional furniture. You want a shoe rack that looks like it came from a high-end boutique rather than a scrap pile. Taking these final steps ensures your project remains durable and visually stunning for years to come.
Applying Wood Filler to Fastener Holes
Grab a flexible putty knife and fill every fastener hole with high-quality wood filler. This simple step hides the screws and creates a seamless, professional surface that hides the mechanics of your build. Ensure you overfill the spots slightly, as the filler often shrinks as it dries.
Final Sanding for a Professional Smooth Finish
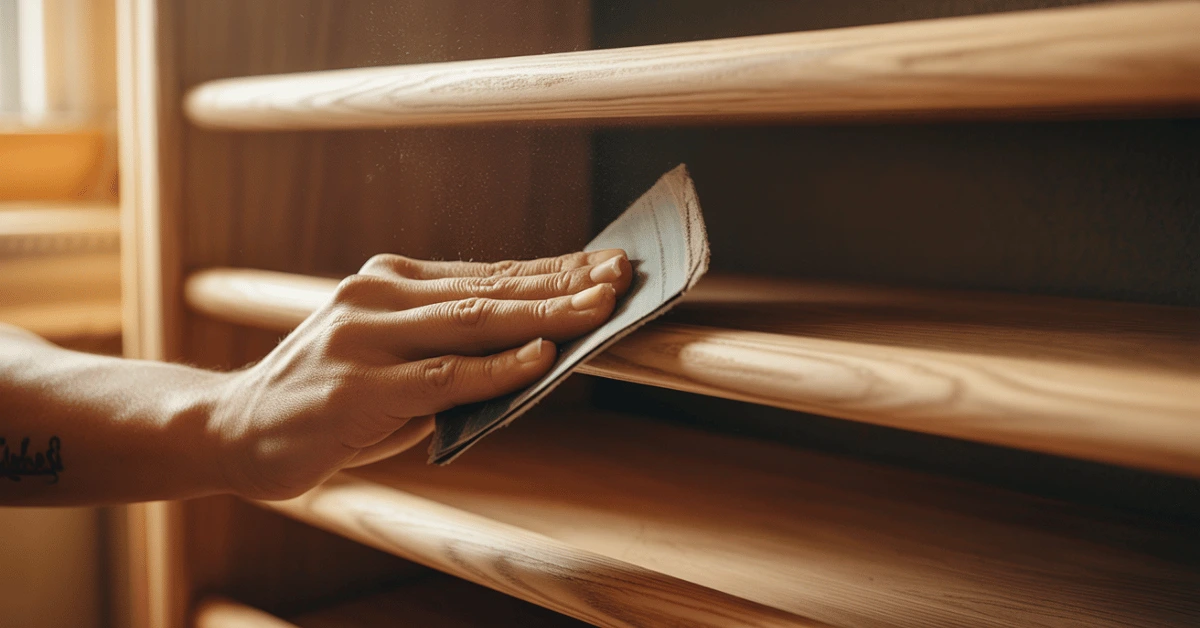
Once the filler dries completely, perform a final sanding across all boards. This process removes excess filler and smooths out any remaining rough edges. Use a tack cloth afterwards to remove every speck of dust so your finish applies perfectly without bumps.
Sealing Your Shoe Rack: Paint, Stain, or Polycrylic Options
The choice you make here defines the shoe rack aesthetic and protects it from daily wear. For rough pine, consider using tung or mineral oil to keep the fibres soft and highlight the natural grain beauty. If you prefer a modern look, a matte coat of paint provides an understated and sleek style.
| Finish Type | Best For | Penetrates and softens fibres |
| Polycrylic | High-traffic areas | Clear, water-based protection |
| Tung Oil | Natural wood grains | Penetrates and softens fibers |
| Matte Paint | Modern styling | Hides imperfections beautifully |
Essential Safety Tips When Using Power Tools
Safety is your absolute priority during any diy build. Always wear eye protection and keep your fingers far away from moving blades or sharp bits. Never rush a cut, and ensure your workspace is free of clutter that could cause a trip or distraction.
5 Common Mistakes That Cause DIY Shoe Rack Projects to Fail
Many projects fail because builders overlook small but critical details. Learning from these common pitfalls will save you frustration and money. Even a small error in the final stages can compromise the stability of your entire rack.
Skipping Measurements and Cutting Without a Plan
The biggest mistake beginners make is “winging it” instead of following a strict blueprint. Cutting your material without a detailed plan leads to misaligned joints and wasted lumber. Always measure twice to ensure every piece fits perfectly before you reach for the saw.
Using the Wrong Fasteners or Insufficient Support
Your shoe organiser needs the right hardware to handle the weight of several pairs of boots. Using fasteners that are too short leads to a weak, wobbly rack that eventually collapses. Ensure you use metal brackets or secure the frame directly into wall studs for maximum safety.
Ignoring Wood Expansion in Humid Environments
Natural materials breathe and move depending on the moisture in the air. If you ignore wood expansion, your shoe storage might warp, crack, or pull away from the wall over the seasons. Give your materials room to breathe and use a high-quality sealant to minimise moisture absorption.
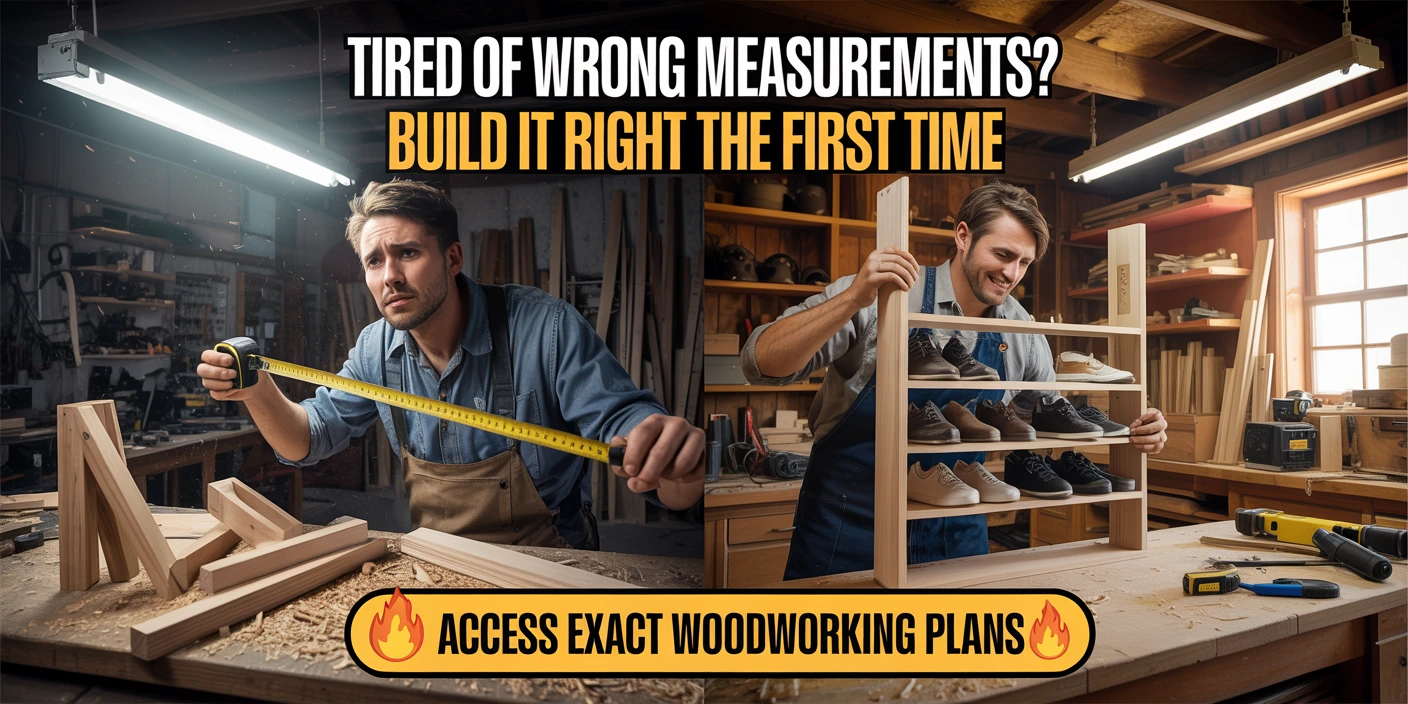
Why DIY Projects Fail Without Proper Plans (And Your Easier Solution)
Entering your workshop without a clear plan is the number one reason why most home improvement dreams turn into expensive nightmares. Many people start with great energy but lose momentum when they face unexpected design hurdles. You deserve a path that leads to a finished piece, not a pile of scraps.
The Truth About Winging It: Why Most Beginners Give Up
We have all seen it happen to the best of us. Ambitious projects begin with high spirits but end as half-finished frames gathering dust in the garage. This happens because “winging it” simply does not work for functional furniture.
Most beginners give up not because they lack skill or passion. They fail because they lack a roadmap with exact dimensions and a foolproof assembly sequence. Without these details, your diy shoe rack remains an unfinished frustration instead of a household asset.
How Professional Woodworking Plans Save You Time, Money, and Frustration
Your time is valuable, and you should not spend it guessing. Professional woodworking plans save you hours by providing every measurement and every cut in crystal-clear detail.
Wasting money on incorrect boards or wrong-sized plywood adds up quickly. Stop making repeated hardware store trips because you were guessing instead of following a proven solution. Following a specific post or guide ensures your shoe storage stays within budget and looks professional.
Get Instant Access to Step-by-Step Plans with Exact Dimensions
You deserve instant access to plans that include exact dimensions for every board. This eliminates the guesswork that causes shoe storage projects to fail before they even start. Precision is the key to a stress-free diy experience.
Professional plans show you precisely where every screw goes and how to space shelves perfectly. This transforms the project from intimidating to achievable in a single afternoon. Get the blueprints you need for a rock-solid shoe rack today and build with total confidence.
🧲 Stop Guessing… Start Building Like a Pro!

Tired of confusing instructions and wasted wood?
👉 Get access to 16,000+ step-by-step woodworking plans that are tested, complete, and beginner-friendly.
✅ Why This Works (What You’ll Get)
- ✔️ Exact measurements & cut lists – no more costly mistakes
- ✔️ Step-by-step instructions – even beginners can follow easily
- ✔️ Plans built & tested in real workshops
- ✔️ Works with basic tools & small spaces
- ✔️ Save time, money & frustration instantly
- ✔️ Build projects that actually turn out RIGHT the first time
⚡ Don’t Let Your Project Fail Like Most Beginners…
👉 Click below and get instant access to proven plans:
🔥 👉 Start Building Smarter Today
Conclusion
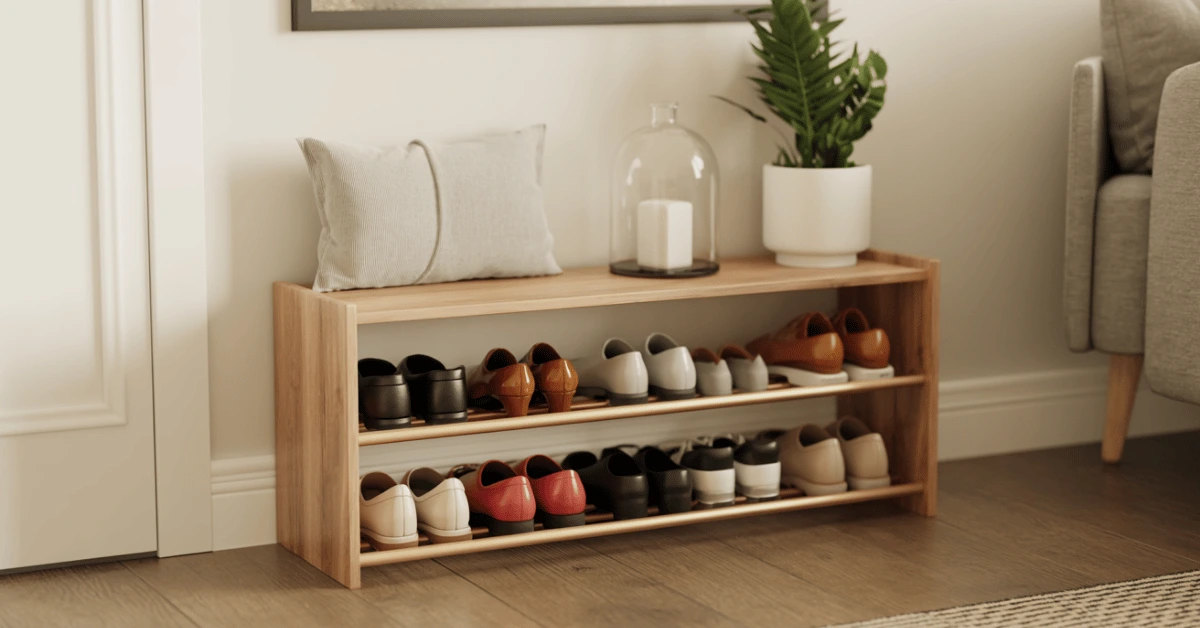
Take the first step toward an organised home by crafting a durable organisation system today, as your diy wooden shoe rack small spaces solution is within reach to transform a congested room. This project creates a high-end look by using pine, wood, or plywood pieces to get the perfect size for your specific needs.
Assemble the front, back, end, and bottom boards into a solid diy shoe rack that fits any place or side to keep your shoes tidy. The shelves sit at an angle to save space and showcase your shoes, handling everything from small flats to large boots with a custom look.
Internal support ensures each shelf holds every shoe safely, while additional support pieces make the frame maintain structural integrity. These shelves help you organise every shoe effectively, and you should invest some time to apply a final finish coat to the top.
This diy shoe unit keeps every shoe in its top spot while utilising the exact size for any closet. Use metal hardware for a diy shoe storage solution that lasts for years. A custom rack offers better shoe storage than any store-bought rack, so start your diy project now and reach your final shoe storage goal!
| Project Aspect | Details and Specifications |
|---|---|
| Build Time | Approximately 10 Hours |
| Estimated Cost | Around $100 USD |
| Primary Materials | Pine Boards, Plywood, Metal Brackets |
| Difficulty Level | Beginner / Intermediate |
| Key Benefit | Custom Fit for Small Entryways |
FAQ
Which lumber works best for your home project?
You should select pine or high-quality plywood for a durable solution. These boards are simple to cut and give your room a professional look. Using strong materials ensures your shoe storage has the strength to hold many pieces without sagging.
How much time will you need to build this?
You can complete this DIY project in just a few hours. Once you cut the side and end sections for your projects, you simply drill holes and fasten them with screws. You apply a quick coat of paint or finish as the final top layer.
Can you adjust the shelf height for tall boots?
Yes, you can customise the size and angle of each bottom or middle support. Designing the front and back layout yourself allows you to manage space efficiently. This flexibility makes it the perfect wooden rack for any collection of shoes.
Do you need metal hardware for better stability in small spaces?
While woodscrews provide most of the support, metal brackets help secure the back to a wall. This prevents the unit from tipping over in a small hallway. Ensure your shelves are level before you tighten every post in place.