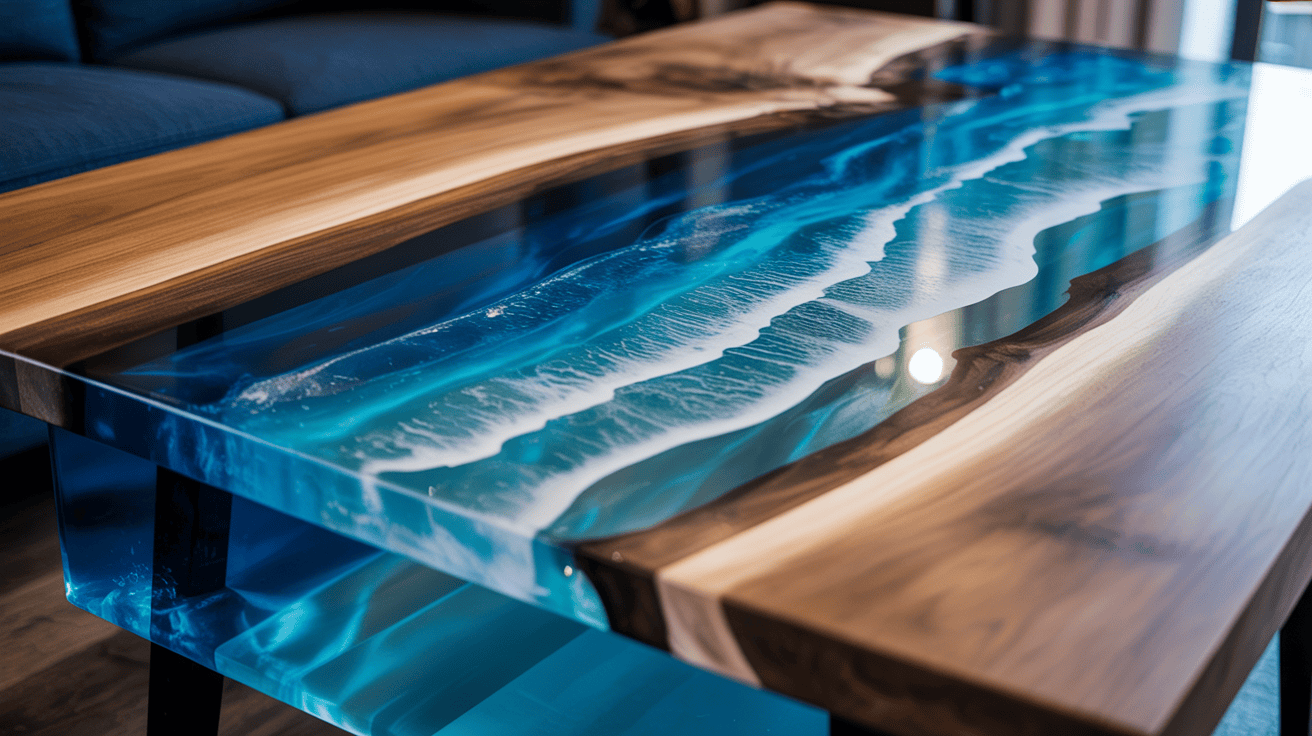
Did you know custom resin art can make a raw wood slab worth over 300% more? You can turn a simple plank into a stunning masterpiece for your living space. This ocean wave epoxy table tutorial helps you start this creative journey today.
Beginners often find these coastal designs surprisingly simple to master with the right guidance. By mixing deep blue shades and white pigments, you create a realistic, moving water look. Our instructions provide clear steps and list the basic tools you need to succeed.
Many homeowners love DIY Rustic Coffee furniture ideas because they blend nature with modern flair. You will learn to prep the timber and pour the liquid layers correctly for a strong visual effect. This specific method creates a durable and glossy finish that every guest will admire.
Key Takeaways
- Select high-quality timber slabs to provide a sturdy and natural base.
- Mix unique liquid pigments to create a realistic and deep-sea look.
- Use a heat tool to produce frothy white cells and lacing effects.
- Apply multiple thin resin layers to achieve a professional 3D appearance.
- Sand the edges carefully to ensure a smooth and high-end furniture feel.
- Seal the finished surface to protect your work from scratches and spills.
What Is an Ocean Wave Epoxy Resin Table
An ocean wave epoxy resin table uses epoxy resin to look like ocean waves on a table top. It often has a wooden base for a beautiful look. This furniture mixes wood’s natural beauty with ocean wave effects, thanks to epoxy resin.
Making an ocean wave epoxy resin table is both art and science. You need to pick the right wood for the base, like live edge or reclaimed wood. Then, you colour and shape the epoxy resin to look like waves, capturing the ocean’s beauty.
An ocean wave epoxy resin table is known for its beauty. The wood grain and epoxy resin patterns make it eye-catching. The epoxy resin also makes the wood last longer and adds shine.
These tables are loved for their ocean feel. They bring calm and beauty to any room. An ocean-inspired epoxy table tutorial can help you make a beautiful piece for your home.
Essential Materials for Your Ocean Wave Epoxy Table Tutorial
Before starting your ocean wave epoxy table project, knowing the necessary materials is key. A stunning DIY epoxy ocean table needs the right supplies for the epoxy wave effect resin. The right materials ensure a beautiful finish and make the project enjoyable.
Choosing the Right Epoxy Resin System
The epoxy resin system is the base of your project. For an epoxy resin woodworking project like an ocean wave table, choose a high-quality epoxy. It should be good for deep pours and have a long working time. Look for an epoxy system designed for table tops and UV-resistant to prevent yellowing.
Wood Selection for a Rustic Coffee Table Base
The wood for your table base greatly affects the look. For a rustic look, use reclaimed or live-edge wood slabs. Popular woods like walnut, oak, or maple are durable and beautiful. Make sure the wood is dry and ready for epoxy.
Ocean-Inspired Pigments and Mica Powders
To get the ocean wave effect, you need pigments for deep blues and turquoises. Mica powders add a shimmer, like the ocean’s sparkle. Pick pigments and mica powders made for epoxy resin for the best results.
Additional Supplies and Embellishments
Other supplies can enhance your project. You’ll need a heat gun for bubbles, stir sticks for mixing, and a thermometer for temperature. Consider adding embellishments like crushed shells or metallic powders for a unique touch.
| Material | Description | Importance |
|---|---|---|
| Epoxy Resin System | High-quality epoxy for deep pours with UV resistance | High |
| Wood Slabs | For creating ocean-inspired colours and effects | High |
| Pigments and Mica Powders | For creating ocean-inspired colors and effects | High |
| Heat Gun and Stir Sticks | For bubble removal and mixing | Medium |
| Embellishments | Crushed shells, metallic powders for added effect | Low |
Tools and Safety Equipment You Will Need
Before starting your epoxy table project, make sure you have all the tools and safety gear you need.
Power Tools and Hand Tools
You’ll need various power tools and hand tools to prepare your wood slabs and work with epoxy resin. A table saw is key for cutting wood. A drill press helps with precise drilling, and a sander smooths out surfaces.
Key power tools: table saw, drill press, sander.
Hand tools like mixing sticks, stir sticks, and putty knives are essential for mixing and applying epoxy resin.
Key hand tools: mixing sticks, stir sticks, and putty knives.
Personal Protective Equipment
When working with epoxy resin and power tools, safety comes first. Personal protective equipment (PPE) is crucial to avoid injuries and exposure to harmful chemicals.
Wear gloves to protect your skin from epoxy and other chemicals. Safety glasses shield your eyes from debris. A respirator mask prevents inhaling fumes.
Always wear protective gear when handling epoxy resin and operating power tools.
Workspace Ventilation Requirements
Good ventilation is essential when working with epoxy resin to avoid harmful fumes.
Make sure your workspace is well-ventilated. Use fans or work in an open area. Consider a ventilation system designed for resin workspaces for a safe environment.
With the right tools and a safe workspace, you’re ready to create a beautiful ocean wave epoxy table. Follow your resin ocean wave tutorial to achieve success.
Step 1: Preparing and Selecting Your Wood Slabs

Making an epoxy ocean wave table begins with preparing your wood slabs. This step is key. It affects the look and durability of your table.
Choosing Live Edge or Reclaimed Wood
You can pick live edge or reclaimed wood for your table. Live-edge wood keeps the tree’s natural edge, giving a unique look. Reclaimed wood brings history and a rustic feel.
Choose based on your taste and the look you want. Think about the colour, grain, and texture you prefer.
Drying and Moisture Content Checking
Make sure your wood slabs are dry before applying epoxy. Wood that’s too wet can warp or crack.
Use a moisture meter to check the wood’s moisture. For indoor use, aim for a moisture level below 12%.
| Wood Type | Ideal Moisture Content (%) |
|---|---|
| Hardwoods | 6-9 |
| Softwoods | 8-12 |
Initial Sanding and Surface Preparation
After selecting and drying your wood, start sanding. Sanding smooths the surface and removes debris.
Begin with coarse sandpaper (80-100 grit) and move to finer grits (up to 220 grit). Always sand with the grain to avoid scratches.
Getting your wood ready is crucial for an epoxy ocean wave table. The right wood, dryness, and sanding ensure a beautiful and lasting design.
Step 2: Building Your Table Mould and Sealing
Creating a watertight mould frame is crucial to crafting your epoxy resin ocean wave table. This frame keeps the epoxy resin in place as it dries. It ensures a smooth, even finish.
Constructing a Watertight Mould Frame
To make a watertight mould frame, you need to create a border around your wood slab. Use melamine or MDF boards, which are easy to work with and smooth. Ensure the frame is level and securely attached to prevent leaks or movement.
Think about the height of your wood slab and how much epoxy resin you’ll use. The frame should be tall enough to hold the resin but not too tall. Add 1-2 inches to the slab’s height for the resin.
Positioning Your Wood Pieces
After making the mould frame, place your wood pieces inside. Make sure the wood is centred and evenly spaced. You might need clamps or adhesive tape to keep it in place.
Double-check that your wood is aligned correctly and the mould is clean. This step prevents imperfections in your ocean wave epoxy table.
Applying Seal Coat to Prevent Air Bubbles
Before pouring the epoxy resin, apply a seal coat to your wood. Mix a small amount of epoxy resin with hardener. Use a foam brush for a thin, even layer on the wood.
This seal coat stops air bubbles from forming in the epoxy resin. It ensures a smooth, bubble-free finish.
| Ensure wood is centred and evenly spaced | Purpose | Tips |
|---|---|---|
| Melamine or MDF boards | Create a watertight border | Easy to work with, smooth surface |
| Clamps or adhesive tape | Hold wood pieces in place | Mix thoroughly, apply a thin, even layer |
| Epoxy resin and hardener | Seal coat and epoxy pour | Mix thoroughly, apply thin, even layer |
Step 3: Mixing Epoxy and Creating Ocean Colours

Now, you’ve got your table base and mould ready. It’s time to mix the epoxy and make the ocean colors for your diy epoxy ocean table. This step is key to your project’s look.
Calculating Resin Quantities Accurately
To not waste material or run out, accurately calculate the epoxy resin needed. Measure your mould’s length, width, and depth to find the volume. Most kits give a coverage guide, so use it to figure out the resin for each layer.
Mixing Resin and Hardener Properly
Mixing the resin and hardener correctly is crucial for success. Always follow the manufacturer’s instructions for the mixing ratio. Usually, it’s equal parts resin and hardener, but check your kit. Use a digital scale for exactness and mix well for 2-3 minutes.
Creating Deep Ocean Blues and Turquoise Shades
To get the deep ocean look, you’ll need various blues and turquoises. Start with a base blue and add shades for depth. Use mica powders or resin pigments made for epoxy. Mix small batches to perfect the colour before adding it to the main mix.
Preparing White for Wave Caps and Foam
For the wave caps and foam, you need pure white resin. Mix white pigment with your epoxy, starting small and adding more for the right opacity. Make sure to mix enough white for the wave crests and foam.
By mixing your epoxy carefully and getting the colours right, you’re closer to a stunning ocean wave effect on your epoxy table.
Step 4: Pouring Your First Epoxy Layer
Now that your mould is ready and the epoxy is mixed, it’s time to pour the first layer. This step brings your ocean wave design to life. It’s crucial as it sets the foundation for the ocean wave effect.
Starting with the Deep Ocean Base Layer
Start by pouring the deep ocean base layer. This layer should be a darker shade of blue or a mix that represents the deepest part of your ocean wave design. Make sure you’re in a well-ventilated area and wearing the right protective gear. Pour the epoxy slowly and steadily, starting from one end and moving across to avoid air pockets.
As you pour, use a stir stick or similar tool to gently guide the epoxy. This ensures it fills the mould evenly. The goal is to achieve a smooth, consistent layer that captures the essence of the deep ocean.
Removing Air Bubbles with Heat
After pouring the first layer, air bubbles will form. Use a heat gun to remove them. Move the heat gun slowly over the surface, allowing the heat to dissipate the bubbles without creating new ones or causing the epoxy to cure too quickly in certain areas.

A useful tip is to keep the heat gun at a safe distance to avoid overheating any single spot. This technique not only removes bubbles but also helps in creating subtle movements in the epoxy, enhancing the ocean wave effect.
| Technique | Purpose | Tool |
|---|---|---|
| Pouring Slowly | Avoid Air Pockets | Pouring Pitcher or Cup |
| Guiding Epoxy | Even Distribution | Stir Stick |
| Removing Bubbles | Smooth Surface | Heat Gun |
Allowing Proper Cure Time Between Layers
After pouring and treating the first layer, let it cure properly. The cure time varies depending on the epoxy system you’re using, so check your product’s instructions. Generally, wait until the epoxy is fully cured before moving on to the next layer.
“Patience is key when working with epoxy resin. Allowing each layer to cure properly ensures a smooth, even finish and prevents issues such as soft spots or uneven surfaces.”
By following these steps and tips for pouring your first epoxy layer, you’ll be well on your way to creating a stunning ocean wave epoxy table. This showcases your craftsmanship and attention to detail.
Step 5: Creating the Ocean Wave Effect

Now, you’re ready to make your epoxy table look like the ocean. This step turns a simple wooden slab into a beautiful piece of art. It shows the dynamic movement of ocean waves.
Layering Different Blue Tones for Depth
To get a realistic ocean wave look, start with different blue layers. Put the deepest blue at the bottom and lighter shades up top. This makes your table look real and deep.
Tip: Mix epoxy resin with blue pigments for various shades. Adding green or purple can make your waves look more natural.
Using a Heat Gun to Create Wave Movement
A heat gun is key to your ocean wave table. It helps move and texture the resin like ocean waves. Heat the surface gently to form cells and control the resin’s flow.
Adding White Foam and Wave Crests
To get the foamy wave crests, mix white pigment into your epoxy. Pour it on and use a heat gun or stir stick to shape the waves.
Manipulating Resin with Stir Sticks and Tools
Working with resin is an art that takes patience and skill. Use stir sticks and tools to make patterns and textures. This is key for a realistic ocean wave look.
Creating Realistic Water Movement Patterns
To make water movement patterns, study ocean waves. Then, use your tools to guide the resin into wave shapes. This step is crucial for realism.
Adding Cells and Organic Flow Effects
Cells and organic flow add realism to your table. Use heat and tools to create these effects. Try different methods until you get the look you want.
By following these steps and practising, you can make a stunning ocean wave epoxy table. It will capture the beauty and movement of the ocean.
Step 6: Final Pour and Flood Coat Application
Getting to the end of your ocean wave epoxy table is exciting. The final pour and flood coat need care and patience. This is where your hard work pays off, and your table looks perfect.
Levelling Your Table Surface
Before the final coat, make sure your table is level. Uneven surfaces can ruin the finish. Use a spirit level or laser level to check and adjust your table base if needed.
Tips for Levelling:
- Use a spirit level or laser level to check the surface.
- Make adjustments as necessary to achieve a level surface.
- Double-check the level after making adjustments.
Applying the Clear Flood Coat
The clear flood coat makes your table shiny and professional. Mix the epoxy well to avoid spots. Follow the manufacturer’s instructions.
Quote from a renowned epoxy artist:
“The flood coat is where the magic happens. It’s the final touch that brings out the depth and clarity of the ocean wave design.”
Pour the mixed epoxy slowly and evenly. Use a stir stick or spreader to remove air bubbles. Work in a well-ventilated area and use a heat gun to fix bubbles.
Curing and Hardening Timeline
The curing and hardening of your epoxy table is important. The time needed depends on the epoxy, temperature, and thickness. Usually, it’s tack-free in 24 hours and fully cured in 72 hours.
| Curing Stage | Time | Conditions |
|---|---|---|
| Tack-free | 24 hours | Room temperature (around 70°F) |
| Full Cure | 72 hours | Room temperature (around 70°F) |
| Full Hardness | 7-10 days | Room temperature (around 70°F) |
By following these steps and waiting for the right time, you’ll get a durable, shiny finish for your ocean wave epoxy table.
Step 7: Sanding and Polishing to Perfection
To make your epoxy resin woodworking project shine, follow these steps. You’ll go from removing the mould to adding a final topcoat. This ensures your ocean wave epoxy table looks amazing.
Removing the Mould and Initial Flattening
Once the epoxy is fully dry, take out the mould to see your ocean wave epoxy table. It’s important to flatten it first to make the surface even. Use a flattening technique or a planer to get rid of extra epoxy and level it out.
Progressive Wet Sanding Technique
Start with coarse-grit sandpaper (120-150) and move to finer grits (220-240) for a smooth finish. Wet sanding cuts down on dust and prevents scratches. You might need to do this a few times to get the smoothness you want.
Polishing for Crystal Clear Finish
Use a polishing compound to fix minor scratches and get a high-gloss finish. Rub the compound with a soft cloth in circular motions. This step is key for making the epoxy resin clear and deep.
Buffing and Final Topcoat Options
For extra protection and shine, think about adding a final topcoat. Buffing with a soft pad can make the table look even better. You can pick from many topcoat options, like polyurethane or a special epoxy resin topcoat.
| Sanding Stage | Grit Size | Purpose |
|---|---|---|
| Initial Flattening | 120-150 | Remove major imperfections |
| Progressive Sanding | 220-240 | Achieve smooth surface |
| Final Sanding | 320-400 | Prepare for polishing |
Design Variations and Creative Ideas
Creating an ocean wave epoxy table lets you try out many design elements and techniques. As you work on your diy epoxy ocean table, you can find many ways to make it stand out. This makes your project truly unique.
Adding Beach Sand and Crushed Shells
Beach sand and crushed shells can add texture and make your table look more like the ocean. Mix these into the epoxy resin for a realistic ocean effect.
Tips for using beach sand and crushed shells:
- Clean and dry the materials thoroughly before use.
- Mix them into the epoxy resin in small quantities to avoid affecting the resin’s clarity.
- Experiment with different ratios of sand to shells to achieve the desired texture.
Incorporating Metallic Accents
Metallic accents can make your ocean wave epoxy table look even better. Use metallic powders or pigments for a shimmering effect that looks like the ocean’s sparkle.
Popular metallic accents include:
- Gold and silver powders for a luxurious look.
- Copper or bronze pigments for a warm, earthy tone.
- Metallic flakes for added texture and shine.
Different Ocean Themes and Colour Palettes
You can try different colour palettes to create unique ocean wave designs. Try a sunset-inspired palette with oranges and pinks, or a deep-sea theme with darker blues and purples.
River Table Versus Ocean Wave Designs
River tables and ocean wave tables are both popular, but they’re different. River tables have a linear design and focus on wood and resin contrast. Ocean wave tables have fluid, organic shapes and colours.
| Design Element | River Table | Ocean Wave Table |
|---|---|---|
| Resin Color | Often clear or translucent | Typically blue or ocean-inspired colors |
| Design Shape | Linear, following the wood grain | Fluid, wave-like shapes |
| Embellishments | May include stones or pebbles | Often features beach sand, shells, or metallic accents |
By exploring these design variations and creative ideas, you can make a unique diy epoxy ocean table. It will show off your personal style and creativity.
Troubleshooting Common Epoxy Table Issues

To make sure your epoxy table looks great, it’s key to know how to fix common problems. Issues like bubbles, soft spots, colour bleeding, and scratches can happen. Learning how to solve these problems will save you time and make your resin ocean wave tutorial project a success.
Fixing Bubbles and Surface Imperfections
Bubbles and surface issues are common in epoxy resin projects. Use a heat gun to gently warm the surface, making bubbles rise and pop. For tough bubbles, a pin or needle can help burst them.
- Use a heat gun on a low setting to avoid overheating the resin.
- For larger bubbles, try using a torch to quickly heat the surface.
- Keep your workspace clean and dust-free to avoid surface imperfections.
Dealing with Soft Spots or Tacky Resin
Soft spots or tacky resin can happen if the resin isn’t mixed right or if it doesn’t cure enough. First, check if the resin was mixed correctly. If it’s still a problem, apply a thin layer of epoxy to the area after cleaning and preparing it.
Key steps to prevent soft spots:
- Make sure to measure and mix the resin and hardener accurately.
- Keep your workspace at a consistent temperature for proper curing.
- Avoid moisture during curing to prevent soft spots.
Correcting Colour Bleeding Problems
Colour bleeding happens when pigments or dyes spread unevenly. To fix it, gently move the resin with a stir stick or tool to even out the colour. Adding clear resin can also help dilute the colour and stop bleeding.
Tips for preventing colour bleeding:
- Choose high-quality pigments made for epoxy resin.
- Avoid overmixing to prevent uneven pigment spread.
- Work in a controlled environment to avoid temperature changes.
Repairing Scratches and Dull Areas
Scratches and dull spots can be fixed by sanding with finer grits and then polishing. For deeper scratches, apply clear epoxy and let it cure before sanding.
Knowing how to fix common issues ensures your epoxy wave effect resin table is beautiful, durable, and long-lasting. Troubleshooting is a key part of the creative process. With practice, you’ll get better at solving these problems quickly.
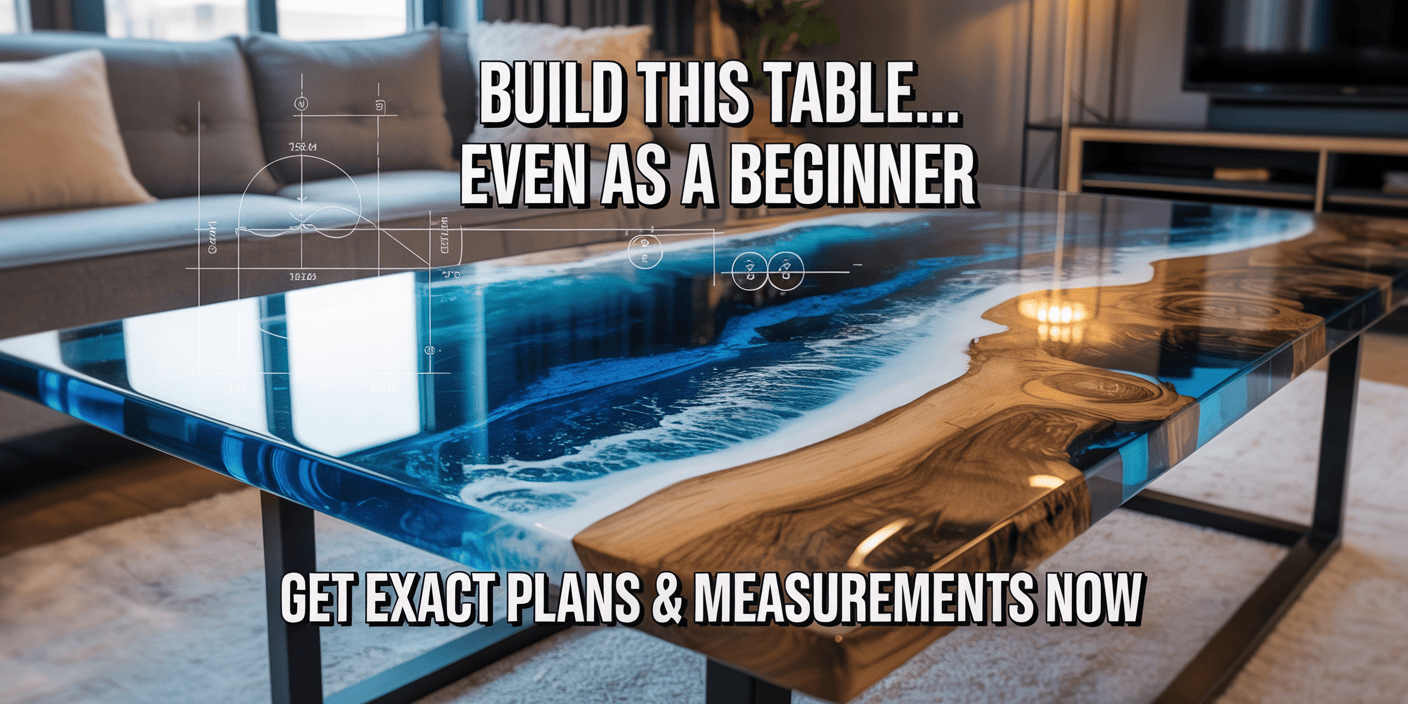
🌊 Ready to Build Your Dream Epoxy Table (Without Guesswork)?

If you loved this project but feel stuck on measurements, designs, or next steps…
👉 You don’t have to figure it all out alone anymore.
🔥 Get Instant Access to 16,000+ Step-by-Step Woodworking Plans
- ✔️ Exact step-by-step instructions (no confusion, no missing steps)
- ✔️ Precise cutting & materials list (save money, zero waste)
- ✔️ Detailed diagrams & blueprints (see every angle before building)
- ✔️ Perfect for beginners & experts (no expensive tools needed)
- ✔️ Build anything: tables, furniture, outdoor projects & more
- ✔️ Lifetime access + new plans every month
- ✔️ Bonus: Videos, guides & even a woodworking business guide
💡 This is the same system used by thousands of woodworkers to build professional-quality projects easily.
🚀 Don’t Just Follow One Project… Build ANYTHING You Imagine
👉 Turn your ideas into reality with ready-made plans that practically build themselves
👉 Click Here to Get Instant Access to 16,000 Woodworking Plans Now
Conclusion
You’ve now reached the end of our comprehensive ocean wave epoxy table tutorial. By following the steps outlined in this guide, you’re well on your way to crafting an epoxy ocean wave table that showcases your creativity and skill.
Crafting an epoxy ocean wave table is a rewarding project. It lets you create a unique piece of furniture for your home. With patience and practice, you can master the techniques required to achieve a stunning ocean wave effect.
As you embark on your project, remember to be patient and enjoy the process. The result will be a beautiful, one-of-a-kind ocean wave epoxy table. It will add a touch of the ocean’s beauty to your living space.
Start your ocean wave epoxy table tutorial today. Discover the joy of creating something truly special with your own hands.
FAQ
What is the best resin to use for an ocean wave epoxy table tutorial?
For your ocean wave epoxy table tutorial, you should use a combination of a deep-pour resin like EcoPoxy for the base and a higher viscosity tabletop resin for the waves. This allows the white pigment to sit on top and create the “lacing” effect without sinking too deep.
How do I get the “cells” and foam look in a resin ocean wave tutorial?
To achieve realistic cells when making an epoxy ocean wave table, you must use a heat gun. By blowing a thin line of white pigmented resin across the blue layers at a shallow angle, the heat breaks the surface tension, creating the “lacy” foam patterns known as cells.
Is it difficult for beginners to start crafting an epoxy ocean wave table?
While it requires patience, following a step-by-step epoxy table tutorial makes it accessible. The key is practising your wave technique on small scraps of wood before committing to a full diy epoxy ocean table project.
Can I use real sand in an ocean-inspired epoxy table tutorial?
Yes! Incorporating real sand is a popular epoxy resin woodworking technique. Ensure the sand is completely dry and clean before mixing it with a small amount of resin to act as the “beach” base for your epoxy ocean table tutorial.
What is the difference between a river table and an ocean wave design tutorial?
A river table usually involves a solid, single-colour pour between two slabs. An ocean wave design tutorial focuses on layering multiple translucent colours and using specialised pigments and heat to create an epoxy wave effect resin that looks like moving water.
How long does an epoxy resin ocean wave table take to cure?
Most high-quality resins require 24 to 72 hours to be dry to the touch, but you should wait at least 7 days before performing final sanding and polishing to ensure the ocean wave epoxy table has reached its maximum hardness.


