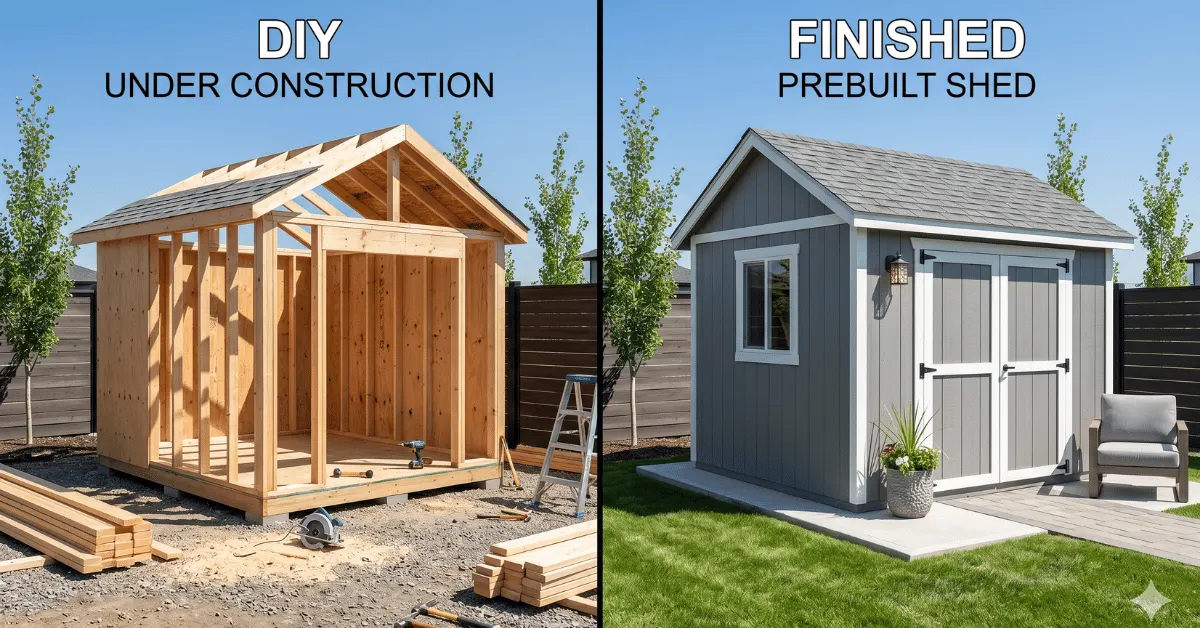
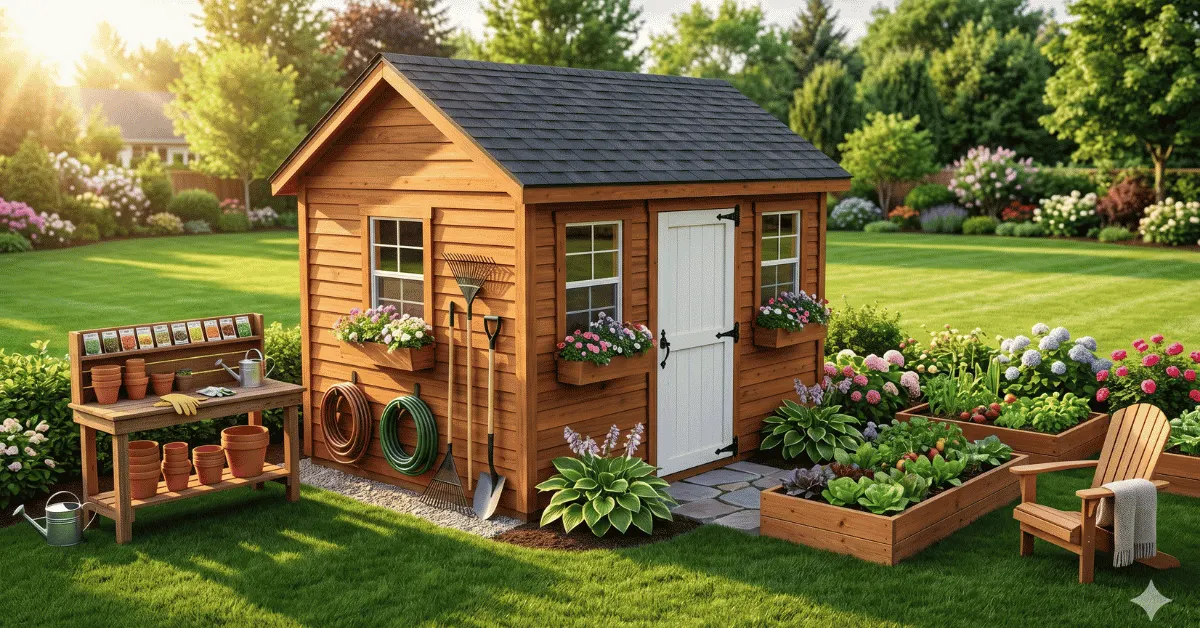
Trying to decide on a 10×8 Build vs Buy Shed for your backyard, but not sure which option fits your budget? You’re in the right place. One of the most common dilemmas homeowners face today is whether to build a shed from scratch or purchase a pre-built one and have it delivered.
The cost difference can be surprising, and making the wrong choice could mean spending hundreds of dollars more than necessary.
In this complete 10×8 Build vs Buy Shed cost comparison guide, we break down every expense — from materials and labour to delivery and installation — so you can make a smart, budget-friendly decision with total confidence.
Whether you’re a seasoned DIYer or a first-time shed buyer, this guide gives you the real numbers, honest pros and cons, and everything in between.
Let’s dive in and find out which option truly gives you the most value for your money.
Key Takeaways
- Check the total budget and time before committing to a diy route.
- Warranties from brands like Keter and Dakota add long-term value.
- Hidden material and permit fees can erase expected savings.
- Choose the right size to avoid surprises with local rules.
- Weigh the stress and time investment against the possible money saved.
The Great Debate: Build vs Buy Shed Cost Comparison
Many homeowners assume a hands-on approach saves money, but the full financial picture often tells a different story.
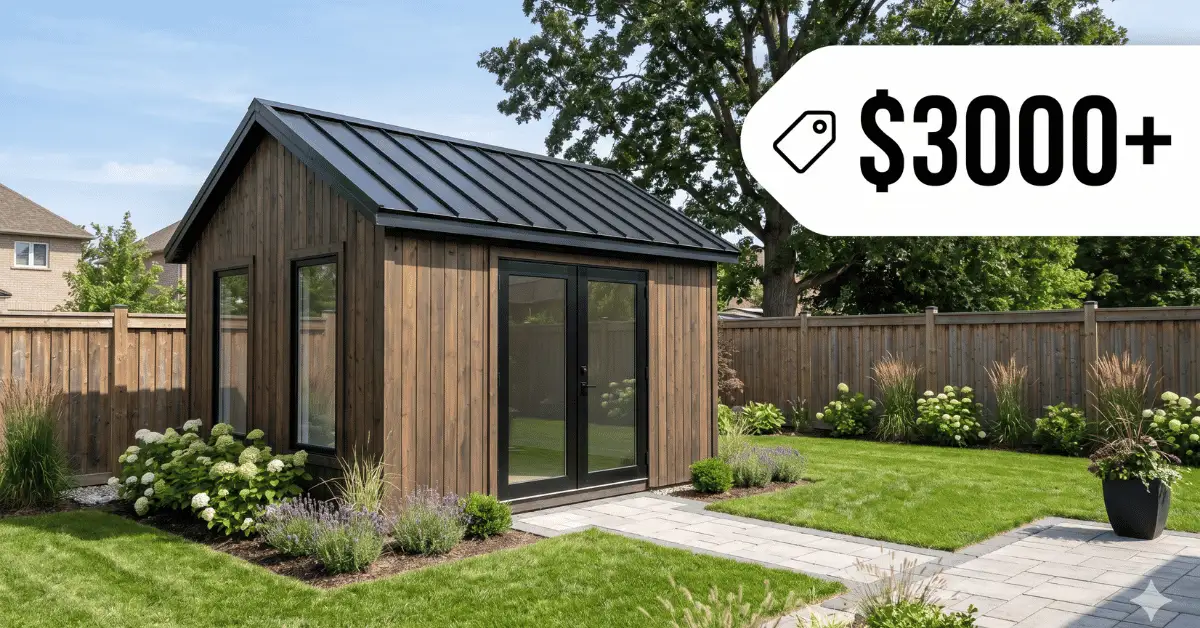
Your local average price for a backyard storage unit sits around $3,350. That number often matches what a DIY project ends up costing after materials, tools, and rework are added.
Professional teams can deliver efficient work that trims hidden expenses. When you factor in skilled labour, warranty coverage, and longevity, a factory-finished option can be the smarter long-term investment for your home.

- Price gaps between a DIY plan and a preassembled unit are usually smaller than you expect.
- Material prices fluctuate in 2026, so planned savings may vanish quickly.
- If you want a cheaper build, be honest about your skills to avoid costly mistakes.
- Buying with professional installation often offsets labour fees through faster, higher-quality results.
Weigh initial price against durability and future maintenance to pick the option that protects your budget long term.
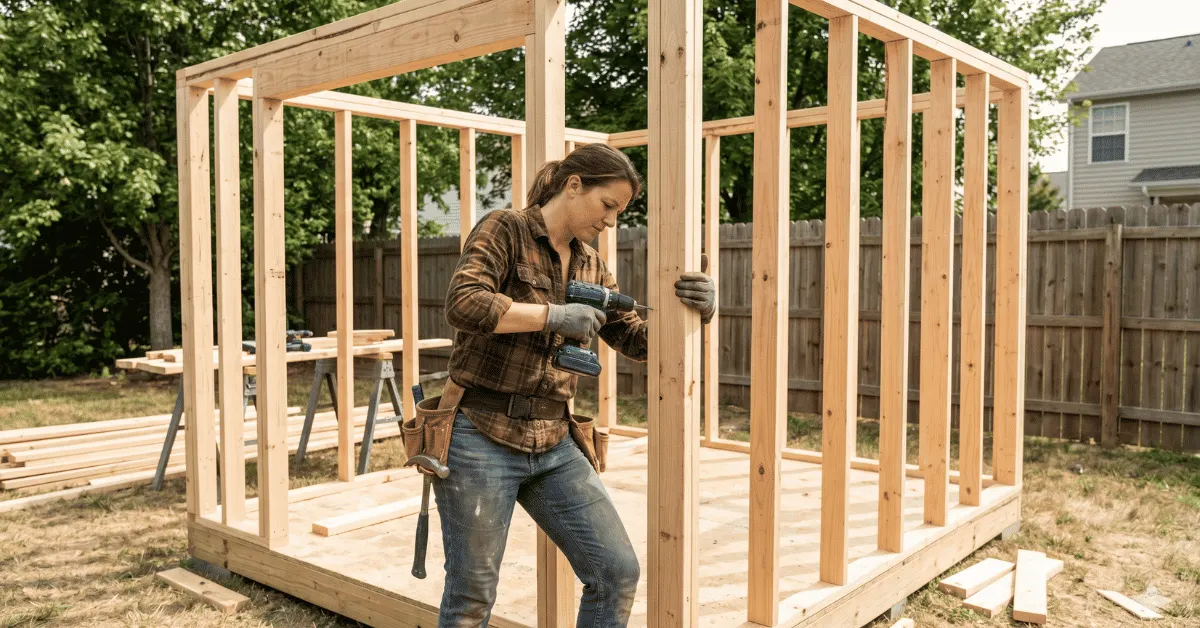
Breaking Down the Financials of DIY Construction
When you add up materials, tools, and hours, the numbers tell a clearer story than the idea alone.
Essential Material Costs
Lumber for a frame usually runs between $12 and $25 per square foot. That range can swing your total material bill fast if your design changes.
Plan for siding, roofing, fasteners, brackets, and waterproofing. Small items add up and often surprise first-time DIYers.
Tool Investment and Equipment Needs
Expect to spend $200 to $800 for power tools like a circular saw and framing nailer if you don’t already own them.
Tool rental can lower upfront expenses but may extend the time you need to finish the project. Labour is your time; plan multiple weekends for framing, siding, and roofing.
| Item | Typical Range | Notes |
|---|---|---|
| Framing lumber | $12–$25 / sq ft | Big impact on total materials |
| Roofing & siding | $300–$900 | Depends on finish and weatherproofing |
| Power tools | $200–$800 | One-time purchase or rental option |
| Fasteners & waterproofing | $50–$250 | Often underestimated |
| Estimated labor time | 20–60 hours | Multiple weekends for most DIY projects |
Hidden Expenses That Often Catch Beginners Off Guard
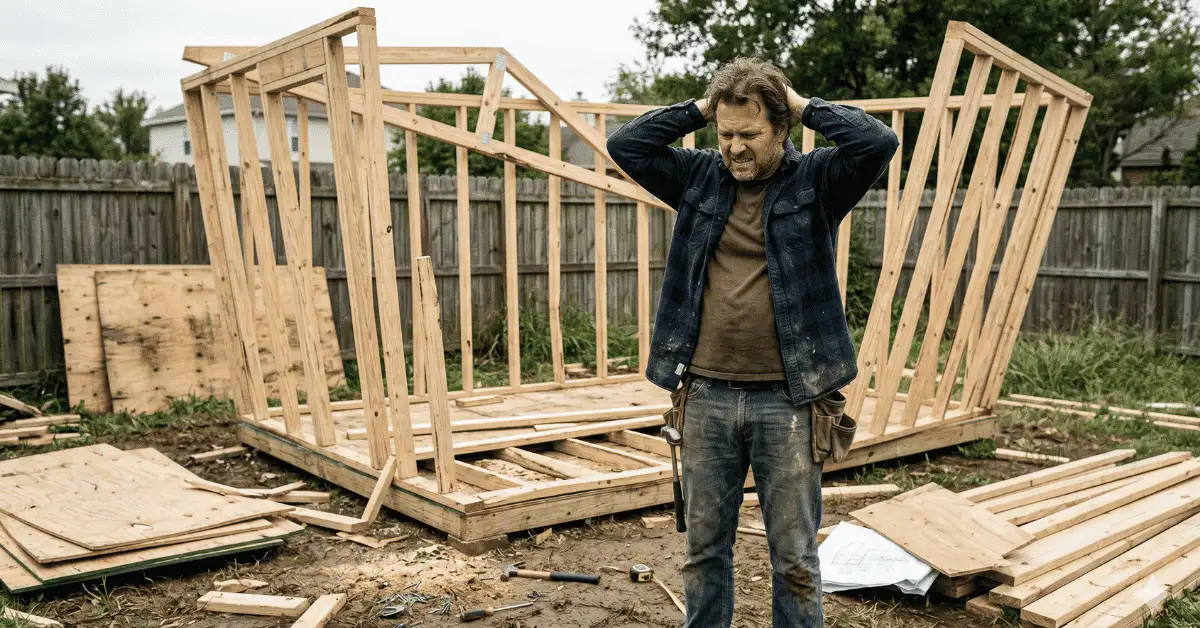
Hidden fees can turn a weekend project into a pricey headache if you don’t plan.
“A small oversight on permits or site prep can erase any expected savings.”
Many areas require permits for a storage structure. Expect a permit fee between $50 and $500, depending on your local rules and the size of the unit.
Site preparation is another common surprise. Levelling, compacting soil, and laying a proper foundation extend the timeline and add material and labour charges.
Delivery charges for bulk materials often slip off the checklist. Heavy lumber and roofing shipments can tack on $100–$300, and missed deliveries waste your time.
- Failing to check local regulations risks fines and forced removal.
- Footprint size affects how much work the site needs to stay stable over the years.
- Cutting mistakes or wasted material quickly raises overall costs.
Plan for permits, delivery, and site work early. That prevents mid-project surprises and protects your budget for the diy shed or prebuilt option you choose.
Evaluating the True Cost of Your Time and Labour
Time is a silent expense: several weekends on a project can cost you more than materials do.
You should start by tracking how many hours the job will take. DIY builders often spend 16 or more hours on a small unit, while a prebuilt kit can be assembled in about 8 hours. That gap matters when you value free time and family nights.
Consider opportunity cost. Every weekend hour you spend framing or roofing is time you could use for rest, errands, or paid work.
“A weekend project can eat weeks of your free time if you don’t plan accurately.”
Tools change the math. If you must buy power tools, the upfront price raises your expenses. Renting can help, but it extends the total time. Also factor in fatigue: physical labour can slow you down and increase the chance of mistakes.
| Item | Typical Time | Why it matters |
|---|---|---|
| DIY assembly | 16+ hours | Higher labor input, higher chance of rework |
| Prebuilt kit setup | ~8 hours | Lower time commitment, faster use |
| Tool purchase or rental | Varies (hours to arrange) | Raises expenses and may delay progress |
| Rework after mistakes | 4–12 hours | Increases material waste and lowers lifespan |
Finally, think about long-term durability. A novice project can let water or weather in and shorten the life of wood and other materials. That leads to future repairs and more money out of your pocket.
Your time has value—sometimes more than the material numbers on a spreadsheet. Count hours, add tool fees, and be honest about your skills before you commit.
Why Building Your Own Shed Offers Unique Advantages

A personal project lets you tailor size and features so the structure fits your yard and habits exactly. You control design choices and pick the materials and wood that match your home.
Customization Potential
You can add insulation, custom shelving, or extra windows to make the space work for tools, hobbies, or seasonal storage. Standard kits often leave out these niche options.
Personal Satisfaction and Skill Development
Completing a DIY project raises your skill level and gives lasting satisfaction. Working through framing, roofing, and finishing teaches practical carpentry that pays off for future projects.
“Taking control of the design ensures every detail meets your standards.”
- Adjust size and layout to fit odd corners or slope in your yard.
- Choose premium wood or eco-friendly materials for a unique look.
- Add lighting, vents, or custom doors to match how you use the space.
The trade-off is time, but the flexibility and one-of-a-kind result often make a DIY shed the right choice for homeowners who value custom features and quality control.
The Convenience and Reliability of Prebuilt Options
Prebuilt units arrive with professional installation, so you avoid complex assembly and heavy lifting.
Delivery and installation are the main conveniences. Pros handle placement, anchoring, and cleanup. That saves you time and keeps labour off your plate.
Preassembled models use tested materials and engineered connections. These options resist harsh weather and reduce long-term maintenance.
Warranties add real peace of mind. Many units include coverage for materials and workmanship for up to ten years. That protection lowers your risk of unexpected repairs.
- Quick delivery gets usable storage in days, not weeks.
- High-quality materials and precise assembly improve durability.
- You avoid sourcing parts, renting tools, and coordinating deliveries.
- Minimal labour means you start using the space almost immediately.
“A professional model bundles craftsmanship, delivery, and warranty into one turnkey option.”
For homeowners who value time, reliability, and consistent quality, prebuilt options are a sensible choice. They simplify shed buying and let you focus on using the new storage right away.
How Professional Shed Plans Reduce Costly Mistakes

Clear, professional plans cut guesswork and keep costly mistakes off your worksite.
Paying roughly $300 for certified working drawings often saves you more than that in wasted materials and rework. The plans give precise cutting lists and engineered details so you avoid guesswork during framing and roofing.
Avoiding Expensive Rework
When you use detailed construction drawings, you reduce wasted material and unplanned trips to the store.
Plans that include engineering stamps also make permit applications smoother. That lowers the chance of delays or rework forced by local officials.
- Precise dimensions and cutting lists limit material waste.
- Certified drawings streamline the permit process with authorities.
- Following a proven design saves you time and prevents framing mistakes that are costly to fix.
- Good plans help you order the right tools and materials so you don’t stop mid-project.
“Investing in high-quality plans is a smart strategy to finish the project efficiently and right the first time.”
Use professional plans as your roadmap: they protect your budget, speed up construction, and give you confidence whether you are building a shed by hand or considering buying shed options.
Choosing the Right Path for Your Backyard Project
Start by listing what matters most: your schedule, your budget, and the features you truly need.
Make an honest assessment of your skills and available time. If you lack tools or experience, factor in labour and permit fees before you commit.
For beginners, a complete shed plan resource is highly recommended. Good plans cut waste, speed up construction, and reduce the chance of costly rework.
A preassembled option can save time and provide consistent quality when you value convenience over hands-on work.
Think long term: choose the option that keeps your storage space functional and adds real value to your yard.
“An honest look at time, tools, and budget leads to the right decision for your project.”
- Assess skills, time, and total budget first.
- Use a full plan resource if you attempt a DIY shed to avoid mistakes.
- Pick prebuilt when time and guaranteed quality matter most.
| Factor | DIY Path | Preassembled Option |
|---|---|---|
| Time | Weeks of weekends | Days to install |
| Upfront expenses | Materials, tools, permit fees | Single purchase, possible delivery fee |
| Long-term value | Custom features, higher maintenance | Warranty, consistent quality |
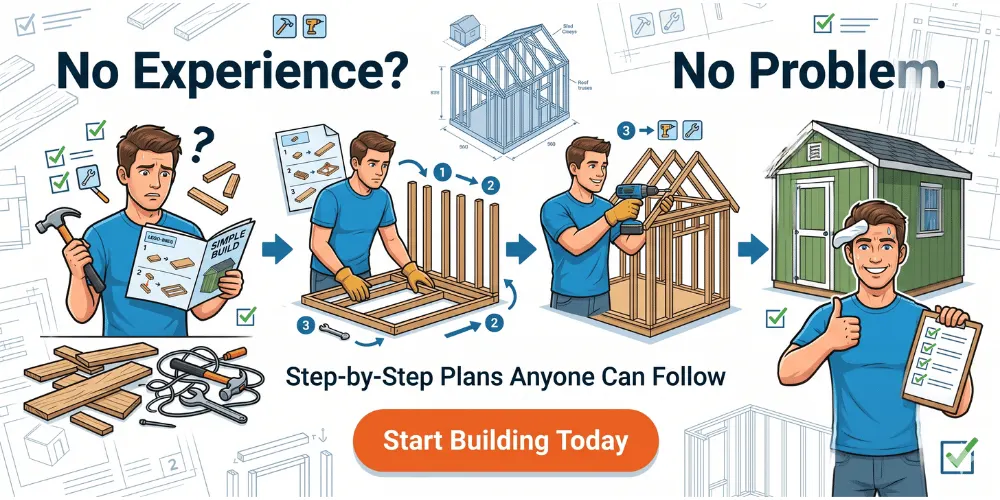
💰 Why Pay $3000+ for a Prebuilt Shed?

Build your own 10×8 shed for under $1000 — even if you’ve never built anything before
🛠️ Build Smarter with “My Shed Plans”
👉 Get instant access to 12,000+ step-by-step shed plans that make building easy — like following LEGO instructions
✅ Here’s What You’ll Get:
- 📐 12,000+ Shed Designs (All Sizes & Styles)
- 🧱 Beginner-Friendly Step-by-Step Instructions
- 📋 Complete Materials & Cutting Lists (No Guesswork)
- 🧠 3D Plans + All Angles for Perfect Builds
- ⚡ Build Faster & Avoid Costly Mistakes
- 🎁 FREE Bonuses Worth $300+ Included
- 🛡️ 60-Day Money-Back Guarantee (100% Risk-Free)
🚀 Start Building & Save Thousands Today
👉 Click here to get instant access to My Shed Plans (Limited-Time Discount)
💡 Stop wasting money on overpriced sheds — build your own the smart way.
Conclusion
A smart selection balances immediate convenience with years of reliable performance.
You should weigh customisation, time, and total cost when comparing your options. DIY work gives you control and unique features. Professional units offer fast installation, consistent quality, and strong warranties that protect your investment.
Always check local permits before starting any project, so your work meets regional rules. Think about how this choice affects your home, maintenance, and daily use. Take time to compare the practical options and pick the path that fits your schedule and lifestyle.
FAQ
How do materials affect the price of a 10×8 project in 2026?
Your material choices drive most of the expense. Pressure-treated lumber, cedar, or engineered siding raises the total, while oriented strand board (OSB) and standard pine lower it. Roofing—metal vs. asphalt shingles—also changes the final figure. Compare local lumber yard prices and factor in fasteners, flashing, and house wrap to get an accurate estimate.
What tools will you need, and how much will they add to the budget?
Expect to invest in cordless drills, a circular saw, a level, a framing hammer, and safety gear. If you don’t own these, rental is an affordable option. Buying quality power tools from brands like DeWalt or Milwaukee is pricier up front, but saves money long term if you plan more projects.
Are permits required, and what fees should you expect?
Permit rules vary by city and township. Many places allow small accessory structures without a permit under a certain square footage, but bigger or electrical-equipped buildings often require one. Check your local building department for fees and timeframes; skipping permits risks fines and forced removal.
How do site prep and foundation type influence overall expenses?
Clearing vegetation, levelling soil, and installing a foundation—gravel pad, concrete blocks, or a poured slab—add labour and material costs. A simple gravel pad with concrete piers keeps costs lower than a full slab but may limit future uses like heavy equipment storage or powered interior finishes.
How do warranties and delivery affect the packaged option you buy?
Prebuilt units often include delivery, setup, and limited warranties on structure and materials. Those services add to the list price but can save you time and mitigate installation risks. Read warranty terms carefully—some exclude weather damage, insect infestation, or improper anchoring.
Will you save money if you do the work yourself versus hiring help?
You save on labour when you do the work, especially if you already own tools and basic skills. However, mistakes, slower progress, and potential rework can erode savings. Hiring professionals shortens the timeline and reduces error risk but increases the upfront expense.
How should you value your own time in the project budget?
Assign an hourly rate to your time based on what you’d otherwise be doing—work, freelancing, or leisure. Multiply that by the estimated hours. If your time is high-value, paying for a prebuilt or pro installation may make more financial sense despite a higher sticker price.
Can buying plans or using prefab panels reduce costly mistakes?
Yes. Professionally drafted plans or manufacturer-supplied wall panels provide accurate cuts, load calculations, and material lists. They minimise waste and prevent structural missteps that cause expensive rework, saving money and time on the whole project.
What hidden costs often appear after the initial purchase or project start?
Expect anchoring hardware, upgraded fasteners, paint or stain, insulation, vents, flooring, electrical wiring, and permit inspections. Delivery surcharges, waste disposal, and adjustments for uneven ground also pop up. Build a 10–20% contingency into your budget to cover surprises.
How does size and design complexity change the per-square-foot economics?
Simpler, rectangular designs lower per-square-foot expenses because they reduce cuts, trim, and labour hours. Adding dormers, windows, lofts, or built-in shelving increases complexity and materials, pushing up the per-square-foot rate considerably.
Are modular or kit options a middle ground for budget and convenience?
Yes. Kits from brands like Tuff Shed or Home Depot include pre-cut materials and instructions, reducing on-site labour and mistakes while keeping costs below full custom construction. They balance control and convenience, but compare package features and exclusions closely.
How should you plan for electrical or HVAC if you want a finished workspace?
Factor in licensed electrician fees, permits, wiring, panels, and possibly a mini-split for heating and cooling. These upgrades significantly raise the total but expand utility and resale value. Budgeting for professional installation ensures code compliance and safety.
How long does a typical backyard project take from start to finish?
A basic 10×8 simple frame structure can go up in a weekend with experienced help; full finishes, electrical work, and permits extend the timeline to several weeks. Prebuilt delivery slashes onsite time to a day or two for setup and anchoring.
Will weather and climate affect material choices and long-term maintenance?
Yes. Humid, coastal, or snowy climates require treated materials, corrosion-resistant fasteners, and robust roofing. Those choices increase upfront spend but lower long-term repair and replacement costs. Plan for maintenance like repainting or resealing every few years.
How do resale value and home improvement impact the decision for your backyard project?
A well-built, code-compliant structure that matches your home’s style can add perceived value and attract buyers. Prebuilt options with warranties may appeal to buyers who prefer low risk, while custom, high-quality construction can command a premium if finished and permitted correctly.

