You remember your first desk or the chair you fixed and felt a quiet thrill. That small victory is the reason you want to build furniture, not fill a garage with gadgets. Jonathan Katz-Moses advises buying gear as you have projects, so you learn skills before chasing the next shiny purchase.
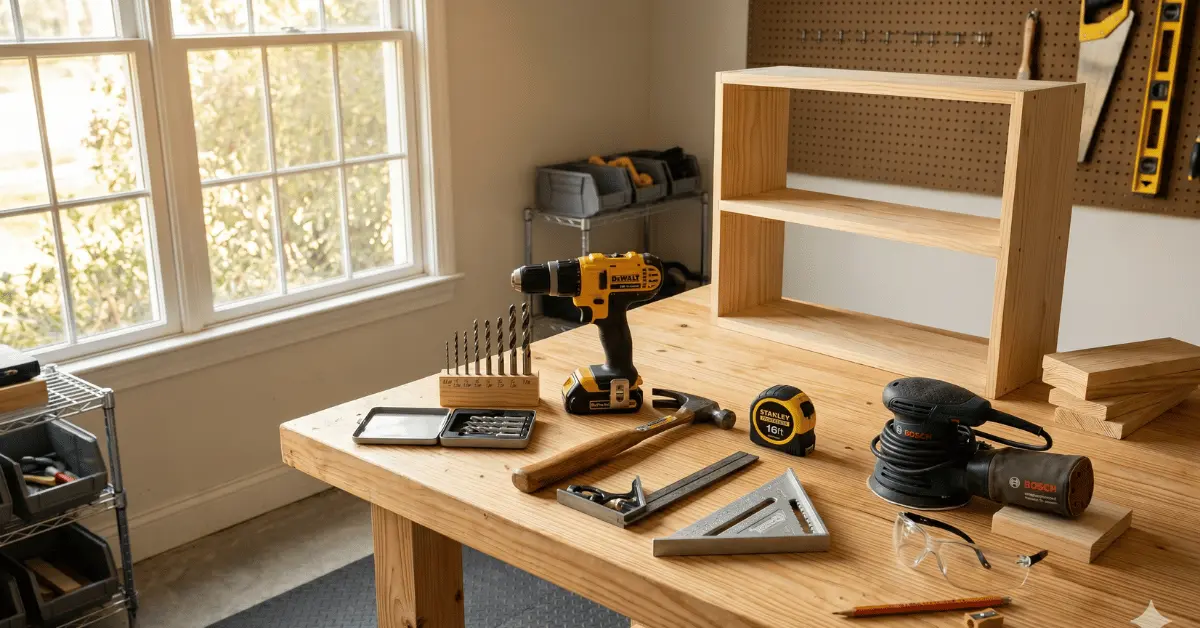
This concise guide provides a focused, budget-minded list of essential hand and power tools, enabling you to make clean cuts, solid joints, and pieces that last. You will learn which saws, chisels, square, block plane, clamps, and a basic router earn their place in a small shop.
Work smart in a tight space and spend time on marking, measuring, and practising rather than on a long wishlist. With the right set, a new woodworker can begin building high-quality furniture without wasting money or time.
Key Takeaways
- Buy as you build: prioritise tools that match your next project.
- Focus on fundamentals: measuring, marking, cutting, and clamps first.
- A small set of hand tools and one or two power items covers most furniture work.
- Budget-friendly choices can deliver clean cuts and reliable joints.
- Practice joinery and safety before expanding your set.
The Philosophy of Buying Only Woodworking Tools Beginners Need
Start buying with purpose: match each purchase to a real project on your bench. This keeps your budget tight and your bench useful.
Jonathan Katz-Moses recommends buying what a project calls for so you do not collect gear you will rarely use. That approach saves time and money.
Prioritise items that give the biggest return. A reliable square, a basic set of chisels, and a good clamp will cover dozens of projects. These hand items teach skills and last.

Focus on value over volume. Many woodworkers find that a short list of hand tools helps them learn joinery and accuracy before spending on big, stationary machines. Save for quality materials and safety gear.
- Buy for the next project, not the someday project.
- Choose versatile tool types that work across builds.
- Keep your garage shop compact and functional.
| Category | Why it matters | Priority |
|---|---|---|
| Measuring & Layout | Controls fit and accuracy for every piece | High |
| Hand Cutting & Shaping | Teaches technique; low-cost to start | High |
| Clamping & Assembly | Secures joints and speeds glue-ups | Medium |
| Stationary Power | Boosts efficiency but costs space | Low (until you have projects) |
Precision Layout and Measuring Essentials
Precision in your layout sets the stage for clean cuts and snug joints. Good marking and a reliable square give your projects repeatable accuracy. These habits reduce rework and help every part fit.
Marking Knives vs. Pencils
Using a marking knife leaves a tiny groove that guides your saw blade and chisel. That groove prevents the pencil line from smudging or hiding when you cut.
Jonathan Katz-Moses prefers wheel marking gauges for joinery because they score a clean, sharp line rather than merely scratching the surface.
The Versatility of Squares
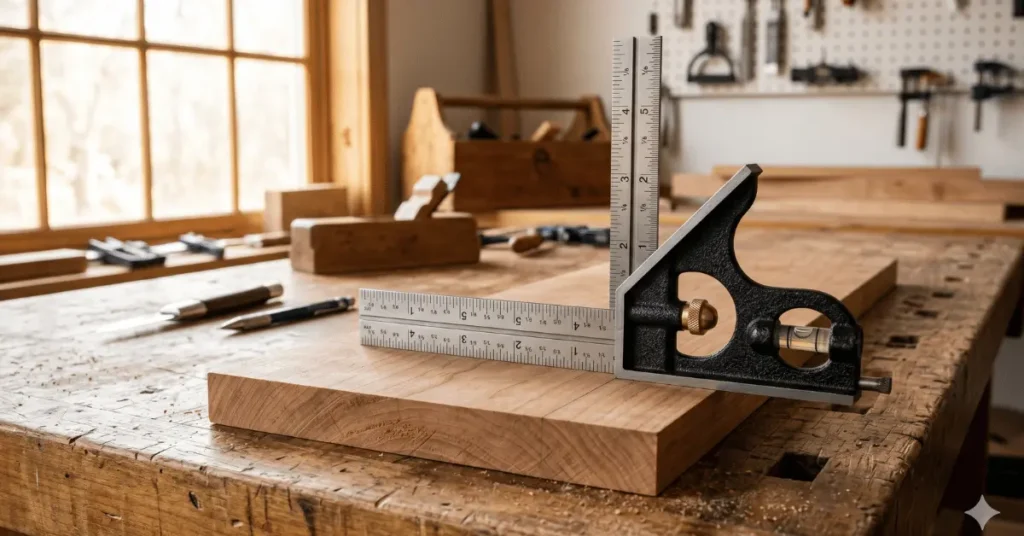
A high-quality combination square is a compact workhorse. With interchangeable fences, it serves as a 90° square, a 45° guide, a protractor, and a level.
When you lay out odd angles, use a bevel gauge or a square with a protractor fence. Keep the same tape measure across a project to avoid hidden errors.
- Marking knife: creates an indentation that guides the blade for accurate cuts.
- Combination square: ensures true angles for tight-fitting joints.
- Bevel gauge & tape: help transfer angles and keep measurements consistent.
| Item | Primary Benefit | When to Use |
|---|---|---|
| Marking knife | Physical groove for saw and chisel guidance | Layout of tenons, dovetails, and precise cuts |
| Pencil | Quick, visible lines for rough layout | Initial layout and mock-ups |
| Combination square | Multiple angle settings; level and protractor | Checking 90°/45° and transferring measurements |
| Bevel gauge | Capture and transfer complex angles | Fitted joinery and angled cuts |
| Tape measure | Consistent linear measurements | Overall dimensions and repeat marks |
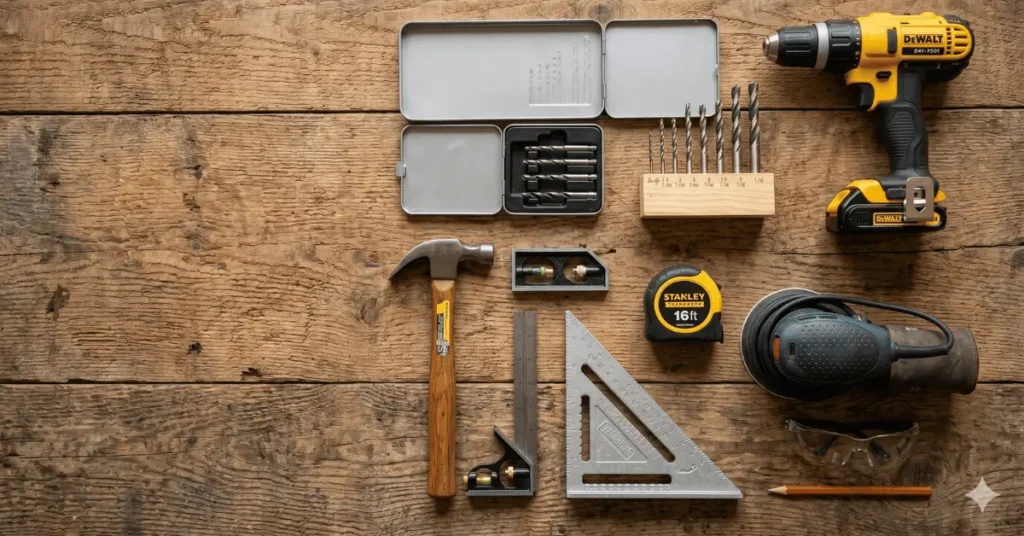
Must-Have Hand Tools for Fine Joinery
Fine joinery starts with a small set of hand implements that give you control over every cut and fit. With a compact collection, you will make cleaner joints and learn technique before expanding your shop.
Focus on blades you can sharpen and a plane you can tune. That pairing saves time and helps you produce furniture that fits. A mallet and a simple sharpening jig finish the basic kit.

Chisel Sets for Beginners
A set of four bevel-edge chisels—1/4″, 1/2″, 3/4″, and 1″—covers most paring and joint cleanup. Jonathan Katz-Moses recommends these sizes as the foundation for fine joinery.
Keep a mallet handy to control the chisel and drive joinery. Maintain bevel angles with a sharpening jig for consistent, clean cuts.
The Utility of Block Planes
Low-angle block planes are ideal for trimming end grain and for flush trimming proud joints. They help you refine fit and soften edges quickly.
Hand Saw Basics
- A 26″ 5 ppi rip saw speeds rough ripping and breaking down stock.
- A 12–14″ carcass saw with 12 ppi crosscut teeth finishes parts to dimension.
Essential Power Tools for Efficiency
Smart power selections help you break down stock, shape edges, and finish surfaces with less sweat. Choose machines that match the scale of your projects and the size of your shop. This keeps your budget and workflow lean.
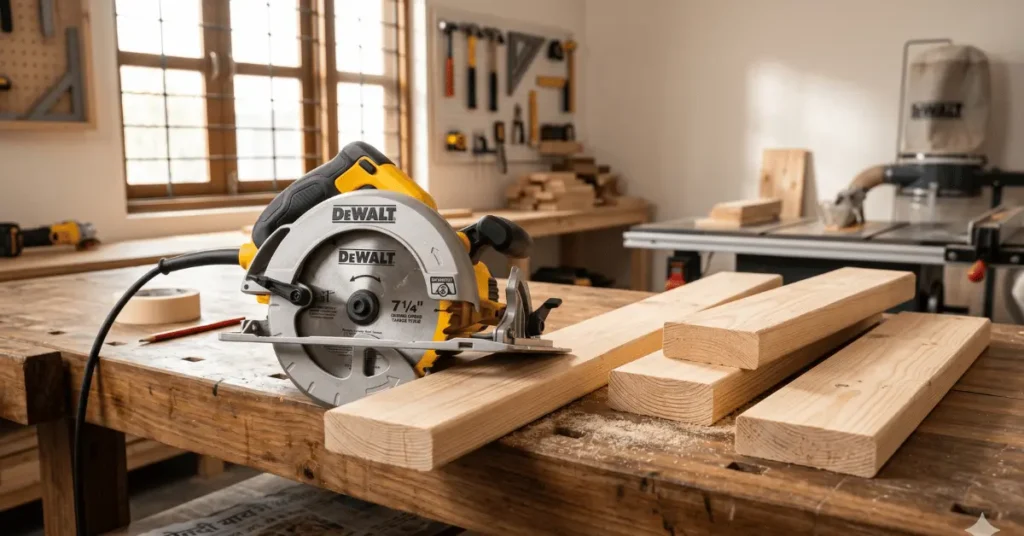
Choosing Between Circular and Track Saws
A circular saw paired with a DIY track is a proven, portable guide for straight cuts on plywood and sheet goods. It gives you control without a large footprint.
If you prefer a table setup, Tamar from 3×3 Custom shows that a jobsite table saw can produce fine furniture with the right skills and jigs. Prioritise safe fences and good blade alignment.
- Compact trim router: adds profiles and inlays on a budget and grows with your skill set.
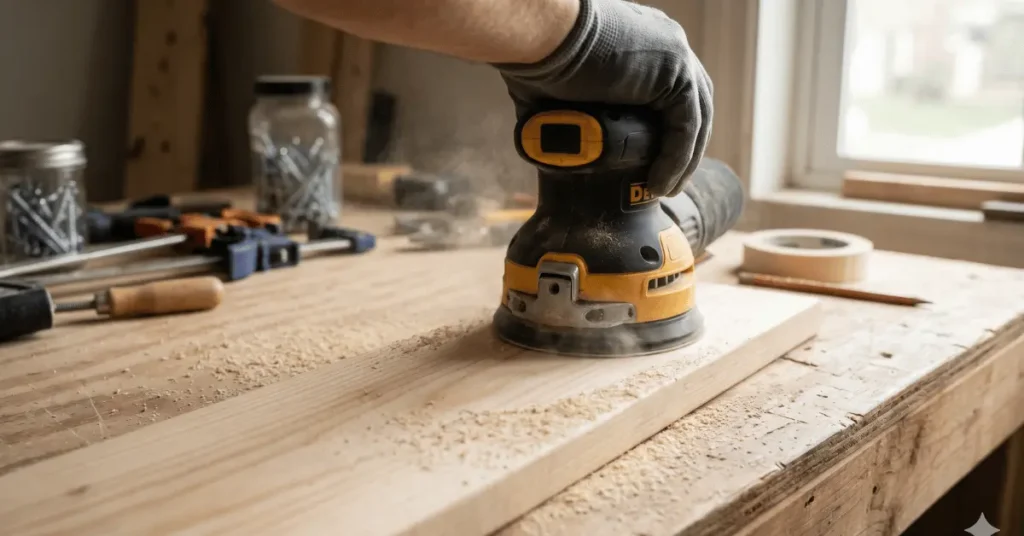
- Random orbital sander: smooths surfaces quickly and reduces swirl marks for a cleaner finish.
- Power drill + Forstner bits: creates clean dowel holes and large bore holes for pegged joinery.
“A 10\” swing brace handles drilling chores from 1/4\” to 2\” wide bits, which is useful for mortises and peg holes.”
Tamar, 3×3 Custom (paraphrased)
| Power Item | Primary Use | Why Pick It |
|---|---|---|
| Circular saw + track | Break down plywood and long boards | Portable, accurate with a straight guide; low cost |
| Jobsite table saw | Ripping and repeatable crosscuts | Compact shop heart; good results with jigs and practice |
| Compact trim router | Edge profiles, inlays, small joinery | Versatile, affordable way to add finish detail |
| Random orbital sander | Surface preparation and finish sanding | Fast, even sanding with minimal swirl |
| Power drill + Forstner bits | Clean, flat-bottom holes for dowels and plugs | Simple alternative to complex mortise work |
Critical Safety Gear for Your Workshop
Safety gear is the silent guardian of every successful project in your shop. You will protect your sight, hearing, and lungs with a few well‑chosen items. Treat these as mandatory, not optional.
Start with reliable eye protection. Fog‑resistant safety glasses block flying chips and dust during power operations. They make close, precise work safer and keep you on task.
Wear hearing protection — earmuffs or earplugs — when machines run. Long exposure to loud sounds can cause permanent hearing loss.
- Respirators or high‑quality dust masks: filter fine particles from sanding and cutting.
- Good lighting and a tidy bench: reduce mistakes and slips that lead to injuries.
- Regular maintenance: keep blades sharp, guards in place, and cords intact to lower the risk when you use the power gear.
Before you run any machine, read the manufacturer’s safety manual and follow its checks. A disciplined habit of inspection and protection keeps your shop productive and your body sound.

Small Shop Organisation and Assembly Tips
A tidy bench and a few smart storage choices turn a small shop into a productive studio. Treat layout and storage as part of your workflow; that saves time on every project.
Workbench Command Centres
Your workbench is the command centre. Mount a vice or a pair of holdfasts and reserve one edge for final assembly and glue-ups.
Keep a wall rack for hand tools and a small cabinet for planes, chisels, and a combination square so the most-used items are at arm’s reach.
Managing Clamps and Glue
Clamps are your extra hands. Stock F-style, pipe, and parallel clamps in a range of sizes and store them on a labelled rack.
Keep glue and finishing supplies in a single bin or on a rolling cart. Store router bits and drill bits in small cases to stop loss and speed setup.
- Use a marking gauge with a micro-adjustment for repeatable layout.
- Group clamps by length, so you grab the right set for big or small joints.
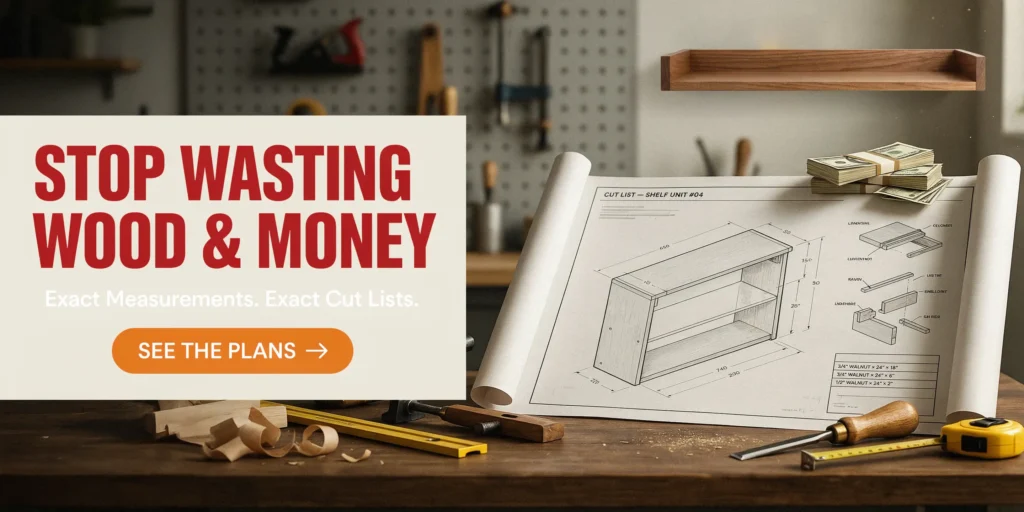
🔨 Ready to Start Building Instead of Just Planning?

Most beginners don’t quit woodworking because of a lack of skill—they quit because of confusing plans, missing measurements, and costly mistakes. That’s exactly the problem Ted’s Woodworking aims to solve with its massive collection of tested, step-by-step woodworking plans.
Why Woodworkers Love Ted’s Woodworking
✅ 16,000+ detailed woodworking plans
✅ Step-by-step instructions with clear diagrams
✅ Exact cut lists and materials lists
✅ Plans tested in a real workshop before publication
✅ Projects for beginners to advanced woodworkers
✅ Search projects by category, skill level, or keyword
✅ New woodworking plans added every month
✅ Lifetime access — no recurring fees
✅ 150+ premium woodworking training videos included
✅ Bonus guide on starting a woodworking business
👉 Build Your Next Project With Confidence
Stop wasting weekends searching for plans that don’t work. Get instant access to thousands of proven woodworking projects and start building with clear, easy-to-follow blueprints today.
🔥 Click Here To Access Ted’s Woodworking & Start Building Smarter →
Whether you want to build furniture, outdoor projects, workshop storage, sheds, pet houses, or small crafts, you’ll find a proven plan ready to use.
Conclusion: Building Your Skills One Tool at a Time
Start small and let each project inform the next purchase.,
Conclusion: This guide helps you get started with a focused list that trims clutter and boosts progress. Practice marking and basic joinery until those skills become second nature.
Take time with the layout and the right angle when you mark stock. Learn how each item on the list behaves and how it affects fit and finish. That habit saves money and raises confidence.
As you gain experience, add gear that fits your projects and style. Most woodworkers grow by doing, not by buying. Enjoy the craft and the quieter satisfaction of well-made furniture as you move from novice to skilled maker.
FAQ
What minimal layout and measuring gear should you buy first?
Get a 25-foot tape measure, a 12-inch combination square, a reliable marking knife, and a marking gauge. These give you accurate lengths, true 90° checks, crisp scribe lines, and repeatable mortise depths. Brands like Starrett and Stanley offer durable squares and tapes that hold calibration as you learn.
Do you need a chisel set or just one good chisel?
Start with a set of three bevel-edged chisels (1/4″, 1/2″, 3/4″) made by Irwin or Narex. That covers trimming, paring, and chopping joinery without cluttering your toolbox. You can add speciality sizes later as your projects demand finer joinery.
Why is a block plane recommended over other planes?
A block plane handles end grain, chamfers, and small smoothing tasks with ease, and it’s simple to use. A low-angle block plane from Stanley or Veritas helps you clean up tenons, square edges, and tune joints quickly—great for furniture and small projects.
Which saw type should you choose first—a hand saw or a power saw?
Buy a quality crosscut handsaw or a Japanese pull saw if you want control and low cost. If you prefer power, a circular saw or track saw adds speed for rip and long crosscuts. Both options work; pick based on space, budget, and the type of cuts you make most often.
How many clamps do you actually need to get started?
Keep a dozen quick‑grip clamps and four parallel or bar clamps in 24″–36″ lengths. That covers glue‑ups for tabletops, frames, and casework. Jorgensen and Bessey make reliable clamps that hold a square under pressure.
Is a router essential for a new woodworker?
A router is optional but highly useful. A compact plunge or fixed-base router lets you cut dados, roundover edges, and joinery with router bits from Bosch or DeWalt. If you want fast joinery and decorative edges, you’ll find it worth the investment.
What safety gear should you invest in immediately?
Prioritise safety glasses, hearing protection, a dust mask or respirator, and a push stick for saw work. Brands such as 3M and Milwaukee provide tested PPE that keeps you safe while you focus on craft and speed up project time.
How do you organise a small shop to work efficiently?
Set up a stable workbench, hang common hand tools on a pegboard, and store blades and router bits in labelled boxes. Create a clamp rack and a small parts drawer for screws and hardware. The organisation saves time and reduces mistakes during assembly.
Which blades and bits should you keep on hand for common cuts and joinery?
Keep a fine-tooth crosscut blade, a general-purpose ripping blade for circular saws, a set of twist drill bits, and a starter collection of router bits (straight, roundover, and flush-trim). Quality options from Freud and Bosch give cleaner cuts and last longer.
How should you approach buying expensive items like a table saw or compound mitre saw?
Wait until you have a few projects under your belt and know the cuts you make most often. Rent or borrow larger machines to test fit in your workflow. When ready, choose trusted models from SawStop, Bosch, or DeWalt that match the accuracy and safety features you’ll use every day.


