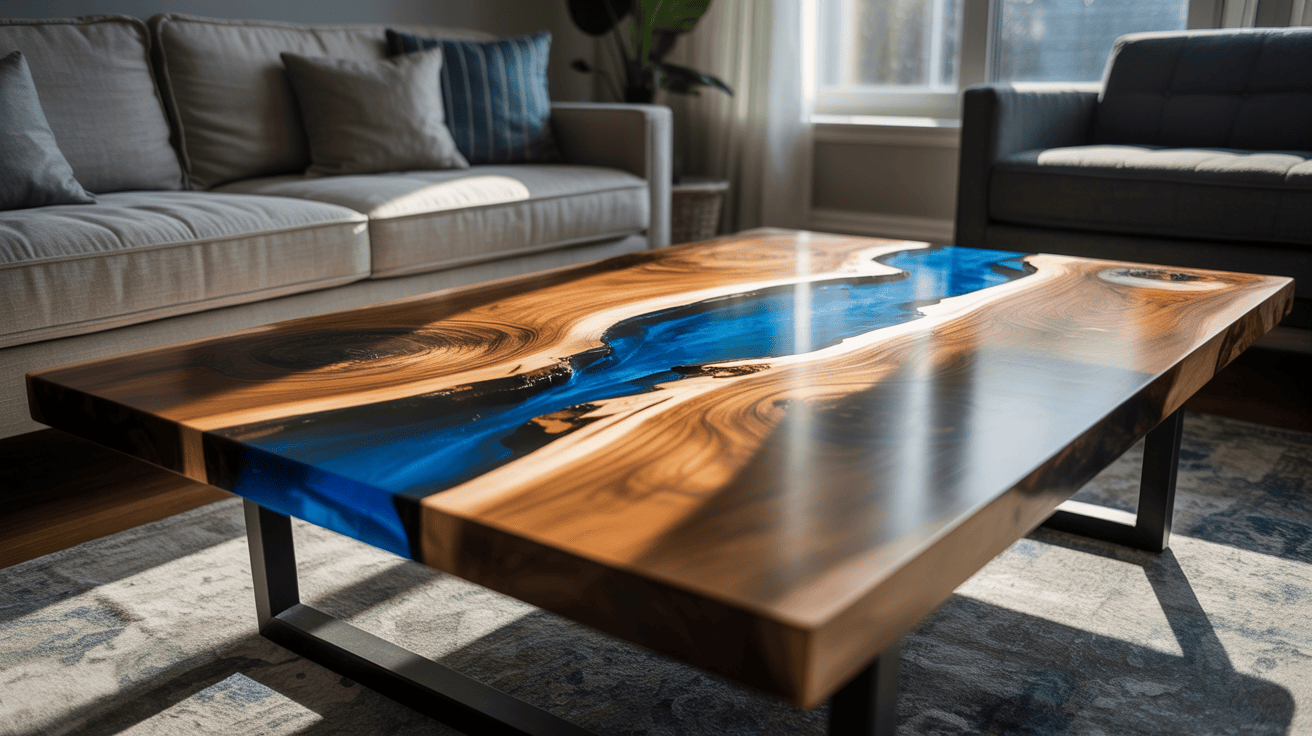
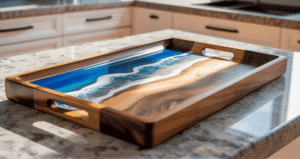
Did you know that a simple piece of salvaged wood can increase in value by 400% with just a bit of liquid resin? Across the United States, people are transforming raw lumber into stunning art pieces that resemble flowing water. This craft combines nature with modern chemistry for a breathtaking result.
Building a live-edge piece is a beautiful and distinctive way to incorporate natural art into your home. The project needs specialised tools, but the stunning result is worth every minute. You can transform a basic room with a single piece of custom furniture.
This guide simplifies the technical steps, allowing you to focus on your creative vision. You will follow a clear path to complete your diy epoxy river coffee table with professional results. Get ready to master a skill that turns raw timber into a functional masterpiece.
Key Takeaways
- Select a high-quality wood slab with natural “live” edges.
- Construct a leak-proof mould using melamine and silicone sealant.
- Mix your resin and hardener with perfect accuracy.
- Use a torch or heat gun to remove stubborn air bubbles.
- Sand the surface through several grits for a glass-like finish.
- Apply a durable topcoat to protect the wood and resin.
1. What Is an Epoxy River Coffee Table and Why Build One
An epoxy river coffee table is a mix of live-edge wood and epoxy resin. It’s a unique piece of furniture. This blend of natural and synthetic materials creates a durable and customizable coffee table.
Understanding the Epoxy River Table Design
The design of an epoxy river table combines a live-edge wood slab with epoxy resin. The wood slab gives a natural shape, while the epoxy resin adds a modern finish. This creates a visually striking and textured piece.
Key design elements include:
- The type and quality of the wood slab used
- The colour and consistency of the epoxy resin
- The ratio of wood to epoxy
- Any additional decorative elements, such as metallic pigments or inclusions
Benefits of Creating Your Own DIY Coffee Table
Building your own epoxy river coffee table has many benefits. You can customise it to fit your style and decor. Select the wood, epoxy colour, and design elements to create a unique piece.
It’s also a cost-effective option. By using your own materials, you can save money and achieve quality results.
Other benefits include:
- The satisfaction of creating something with your own hands
- The ability to customise the size and shape to fit your space
- The potential to create a family heirloom or a unique gift

Cost Comparison: DIY vs Store-Bought River Tables
Cost is a key factor when considering an epoxy river coffee table. Building your own can be more affordable than buying one.
Store-bought tables can cost from a few hundred to several thousand dollars. DIY costs depend on the materials and their availability.
| Cost Component | DIY Cost | Store-Bought Cost |
|---|---|---|
| Materials (wood, epoxy, etc.) | $200-$500 | $500-$2,000 |
| Labor | $0 (your time) | $500-$1,500 |
| Total | $200-$500 | $1,000-$3,500 |
By building your own, you can save between $800 and $3,000. This depends on the design and materials used.
2. Essential Materials for Your Epoxy River Coffee Table Project
Starting your epoxy resin coffee table project means picking the right materials. The quality and type of materials significantly impact the table’s appearance and longevity.
Wood Slab Requirements and Specifications
The wood slab is the base of your epoxy river coffee table. Look for the right type of wood, its size, and moisture level. Live-edge slabs are an excellent addition for adding a natural touch.
Ensure the wood slab is dry and ready for epoxy application. The slab’s size will depend on the dimensions of your coffee table.
Choosing the Best Epoxy for River Tables
Selecting the right epoxy resin is crucial for a successful project. The epoxy should work well for deep pours and have enough time to cure properly.
Deep Pour Epoxy Resin Options
For river tables, you need a deep pour epoxy resin. These epoxies cure well, even in thick layers. Look for “deep pour” or “river table epoxy” labels.
Standard Epoxy Resin Alternatives
If you’re working on a smaller project or require a different curing time, standard epoxy resin may be suitable. Just ensure it meets your project’s needs.
Metallic Pigments and Color Additives
To achieve the desired look for your epoxy resin coffee table, select the right metallic pigments or colour additives. You can choose simple colours or metallic effects.
Try different pigment ratios to get the colour and effect you want. Test the pigments with your epoxy to make sure they work together.

Sealers and Finishing Products
After your epoxy cures, you’ll need sealers and finishing products. Choose ones that match your epoxy and wood.
Using a protective finish will keep your DIY coffee table looking good for a long time.
3. Tools You’ll Need for This Woodworking Project
Having the right tools is crucial for creating a stunning epoxy river coffee table. The right tools make the job easier and give your table a pro look.
Power Tools for Wood Preparation
You’ll need strong tools for cutting and sanding your wood slabs. These tools make the prep work smooth.
Circular Saw or Table Saw
A circular saw or table saw is vital for cutting wood to size. They help you make straight cuts with ease.
Orbital Sander and Belt Sander
For smooth wood surfaces, use an orbital sander for fine work and a belt sander for quick material removal.
Epoxy Application and Mixing Tools
Applying epoxy resin needs special tools for a flawless finish.
- Mixing Cups and Stir Sticks: Accurate mixing is key. Use graduated cups and strong stir sticks for mixing epoxy and hardener.
- Pouring Pigs or Similar Tools: These tools control epoxy flow, helping you get the river effect right.
Safety Equipment Requirements
Working with power tools and epoxy resin requires the use of safety gear.
- Safety Glasses and Gloves: Keep your eyes and skin safe from debris and chemicals.
- Respirator Mask: Essential for protecting against dust and epoxy fumes.
- Well-Ventilated Workspace: Good airflow prevents the buildup of harmful fumes.

With these tools and their uses, you’re ready to start your epoxy river coffee table project.
4. Choosing and Preparing Your Wood Slabs
Starting a river table project means picking the right wood is key. The wood you choose affects not only how your table looks but also how long it lasts.
Best Wood Types for River Tables
There are many types of wood to choose from for river tables. They should contrast well with the epoxy resin.
Walnut for Dark Contrast
Walnut is a top pick for river tables. Its dark colour stands out against the epoxy. It also adds depth and character.
Maple and Oak Options
Maple and oak are also good choices. Maple’s light colour makes the epoxy pop. Oak gives a strong, classic look.
Exotic Wood Choices
For something special, try burl or spalted maple. These woods have unique patterns and colours that make your table stand out.
Live Edge Selection and Quality Assessment
Choosing live-edge slabs means looking for interesting shapes and few flaws. Inspect for natural defects and ensure it’s dry.
- Inspect the slab for cracks and splits.
- Check the moisture content to ensure it’s within the acceptable range.
- Consider the aesthetic appeal of the live edge.
Moisture Content and Wood Drying Requirements
Drying your wood properly is crucial to avoid warping or cracking. The ideal moisture level ranges from 6% to 12%, depending on the type of wood.

Getting your wood dry and ready will significantly improve the quality of your epoxy river coffee table.
5. Step-by-Step: Preparing Your Wood for the River Pour
Preparing your wood for the epoxy pour is crucial to a successful epoxy river coffee table. Good preparation leads to a smooth finish and a strong final product.
Step 1: Cutting Your Slabs to Size
First, cut your wood slabs to the right size for your coffee table. Use a circular saw or a wood bandsaw for this. Ensure your cuts are precise to avoid extra sanding later.
Step 2: Flattening and Levelling the Surfaces
Next, flatten and level the surfaces of your slabs. You can use a jointer or a router with a flattening jig. This step is important for a stable and even epoxy river table.
Step 3: Progressive Sanding Technique
Sanding is a crucial step in preparing your wood for the epoxy pour. It involves sanding the wood surface in a step-by-step process to achieve a smooth finish.
Starting with 80-Grit Sandpaper
Start with 80-grit sandpaper to remove big imperfections or rough spots on the wood surface.
Finishing with 220-Grit
Then, move to higher grits, ending with 220-grit sandpaper. This will make your wood smooth and ready for the epoxy pour.
Step 4: Cleaning Wood Dust Thoroughly
After sanding, thoroughly clean the wood dust. Use a vacuum cleaner and then a tack cloth to remove any dust. This ensures the surface is clean for the epoxy to adhere to.
Step 5: Sealing the Wood to Prevent Bubbles
Lastly, seal the wood to stop bubbles from forming during the epoxy pour. Apply the wood sealer as the manufacturer instructs and let it dry completely before proceeding.

By following these steps, you’ll be on your way to making a stunning epoxy river coffee table with a professional look.
6. Building the Mould for Your Epoxy River Table
The mould is key to your epoxy river table’s success. A well-made mould ensures a beautiful, durable, and professional finish.
Measuring and Planning Your Mould Dimensions
First, measure and plan your mould’s dimensions carefully. Take precise measurements of your wood slabs. Decide on the river’s width and depth. Consider the table’s size and where it will be placed.
Also, consider the mold walls thickness and the material you’ll use.
Constructing a Leak-Proof Melamine Mould
Melamine is great for moulds because it’s durable and easy to work with. To make a leak-proof melamine mould, cut the melamine sheets accurately. Use a strong adhesive and clamps to assemble them.

Cutting Mould Pieces
For cutting, use a circular saw or a CNC machine for precision. Make sure the edges are smooth and straight. Any imperfections can cause leaks or uneven surfaces.
Positioning and Securing Wood Slabs in the Mould
After building your mould, place and secure your wood slabs. Apply a small amount of wax or mould release to the mould surfaces. This makes removing the table easier after the epoxy cures.
Place your wood slabs carefully, ensuring they’re aligned and secure. You might need clamps or supports to keep them steady during the epoxy pour.
Creating the River Gap Spacing
The river gap is where the epoxy flows. Use spacers or shims for a consistent gap width. The gap size depends on your design and the size of your table.
By following these steps and focusing on the details, you can create a mould for a stunning epoxy river table. Work patiently and take your time to prepare every part of the mould correctly.
7. How to Make Epoxy River Coffee Table: Mixing and Pouring Resin
Once your mould is ready, it’s time to mix and pour the epoxy resin. This step is key to creating the river effect. It requires careful attention to detail for a perfect finish.
Step 1: Calculating Required Epoxy Resin Amounts
To start, measure the length, width, and depth of your mould’s river channel. Accurate measurements are crucial to avoid running out of epoxy or having too much.
Use the formula: Length (in inches) × Width (in inches) × Depth (in inches) ÷ 61.02 = Volume in fluid ounces. Adjust this for your project’s specific dimensions.
Step 2: Mixing Epoxy Resin and Hardener Properly
Mixing epoxy resin and hardener is a precise process. Always follow the manufacturer’s instructions for the mix ratio, which is typically 1:1 or 2:1 by volume or weight.
Maintaining Correct Mix Ratios
Use digital scales to accurately measure resin and hardener. Deviation from the recommended ratio can lead to improper curing or weakened epoxy.
Mixing Time and Technique
Mix the resin and hardener well but gently to avoid air bubbles. Mix for about 3-5 minutes. Use a mixing stick or a mechanical mixer designed for epoxy.
Step 3: Adding Metallic Pigments and Creating Effects
Add metallic pigments or other additives to colour or create effects in your epoxy river. Start with small amounts and mix well to achieve the desired colour intensity.
Step 4: The Seal Coat Application
Apply a seal coat to the wood surfaces before pouring the main epoxy river. This prevents air bubbles from the wood from rising into the epoxy. Use a thin layer and cure it according to the manufacturer’s instructions.
Step 5: First River Pour Technique
When pouring the epoxy for the river, do so in a controlled manner to minimise air entrapment.
Pour Depth Limitations
Pouring too deeply can cause excessive heat generation during the curing process, which may lead to cracking. Pour in layers, not exceeding 1/2 inch per pour.
Working in Layers
Working in layers allows for better control over the epoxy flow and helps in managing the curing process. Allow each layer to cure before adding the next.
| Layer Number | Pour Depth (inches) | Curing Time (hours) |
|---|---|---|
| 1 | 0.5 | 24 |
| 2 | 0.5 | 24 |
| 3 | Flood Coat | 48 |
Step 6: Removing Air Bubbles with a Heat Gun
Air bubbles can be removed using a heat gun. Gently heat the surface until the bubbles rise and pop. Be cautious not to overheat, as this can damage the epoxy or the mould.
Step 7: Additional Pours and Flood Coat
Depending on the desired depth and finish, additional pours may be necessary. The final pour, or flood coat, should be done after ensuring the previous layer is fully cured and the surface is prepared.
8. Curing, Demolding, and Finishing Your Coffee Table
The curing process is key to making your epoxy river coffee table. It needs patience and the right conditions. This ensures your table is strong and durable.
Proper Curing Time and Environmental Conditions
Curing needs the right temperature and a clean environment. The best temperature for curing epoxy is 70°F to 80°F (21°C to 27°C). Maintaining a steady temperature is crucial for effective curing.
Temperature Requirements
Temperature is crucial in curing. As “Epoxy cures faster at higher temperatures, but too much heat can cause bubbles or uneven curing”, an epoxy expert says. Ensure your workspace is maintained at the optimal temperature for optimal results.
Safely Removing the Table from the Mould
After curing, it’s time to demold your coffee table. Remove the table carefully from the mould to avoid damage. Use a soft mallet or rubber hammer to tap the mould and loosen it gently.
Flattening and Levelling with a Router
After demolding, your table may need to be flattened and levelled. Use a router to remove excess epoxy or uneven surfaces. This step is important for a stable and even table.
Progressive Sanding the Epoxy Surface
Sanding is key to a glass-like finish. Start with coarse-grit sandpaper and move to finer grits. Wet sanding is very effective for a high-gloss finish.
Wet Sanding Technique
Wet sanding refers to sanding with water or a lubricant to prevent scratches. Use high-grit sandpaper (1200 grit or higher) and sand in a circular motion.
Achieving a Glass-Like Finish
To get a glass-like finish, keep sanding with finer grits until you reach a high polish.
“The key to a flawless finish is patience and attention to detail,” notes a seasoned woodworker.
Check your work frequently to ensure it’s smooth enough.
Applying Protective Finish Coats
Apply a protective finish coat to your epoxy river table. This will protect it from UV light, scratches, and spills. Choose a high-quality finish made for epoxy surfaces.
9. Adding Table Legs and Final Assembly
Now that your epoxy river table is cured and demolded, it’s time to add the legs. This step is crucial to completing your guide and making your table effective.
Choosing the Right Coffee Table Legs
Choosing the right legs for your epoxy river coffee table is crucial. The style and material of the legs significantly impact the table’s appearance and feel.
Hairpin Legs for Modern Style
Hairpin legs are great for modern and industrial-style tables. They’re made from metal and have a simple design that adds elegance to your table.
Wooden Legs for Rustic Appeal
Wooden legs are perfect for a rustic or traditional look. You can stain or paint them to match the wood of your table, creating a natural look.
Metal Base Options
Metal bases are strong and durable for your epoxy river coffee table. They come in a variety of designs, ranging from simple to elaborate, to complement your table’s unique style.
| Leg Style | Material | Aesthetic |
|---|---|---|
| Hairpin | Metal | Modern, Industrial |
| Wooden | Wood | Rustic, Traditional |
| Metal Base | Metal | Modern, Sturdy |
Mounting Hardware and Installation Technique
After picking the perfect legs, choose the right mounting hardware. The type of hardware needed depends on your legs’ design and the table’s material.
Common mounting hardware includes:
- Screws
- Bolts
- Metal brackets
Ensure the hardware fits both the legs and the table to prevent damage during installation.
Final Inspection and Minor Touch-Ups
After attaching the legs, check your epoxy river coffee table carefully. Inspect for dust and minor scratches, and repair them as needed.
Minor touch-ups may include:
- Sanding down rough spots
- Applying additional coats of finish
- Tightening any loose hardware
By following these steps, your DIY epoxy river coffee table will be beautiful, durable, and functional.
🔨 Want Detailed Plans for Your Next Woodworking Project?

Building an epoxy river coffee table is just the beginning. Imagine having access to thousands of step-by-step woodworking plans that show you exactly how to build stunning furniture and DIY projects with confidence.
That’s exactly what you get with Ted’s Woodworking — the world’s largest woodworking plan collection.
Here’s What You’ll Get Inside
✔ 16,000 detailed woodworking plans for furniture, outdoor builds, decor, and workshop projects
✔ Step-by-step instructions and clear diagrams so there’s no guesswork
✔ Complete cutting lists and materials lists to save time and money
✔ Plans suitable for beginners and experienced woodworkers
✔ Lifetime access with new plans added every month
With these plans, you can build tables, chairs, cabinets, sheds, outdoor furniture, and thousands of other projects easily and professionally.
👉 Click here to explore the 16,000 woodworking plans and start your next project today.
Conclusion
Now you know how to make an epoxy river coffee table. This guide took you from preparing wood slabs to applying the final finish. You’re all set to start your DIY project.
Making your own epoxy river coffee table lets you customise it. You can make it fit your living space perfectly. With the right materials and tools, you can create something that shows off your style.
This guide has given you the confidence to take on this project. So, gather your materials and begin building your one-of-a-kind epoxy river coffee table. It might take patience and effort, but the result will be worth it. You’ll have a beautiful, unique piece to enjoy for years.
FAQ
What is the best epoxy for river tables to ensure a crystal-clear finish?
For a deep pour, look for “Deep Cast” formulas. EcoPoxy FlowCast and Superclear Liquid Glass Deep Pour are top choices. They have low viscosity and slow curing, which helps air bubbles escape and prevents overheating.
How can I prevent bubbles from ruining my epoxy resin coffee table design?
Use a “seal coat” of resin on the wood slabs first. Then, use a Wagner HT1000 heat gun or a small propane torch to pop bubbles during the main pour. A step-by-step guide will help you time these steps perfectly.
Is a diy epoxy river coffee table project significantly cheaper than buying a pre-made one?
Yes, making your own epoxy river coffee table can save thousands. High-quality materials are an upfront cost, but store-bought tables cost $3,000 to $10,000. You only pay for materials and time with a DIY project.
What are the most popular epoxy resin woodworking ideas for beginners?
Beginners often start with a blue or turquoise river table. Other ideas include glow-in-the-dark powders, “ghost” pigments, and adding stones and LED strips for a modern look.
Which wood species are recommended for woodworking with epoxy resin?
Choose hardwoods like Black Walnut, Cherry, and Maple for their grain patterns and natural edges. Ensure the wood is kiln-dried to a moisture content of 6-8% to prevent warping.
Do I need specialised tools for a river table woodworking project?
You don’t need a full industrial shop, but some tools are crucial. A DeWalt Random Orbital Sander, a plunge router, and a leak-proof mould are essential. A detailed guide will help you prepare your tools.
Where can I find a reliable step-by-step epoxy river table guide for my first build?
You’re in the right place! This guide offers a detailed breakdown of the process. For inspiration, check out Black Diamond Pigments galleries or professional woodworking channels.

