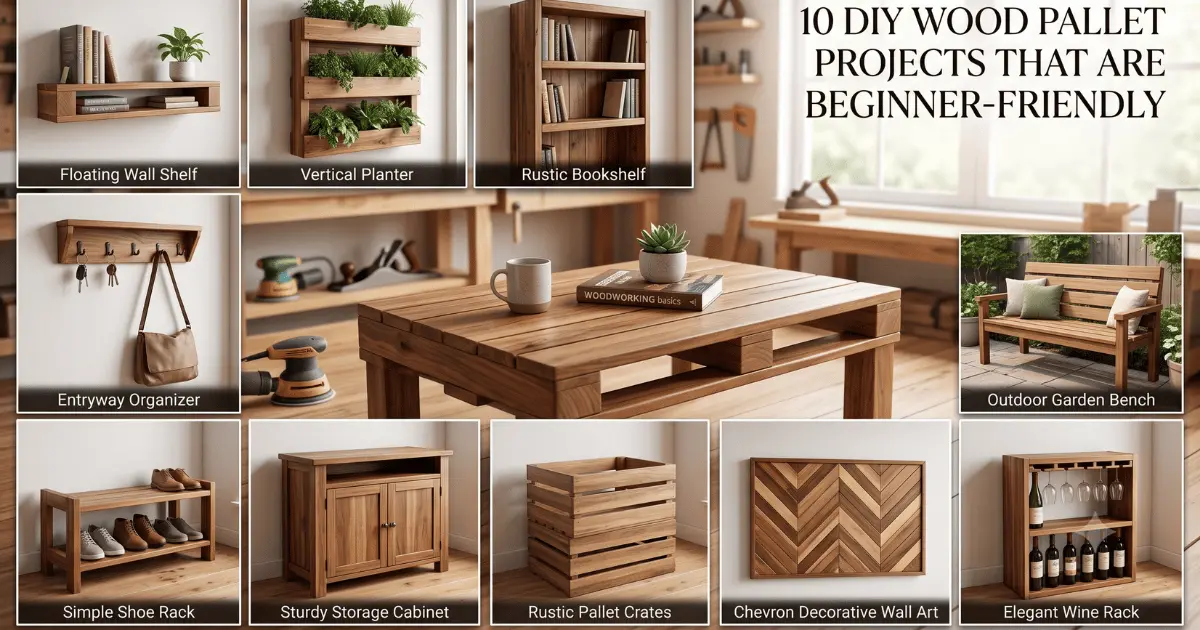
Want to turn discarded planks into show-stopping furniture that guests will swear came from a boutique store? You can transform simple scraps into polished pieces that lift your home style and save money.
This guide walks you through ten easy-to-follow builds with clear measurements and pro techniques. You will learn how to source safe materials, set up a tidy workspace, and apply finishes that give each project a refined look.
Whether you are new to making things or you already have some experience, these step-by-step instructions help you build with confidence and get a high-end result on a budget.
Key Takeaways
- You will learn ten step-by-step builds that look professionally made.
- Each project includes measurements and finishing tips for a refined result.
- Guidance covers sourcing safe materials and preparing your workspace.
- Techniques are friendly for beginners yet useful for experienced makers.
- Following these plans saves money while elevating your home style.
Getting Started with DIY Wood Pallet Projects
Choosing safe pallet wood is your first win. Look for clean, dry boards at grocery stores, big-box retailers, or local warehouses. Always ask permission before taking pallets—many businesses reuse them or return them to suppliers.
Inspect each pallet for stamps and odours. Reject any that smell of chemicals or show heavy staining. If you plan to make pallet furniture, favour pallets marked for heat treatment (HT).
Prepare reclaimed wood by removing nails, sanding rough spots, and flattening warped planks. Gather basic tools: a pry bar, circular saw, drill, sander, and clamps. Set up a clean, well-lit space and wear safety gear.
Finishing makes the difference. Sand progressively from coarse to fine grit, then choose stain or paint to match your decor. Seal with a clear coat for durability and easy cleaning.
- Avoid common mistakes: skipping inspections, poor sanding, and rushing assembly.
- Plan every cut and test-fit before fastening to save time and materials.
With care, you can make pallet pieces that expand your usable space and spark fresh ideas for future wood projects.
Sourcing and Selecting Safe Pallet Wood
Begin your search with a close look at markings and overall condition to avoid unsafe materials. Choosing the right boards keeps your home healthy and makes every build more enjoyable.
Focus on stamps first. The “HT” mark means heat-treated and is safe for indoor use. Avoid pallets stamped “MB” — methyl bromide is toxic and not suitable for household pieces.
Identifying Safe Stamps
- Look for “HT” on the pallet; this confirms heat treatment and safer handling.
- Reject any pallet with “MB” or unknown chemical abbreviations.
- Note country codes and manufacturer marks for extra context about origin.
Inspecting for Damage
Before you start any project, inspect every pallet for mould, pests, or structural damage. Do not bring contaminated boards into your home.
When using pallet wood, pick only clean, untreated, or heat-treated boards for furniture builds. This protects your family and preserves the finish.
| Stamp | Meaning | Recommended Action |
|---|---|---|
| HT | Heat-treated (no chemical fumigation) | Safe for indoor use; acceptable for furniture |
| MB | Methyl bromide fumigation (chemical) | Avoid; do not use indoors |
| Unmarked / Damaged | No clear treatment info or visible contamination | Discard or use only for non-living-area, outdoor tasks |
| Clean & Stamped | Properly labelled, no mould, no pests | Good choice for finished furniture |

Essential Tools for Your Workshop
The right set of tools turns rough boards into polished furniture with less frustration.
Start with demolition and cutting gear. A pry bar and hammer let you dismantle pallets safely. Add a circular saw for straight, repeatable cuts that fit your plans.
Sanding and fastening matter for a refined finish. A quality sander will smooth surfaces so stains and paints apply evenly. Pair a reliable drill with a set of wood screws to assemble each piece with strength and accuracy.
Measure twice, cut once. A measuring tape and a carpenter’s square keep your corners true and edges level. These small tools save time and material on every project.
Never skip safety gear. Gloves and goggles protect you when prying, cutting, and sanding reclaimed material. Add a dust mask and hearing protection for longer sessions.
When you gather these basics, you’ll be ready to tackle any diy pallet build with the efficiency of a seasoned maker.
Preparing Reclaimed Wood for Construction
A calm, methodical approach to taking pallets apart saves material and keeps you safe.
Begin by clearing a well-lit area and laying out the boards by size. Keep your tools—a pry bar, hammer, and saw—within reach so you work steadily and avoid rushed cuts.
Safe Dismantling Techniques
Start by levering the stringers with a pry bar and tap with a hammer to loosen boards. Work slowly to prevent splitting and to keep boards usable for your project.
Pull every nail and staple with a nail puller or pliers. Removing metal early protects sanders and planers and helps you make pallet wood that is safe and strong.
- Wear gloves, safety goggles, and a dust mask at all times to prevent splinters and inhalation of fine particles.
- Use a planer or heavy-duty sander to flatten and smooth boards before assembly.
- Sort boards into groups: prime pieces, filler slats, and those only fit for outdoor use.
“Meticulous prep is what separates an amateur build from a piece that looks professionally made.”
Take your time cleaning and prepping the material. When you make pallet wood ready for the bench, the final piece is more durable, smooth, and visually appealing.
Crafting Functional Pallet Furniture
Turn simple boards into sturdy, stylish furniture that fits your home and budget. These builds are practical and look great in a living room or on a patio.
Coffee Tables
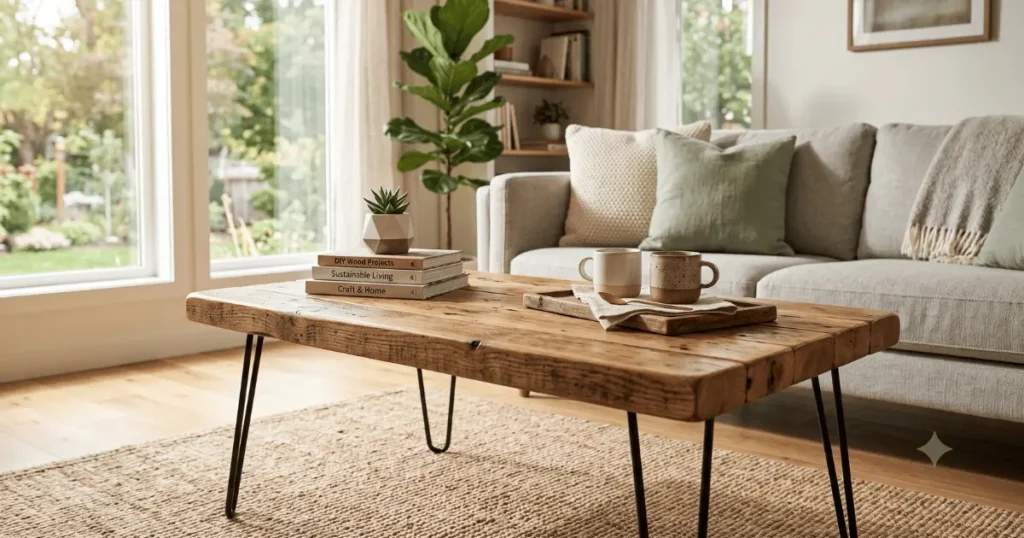
Beginner-friendly and fast to finish. A basic coffee table is an ideal starter. Estimated difficulty: easy. Build time: about 4 hours. Budget: under $30.
Add castor wheels for mobility and a clear coat to protect the surface. Check that the joints are secure and level before finishing.
Outdoor Benches
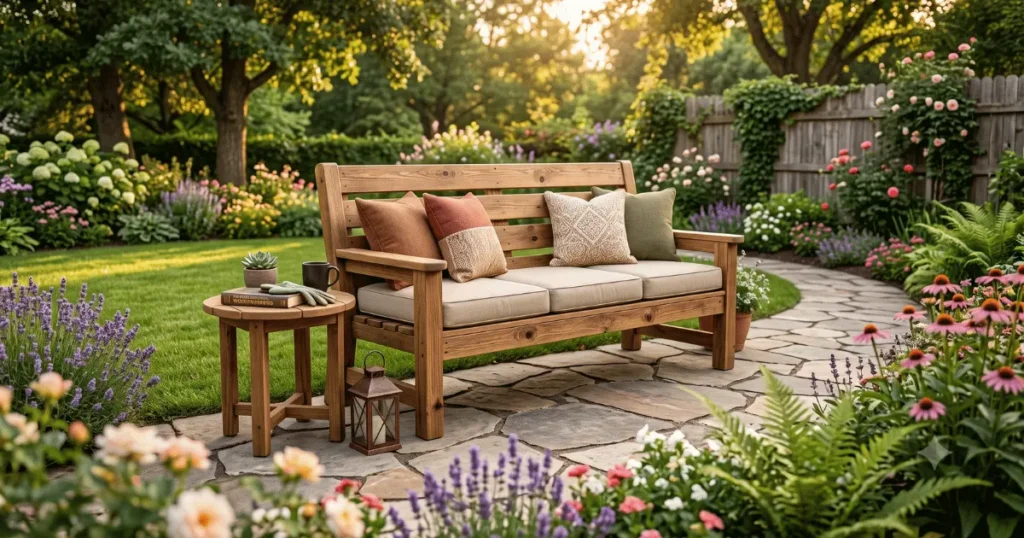
Join two pallets to form a wide seat and reinforce with screws and braces. Difficulty: medium. Time: 3–6 hours, depending on reinforcement. Budget: $25–$60.
These benches save space and can be sealed for weather resistance. Inspect each piece for stability and replace any damaged slats.
| Item | Difficulty | Time | Approx. Budget |
|---|---|---|---|
| Pallet coffee table | Easy | ~4 hours | Under $30 |
| Outdoor bench (2 joined) | Medium | 3–6 hours | $25–$60 |
| Rolling coffee table (with wheels) | Easy | 4–5 hours | $35–$70 |
Building Stylish Wall Shelves and Storage
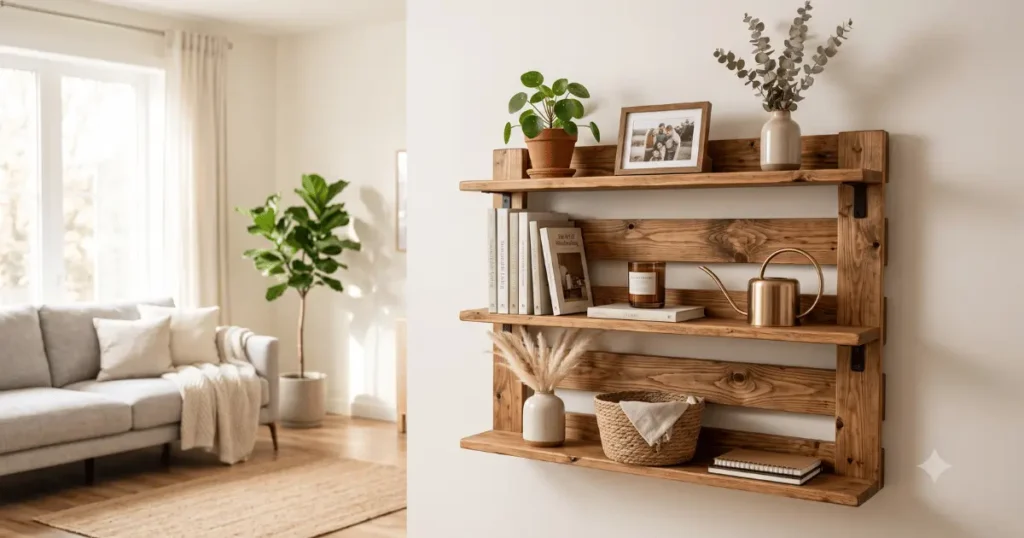
Transform scrap boards into sleek wall shelves that lift any room’s style. With a few straight cuts and secure anchors, you can make storage that looks like it came from a boutique.
Build a forward-facing bookshelf for a bedroom to display books and invite kids to read. These pallet wood shelves use simple shelves and a backing board so volumes sit safely and face forward.
Create a wall-mounted storage rack for your entryway to hold coats, bags, and daily gear. Mount the unit with studs or heavy-duty anchors so the shelf can carry jars, books, or a small coffee table tray without sagging.
- These storage units are a great way to organise clutter and add rustic charm.
- Most builds need only a few boards and basic tools, so you can finish in a weekend.
- Finish with a clear coat to highlight grain and protect surfaces.
Follow detailed plans to space shelves evenly, reinforce corners, and achieve a professional result that suits your home.
Creating Unique Garden Planters and Vertical Gardens
Turn a narrow outdoor corner into a living tapestry by stacking planters vertically on a single wall.
A vertical garden is ideal when you have limited space and want fresh herbs or bright flowers close by.
Build a simple pallet planter by lining the back with landscape fabric to hold soil and slow rot. Add drainage holes and a gravel layer so roots stay healthy.
Paint or stain the wood to match your patio, or leave it raw for a rustic look. These garden features are highly customizable and easy to refresh each season.
- Stack pockets on a sun-facing wall for herbs.
- Use heavy-duty anchors for a secure mount.
- Consider a small swing for a cosy seating nook nearby.
“A bit of creativity turns reclaimed boards into a lush, green sanctuary.”
Place your planters where drainage is good and rotate crops to keep the soil fresh. With simple steps, these pallet wood solutions can transform your outdoor space into something that looks professionally designed.
Designing Rustic Décor and Entryway Organisers
You can craft charming rustic accents that keep keys, photos, and mail tidy while lifting your home’s style.
An entryway organiser made from pallet wood gives you a functional piece that holds daily items and displays photos. Add hooks for keys and a shallow shelf for mail.
A simple American flag wall hanging is a quick way to add patriotic charm. Use stencils, spray paint, and light distressing to achieve a vintage finish in a few hours.
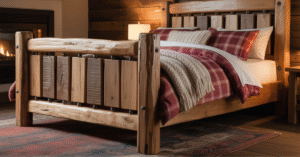
Make a compact desk organiser from a single board to corral pens and a phone. For a larger statement, a headboard built from reclaimed boards warms a bedroom or living room and reads as a custom-made pallet piece.
- Distress paint for a lived-in look that fits many decor styles.
- Use anchor hardware for wall items near a table or swing.
- Display photos and small plants to personalise each piece.
“Small, practical builds give your home character and function—fast.”
| Item | Time | Use |
|---|---|---|
| Entryway organizer | 1–3 hours | Keys, mail, photos |
| American flag wall hanging | 1–2 hours | Wall decor, garden accent |
| Desk organizer / small shelf | 30–90 minutes | Workspace tidy, phone holder |

Mastering Sanding and Surface Preparation
Sanding is the step that turns rough reclaimed boards into pieces you can proudly display.
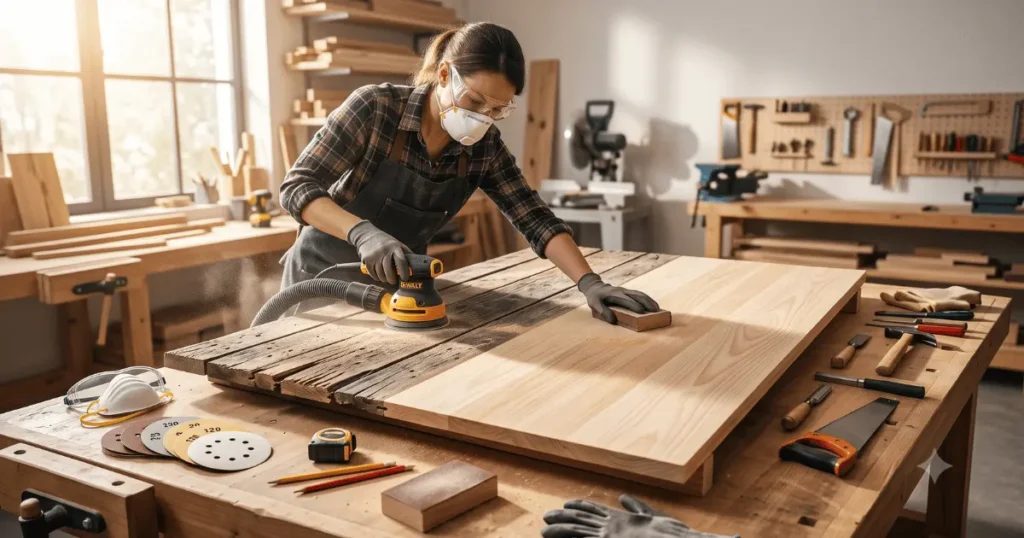
Start coarse, finish fine. Begin with a 60–80 grit to remove splinters and uneven spots. Follow with 120 grit, then 220 for a smooth finish.
Why this matters: Proper prep helps paint or stain grip evenly and prevents blotches on a table or shelf.
Sand edges carefully when you build a wall unit or a garden planter. Smooth edges improve safety and make the piece look polished.
“A well-sanded pallet piece will feel smooth to the touch, proving reclaimed wood can be just as refined as new lumber.”
Use a power sander to speed work on broad faces, then hand-sand corners for control. This saves time and gives crisp results for your next project.
| Grit Range | Use | Pro Tip |
|---|---|---|
| 60–80 | Remove rough spots, old finishes | Keep motion steady to avoid gouges |
| 120 | Even surfaces, blend repairs | Check with your hand for smoothness |
| 220 | Final polish before paint or oil | Wipe dust between steps for best adhesion |
Finish check: Run your palm across the grain. If it feels soft and even, you’re ready to seal, stain, or paint the made pallet wood piece.
Applying Professional Stains and Paints
A careful finish brings reclaimed boards from rough to refined, giving each piece a showroom feel.
Start with a clean, sanded surface. Use progressive grits so the stain or paint sits evenly and the grain shows true. A high-quality stain enriches the grain and gives pallet wood a rich, professional look.
If you prefer a modern finish, cover the boards with paint to match your room. Always apply primer first, so the final colour stays vibrant and lasts, especially for outdoor pallets and a table you use often.
Try techniques like whitewashing or light distressing for a custom feel. These methods let you control the final look and add character without heavy work.
- Use stain to highlight grain; choose paint for colour control.
- Prime painted surfaces for durability and true colour.
- Seal everything with a clear topcoat to resist moisture and scratches.
“Taking time with your finish turns a simple diy build into something that looks like it belongs in a boutique.”
Common Mistakes to Avoid During Assembly
Small shortcuts in assembly can turn a weekend build into a long-term headache. Catching simple errors early keeps your piece stable and safe. Use checks and smart habits so your finished table or storage unit holds up for years.
Ignoring Structural Integrity
Don’t skimp on reinforcement. A loose joint will show up as a wobble in a coffee table or a sag in a shelf. Always double-check joints and add screws, glue, or corner braces where needed.
Test before finishing: press, rock, and inspect every connection under load. If something shifts, fix it now rather than after the finish is on.
Skipping Safety Gear
Working without gloves, goggles, or a dust mask is risky. You can cut, splinter, or inhale dust when you cut or sand reclaimed wood.
Keep basic protective tools nearby and wear them every time. Good habits reduce downtime from injuries and keep your workspace productive.
Poor Sanding Habits
Sanding too fast or stopping early leaves rough patches that ruin the final look of your furniture. Sand in stages and wipe dust between grits for a smooth surface.
Finish-sanding corners by hand for control. A well-prepared surface makes stain and paint apply evenly and gives a professional result to your project.
- Measure twice before each cut to avoid wasted material.
- Reinforce joints with screws or glue to prevent failure over time.
- Keep your tools sharp and clean for safer, cleaner cuts.
“By being mindful of these common pitfalls, you can build with confidence and ensure your creations are both durable and beautiful.”
The Importance of Detailed Woodworking Plans
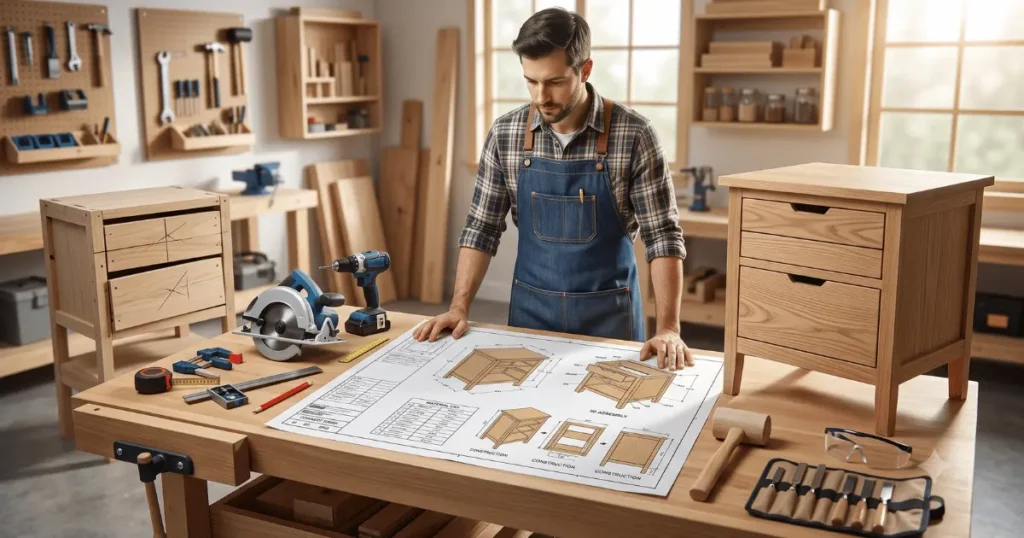
Clear, precise plans are the secret to building pieces that fit your home and last for years.
Start with measurements, a cut list, and a full materials list. These elements save trips to the store and prevent costly mistakes. When you know each board, screw, and finish, assembly is calm and predictable.
Step-by-step instructions guide you through complex builds like a coffee table or a pallet bookshelf. They help you visualise how the final table or shelf will sit in your living room or bedroom space.
- Precise measurements and cut lists give you confidence and accuracy.
- A materials list ensures you have all items before you begin.
- Ordered steps reduce errors and keep structural integrity intact for furniture.
Whether you are making an American flag decor piece, a garden planter, an entryway organiser, or a compact desk, following a professional plan helps the final piece look and function like it came from a boutique. That clarity also makes finishing—stain, paint, or oil—simpler and more consistent.
“Good plans turn imagination into a reliable build that fits your room and your life.”
Adding a Personal Touch with Branding
A simple brand can tell viewers your story and make each piece unmistakably yours.
Use a custom mark to raise the perceived value of your finished pieces. A small, neat stamp turns a common item into a signature creation. It also signals that you stand behind your work.
Gearheart branding irons are a reliable way to mark your work with your name or logo. They heat evenly and leave a crisp impression on most finishes. Many makers use a brand to both sign and protect their images online.
- Adding a custom brand to your pieces is a great way to leave a unique mark that shows craftsmanship.
- Use a branding iron on a desk organiser or larger furniture so your work is clearly identified as yours.
- Ordering a custom iron is easy; you can stamp your name or logo onto any finished surface, including a made pallet item.
- Branding also helps prevent others from using your photos without credit.
“Taking this final step shows you take pride in your work and helps your creations look truly professional.”
🪵 Build Better. Waste Less. Create with Confidence.

You don’t need expensive tools or years of experience to build amazing pallet projects. You just need plans that actually work.
✅ Why Thousands of Woodworkers Choose Ted’s Woodworking
- ✔️ 16,000+ tested woodworking plans
- ✔️ Easy step-by-step instructions anyone can follow
- ✔️ Exact measurements and complete cut lists
- ✔️ Detailed materials lists—buy only what you need
- ✔️ 3D diagrams & professional schematics
- ✔️ Projects for beginners and experienced woodworkers
- ✔️ Lifetime updates with new woodworking plans
- ✔️ Build confidently without costly mistakes or wasted lumber
🚀 Ready to Build Your Next Project?
Whether you’re creating a pallet coffee table, garden planter, wall shelf, or outdoor bench, Ted’s Woodworking gives you the complete blueprint from the first cut to the final finish.
Stop guessing. Start building with confidence. Your next DIY masterpiece begins with the right plan.
Conclusion
Wrap up your work with confidence—each finished piece adds warmth and function to any room.
Creating a project from reclaimed boards rewards you with unique accents that lift your home. By sourcing safe materials, preparing surfaces, and using pro finishes, you get results that look cared-for and last.
Remember: practice builds skill. Every diy build teaches fitting, fastening, and finishing. Safety and precision keep your pieces strong and reliable for years.
We hope these ten ideas inspire you to start, finish, and share your work. Show others how sustainable creativity turns simple wood and pallet materials into beautiful, usable art.
FAQ
What are the safest ways to find and choose reclaimed pallet wood for furniture?
Look for stamps like HT (heat-treated) on the boards, avoid MB (methyl bromide) markings, and inspect for heavy stains, mould, or signs of chemical exposure. Choose straight boards with minimal rot and check for nails or embedded hardware. Visit stores, warehouses, and home centres that discard pallets and ask staff about their use to increase the chance of finding clean, usable material.
How do you dismantle pallets without damaging the boards?
Use a pry bar and a hammer or a reciprocating saw with a demolition blade to cut through nails rather than prying. Work slowly, supporting the board to prevent splitting, and remove nails with a cat’s paw or nail puller. Wearing gloves and safety glasses protects you while preserving long, intact boards for tables, shelves, and planters.
Which basic tools should you have before starting a pallet furniture build?
Start with a circular saw, drill/driver, sander, pry bar, measuring tape, and clamps. Add a mitre saw and orbital sander for faster, cleaner cuts and finishing. A screw selection, wood glue, and a nail gun help with assembly. Proper tools speed up work and improve the look of coffee tables, benches, and shelving.
How do you prepare reclaimed boards for staining or painting?
Clean boards with a mild detergent and water, then allow them to dry fully. Sand progressively—from coarse to fine grit—to remove splinters and old finish, and fill cracks or holes with exterior wood filler if needed. Wipe surfaces with a tack cloth before applying primer, stain, or paint to achieve an even, professional finish.
What finishing products work best for indoor pieces like a living room coffee table?
For indoor furniture, use a high-quality stain or water-based finish followed by a clear polyurethane or hard-wax oil for durability. Water-based poly dries fast, has low odour, and keeps colours true; oil finishes add depth and a natural feel. Always test on a scrap board to confirm the look.
Can you use reclaimed boards outdoors for garden planters and benches?
Yes, but choose rot-resistant species naturally when possible and seal all sides with exterior-grade stain or paint. Line planters with landscape fabric to protect wood from constant moisture and elevate outdoor benches on feet or pavers to reduce ground contact. Regular maintenance extends life.
How do you ensure structural integrity when building larger items like benches or a desk?
Start with a solid frame using thicker, undamaged boards or new lumber for the load-bearing parts. Use proper joinery—pocket screws, mortise-and-tenon, or heavy-duty brackets—and reinforce long spans with centre supports. Test the weight capacity early and adjust bracing to prevent sagging.
What safety gear is essential during cutting, sanding, and assembly?
Always wear safety glasses, work gloves, and a dust mask or respirator—especially when removing old finish or sanding. Use hearing protection when operating loud power tools and wear closed-toe shoes. Keep a first-aid kit and a fire extinguisher nearby for emergencies.
How can you add personalised touches like photos, stencils, or an American flag motif?
Use stencils and painter’s tape for crisp designs, and transfer photos with decoupage medium or printable transfer papers. For an American flag motif, sand crisp lines and use high-quality exterior paint if the piece will sit outdoors. Seal designs with a clear topcoat to protect against wear.
What common mistakes should you avoid to get a professional-looking finish?
Don’t rush sanding—poor surface prep shows under stain or paint. Avoid using too many nails instead of proper joinery, skipping primer on painted pieces, or neglecting to remove all dust before finishing. Plan cuts and measurements carefully to minimise wasted boards and mismatched grain.
How do you design vertical gardens or planters using reclaimed boards?
Build a sturdy frame and use slats spaced to allow drainage. Line planter boxes with waterproofing or landscape fabric, and select plants based on sun exposure. For vertical gardens, create modular pockets or shelf tiers and secure the whole unit to a wall or freestanding frame for safety.
Where can you find woodworking plans and inspiration for entryway organisers and shelving?
Look to speciality magazines, woodworking websites, and maker forums for downloadable plans. Retailers like Home Depot and Lowe’s offer project guides, while YouTube creators demonstrate step-by-step builds. Use plans as a starting point and adapt dimensions to your space and stored items.
How should you store reclaimed boards before beginning a build?
Stack boards flat and elevate them off the ground on stickers (thin strips) to allow air circulation. Keep them in a dry, covered area to prevent warping and further moisture absorption. Rotate and inspect boards periodically to catch any developing issues before use.
Are there eco-friendly finishing and protection options for reclaimed furniture?
Yes—choose low-VOC or water-based stains and sealers, and natural oils like tung or linseed oil for a greener approach. Many brands, such as General Finishes and Rubio Monocoat, offer eco-friendly products that balance protection with environmental considerations.