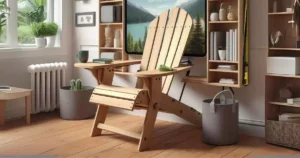
A well-made stool can transform a room’s look for less than the price of a single barstool. Many DIYers spend under $40 and end up with a piece that looks like it’s from West Elm or Anthropologie. If you like clean lines and function, making your Scandinavian wooden stool is a quick way to add modern charm to your home.
This guide will help you start minimalist projects with smart choices. You’ll learn about seat heights, the beauty of oak and birch, and how plywood or reclaimed wood can save money. These materials keep your stool looking modern and Scandinavian.
Whether you want a three-legged stool, a counter-height one, or a small bedside stool, these plans are for you. They balance simplicity, strength, and Scandinavian style. So, you can build a stool that fits your space and skills.
Key Takeaways
- You can achieve high-end modern Scandinavian furniture looks on a modest DIY budget.
- Standard stool heights guide your project choice for islands, counters, and low seating.
- Oak, birch, and ash deliver authentic Scandinavian tones; plywood and reclaimed wood are budget-friendly alternatives.
- Minimalist projects focus on proportion, function, and natural finishes over ornamentation.
- This guide pairs step-by-step plans with realistic time and tool recommendations so you can start building confidently.
Introduction to Scandinavian wooden stool design and minimalist projects
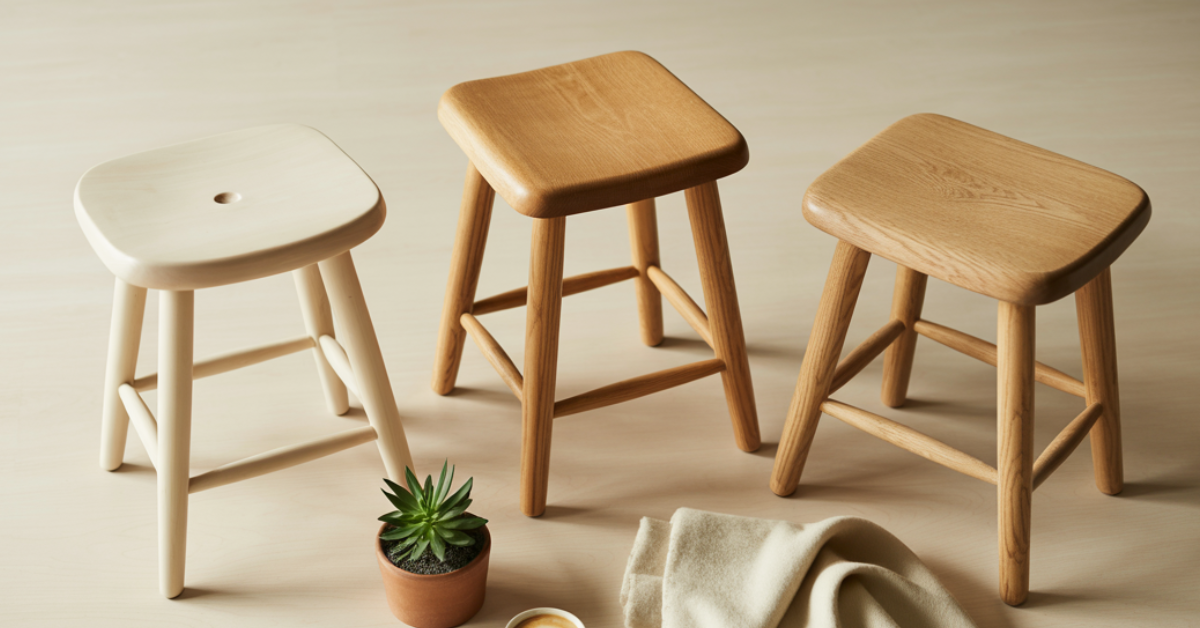
Scandinavian wooden stools mix clean lines with warm wood. They use neutral colours and solid woods like oak and birch. These stools are perfect for kitchen islands, breakfast bars, and entryways.
Why Scandinavian stools suit modern homes
These stools are great for modern homes because they focus on function over fancy designs. A simple three-legged stool or a slim counter stool can save space. They add a quiet touch without clashing with other decor.
Core principles: simplicity, function, and natural materials
The main idea is to keep things simple and useful. Use natural wood for its texture and durability. This makes your space feel calm and intentional.
What to expect in this how-to guide
This guide offers easy-to-follow steps for DIY projects. You’ll get cut lists, assembly tips, and advice on scaling. This way, you can make these stools for any size space, from small apartments to big kitchens.
Materials and tools for homemade wood stool ideas
Make a list of what you need to keep your project simple. The right wood, tools, and finishes will help you make most Scandinavian designs easily.
Recommended woods for Scandinavian aesthetics (oak, birch, ash)
Oak, birch, and ash are great for a Scandinavian look. Oak is strong for legs and seats. Birch is easy to work with for painted or clear finishes.
Ash is good for curved seats or tapered legs. Use quarter-sawn boards for stable legs and seats. Choose boards that fit well together to avoid problems.

Essential hand and power tools for simple wooden furniture diy
Start with basic tools. A circular saw and jigsaw do most cutting. A router shapes edges and makes clean joins.
A drill/driver and clamps help with assembly. A sander and chisels refine the finish. Wear safety gear when working.
Finishes, fasteners, and eco-friendly options
Choose the right fasteners for your stool. Dowels and mortise-and-tenon joints are good for weighty stools. Screws and pocket screws are quicker for prototypes.
For finishes, try tung oil, Danish oil, or water-based polyurethane. These options are natural and durable. Test them on scrap wood first.
| Item | Why it matters | Recommended choice |
|---|---|---|
| Primary woods | Defines look, strength, and grain | Oak for strength, birch for smoothness, ash for bend and grain |
| Sawing options | Stability and movement resistance | Quarter-sawn for legs; plain-sawn for wide seat panels |
| Basic power tools | Speeds accurate cuts and shaping | Circular saw, jigsaw, router, random-orbit sander |
| Hand tools | Fine-tune fits and surfaces | Chisels, hand plane, good clamps, drill/driver |
| Joinery & fasteners | Strength and assembly simplicity | Dowels, pocket screws, and wood screws sized to the thickness |
| Finishes | Protection and final appearance | Tung oil, Danish oil, water-based polyurethane, low-VOC options |
| Eco choices | Sustainability and indoor air quality | FSC lumber, reclaimed wood, low-VOC finishes |
| Safety | Prevents injury and protects health | Eye and hearing protection, dust mask, push sticks |
| Beginner kit | Allows first builds without heavy investment | Circular saw, drill/driver, clamps, sander, basic chisels |
| Skill builder tools | Improves accuracy and finish quality | Router, dowel jig, pocket-hole jig, bench plane |
Basic joinery and techniques for building durable stools

Before you start cutting, make sure you know the joinery you’ll use. Many sturdy frames use simple joinery for strength. Choose methods that fit your skill level for reliable and lasting work.
Joinery methods: dowels, mortise-and-tenon, and pocket screws
Dowels are great for quick, neat builds. Use a drill guide and glue for accurate alignment. Pocket screws are perfect for modern, minimal frames in handmade furniture.
Mortise-and-tenon joints need more setup but offer unmatched strength. Brands like Festool and Porter-Cable make tools that make cutting tenons and cleaning mortises easier.
Shaping seats: carving, steam-bending, and layered plywood
Carving a solid-wood seat with a spokeshave and rasps adds a classic touch. Work in small passes and check the curve on your lap often. This method is great for handmade furniture.
Steam-bending thin laminates creates smooth, organic curves. Use a steam box and form blocks to hold the shape until it cools. Layered plywood is another option, offering consistent results in Scandinavian crafts.
Tips for safe woodworking and accurate measurements
Measure twice, cut once. Use jigs for repeatable cuts and mark parts clearly to avoid errors. Many online plans include dimensioned drawings to help.
Wear eye and ear protection, and use push sticks and blade guards on table saws. Set fences and stops for accurate cuts. Accurate work habits keep your build efficient and your workshop safe while you develop skills in simple wooden furniture diy and Scandinavian diy crafts.
Design principles for minimalist projects in Scandinavian interior design trends

Think about proportion and open space first. Scandinavian stools look best when their size matches the room. Keep the design simple to create a calm and intentional look.
Proportions, negative space, and multifunctional use
Match stool height to its function. Use counter stools for islands and lower stools for entryways. Compact heights work well for bedside surfaces.
Keep seats apart to preserve negative space. This makes the room feel airy.
Design stools to serve two purposes. A small wooden stool can be both a seat and a side table. Choose sturdy construction for long-lasting use.
Colour palettes and natural textures that match modern Scandinavian furniture
Stick to a simple colour scheme: whites, soft greys, muted pastels, and warm wood tones. These colours let texture be the focus, not decoration.
Use matte finishes to show off natural grain. Add woven cushions in linen or wool for texture. This connects the stool to other modern Scandinavian pieces.
How to scale a stool to different rooms: kitchen, entryway, and bedroom
In kitchens, follow standard counter and bar heights. Make sure there’s at least 12 inches of knee room. This ensures comfort and aligns with island use.
Entryway stools should be low and stable for shoe removal. Use solid legs and non-slip feet for everyday use.
Bedroom stools can be used as seating or as a foot-of-bed accent. Keep them modest in size to fit beside dressers or at the bed’s foot without blocking the way.
- Proportion tip: measure existing furniture before finalising stool height.
- Texture tip: favor single-material surfaces or subtle mixed textures.
- Function tip: design for at least two uses to add value in small spaces.
diy scandinavian wooden stool designs minimalist projects
You’ll find 15 small, modern stool plans here. They fit different skill levels and spaces. Each project aims to mix function and beauty, so you can choose one that suits your skills and style.
Overview of the 15 projects and difficulty levels
The collection ranges from simple three-legged stools for beginners to complex bent-plywood and mortise-and-tenon designs for experts. Many designs are inspired by Pinterest and product boards, making it easy to find what you like.
Beginners can start with pocket-screw assemblies and simple cut lists. Intermediate projects include shaped seats and tapered legs. For a bigger challenge, advanced plans require steam-bending, precise joinery, or complex angles.
How to choose a project based on skill, tools, and purpose
First, list your tools and available workshop time. If you have basic tools like a circular saw, drill, and sander, choose plywood or pocket-screw designs. These are quicker to make.
If you have more advanced tools like a band saw, router, and chisels, go for mortise-and-tenon or steam-bent seats. These projects are more challenging but rewarding.
Links between project selection and Scandinavian DIY crafts trends
Scandinavian DIY trends include minimal designs, natural woods like oak and birch, and versatile pieces. Look for compact stools that can also serve as side tables and bent-plywood seats that look like high-end furniture.
Choosing a project that follows these trends means you’ll create something that looks both handmade and modern. Use simple finishes like wax, Danish oil, or clear lacquer to keep the look clean and minimalist.
Fifteen DIY stool project briefs: from beginner to advanced
Start with a clear plan for each stool brief. Know the materials, time, and scale before you cut wood. These project summaries group ideas by function and skill. They give you quick references to start your next build in handmade minimalistic furniture.
Project categories: counter stools, low stools, accent stools, multipurpose stools
Counter stools: Use tall seat heights and sturdy joinery. Typical woods include oak and birch for visible grain and strength. Expect simple three- or four-leg designs for stable seating.
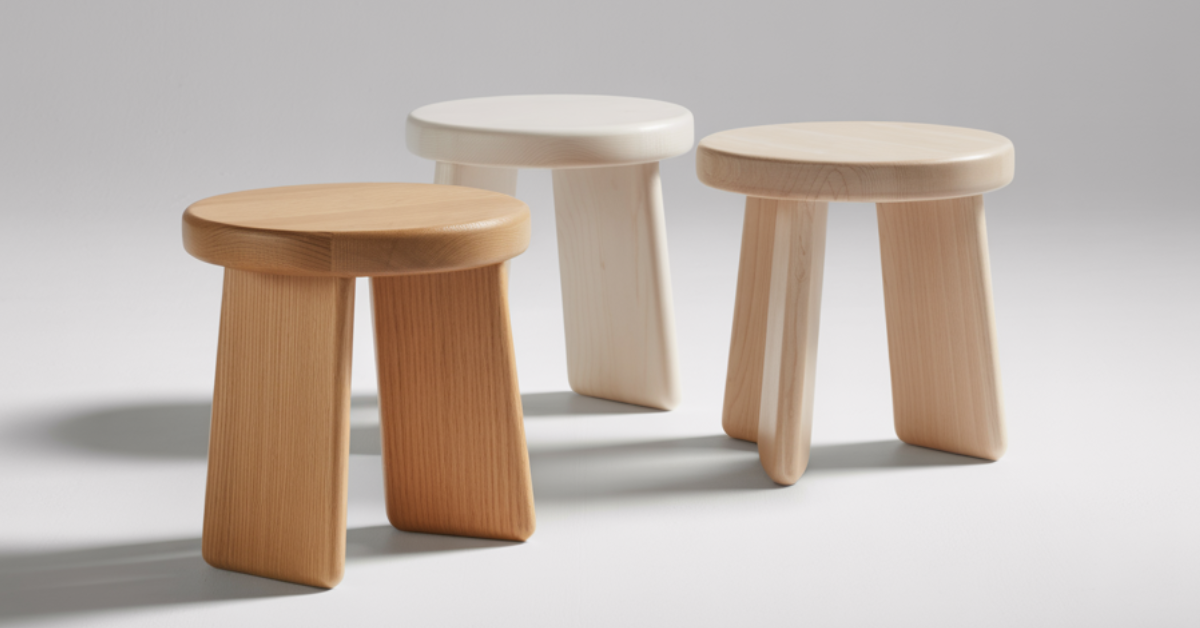
Low stools: compact seats work well in living areas and bedrooms. Ash and plywood offer lightweight and smooth shaping. These are quick builds that suit many diy home decor projects.
Accent stools: focus on form and texture. Thin tapered legs, carved seats, or leather straps add visual interest. These pieces make great handmade minimalistic furniture accents without heavy ornamentation.
Multipurpose stools: add storage, removable trays, or nesting sets. Use robust joinery and plan for hardware. These transform a basic stool into a practical item for small homes and busy households.

Materials list and time estimates for each category
Beginner briefs (a few hours to one weekend): 1x oak or birch boards, 3–4 legs, wood glue, 3″ screws, sandpaper, oil finish. Plans focus on straight cuts and pocket screws so you can finish quickly.
Intermediate briefs (weekend plus finishing): mixed hardwoods, dowels or mortise-and-tenon joints, hand tools for shaping, upholstery foam for optional seats. Allow drying time for glue and oil or varnish coats.
Advanced briefs (multiple weekends): laminated or steam-bent seats, tapered leg sets, complex joinery, CAD-refined templates. Budget extra hours for trial fits, curved shaping, and applied finishes.
Suggestions for customising each brief to your style
Change wood species to shift tone: ash for pale warmth, oak for classic grain, birch for smooth light surfaces. You can swap a clear oil for a tinted stain to match your palette.
Add simple upholstery with muted linen or leather strips for subtle comfort while keeping minimalist lines. Taper leg profiles or alter seat diameter to adapt stools for counters, bedside tables, or plant stands.
Use printable plans or CAD templates to scale dimensions before cutting. Small tweaks to leg angle or seat thickness can improve ergonomics and let your homemade wood stool ideas fit exactly where you want them.
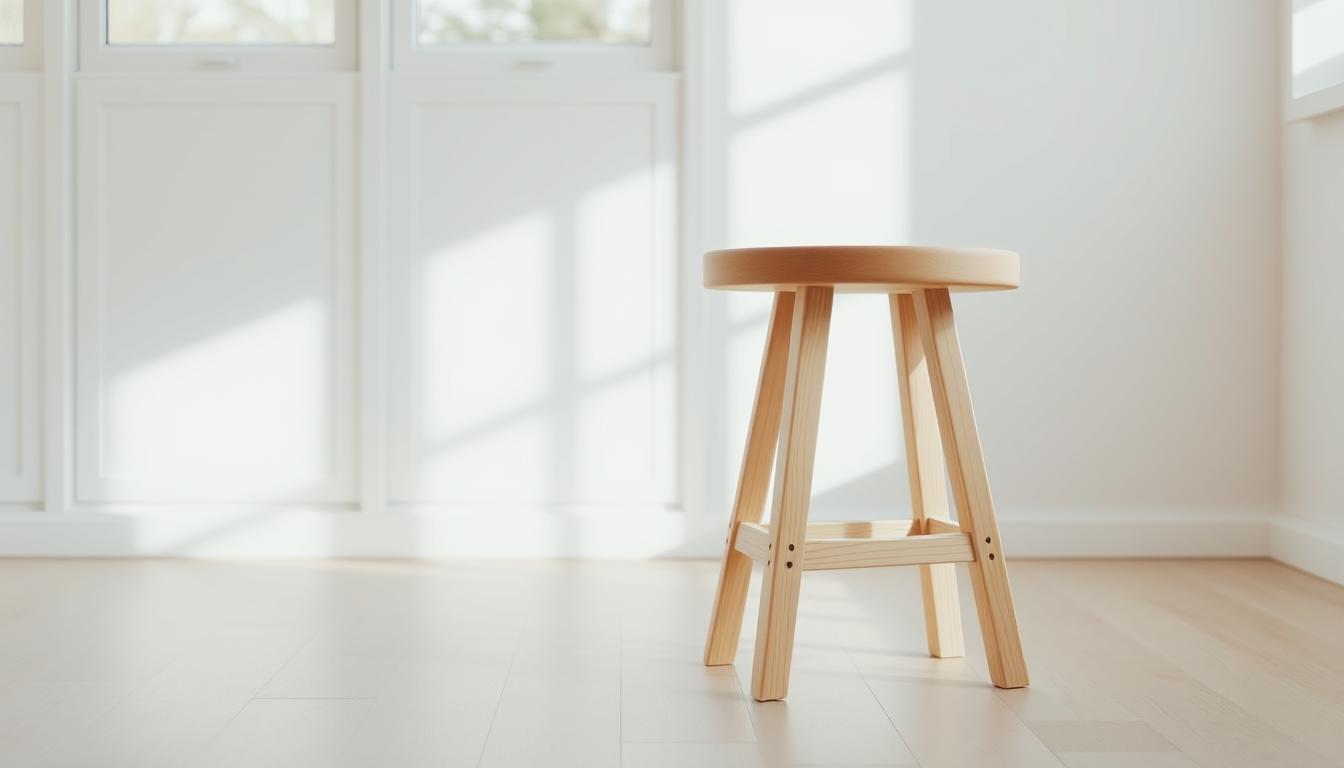
Step-by-step build example: a simple Scandinavian three-legged stool
This project is perfect for a quick afternoon build. You’ll learn to plan heights, prepare parts, and assemble the stool. It’s great for those starting with simple wooden furniture DIY, and fits well in modern homes.
Cut list and material preparation
Use hardwoods like oak or birch, 1″ to 1¼” thick, for stability. For a counter-height stool, aim for a seat height of 24″. For a bar stool, it’s closer to 30″. You’ll need three legs, one seat, and dowels for assembly.
Start by cutting the legs and preparing the seat. Use a mitre saw for leg cuts and a router for the seat. Planning ensures all parts are the same thickness.
Assembly sequence
Mark leg angles on a jig and cut them with a mitre saw. Then, lay out the leg sockets on the seat’s underside. You can use mortises for a strong connection or dowel holes for a simpler join.
Assemble the stool, checking for alignment. Glue the legs into place and clamp everything. Ensure the stool is stable by checking the seat height and leg spacing.
Seat shaping and joinery details
Use a router or spokeshave to shape the seat. Round the edges for comfort. If using mortise-and-tenon joinery, trim the tenons and sand the joints for a clean look.
Finishing touches: sanding, oiling, and spacing guidance
Sand the stool in stages: 120, 180, then 220 grit. Wipe with a tack cloth between grits. Apply a penetrating oil like boiled linseed or tung oil, following the directions.
Place stools 24″–30″ apart at an island. Keep about 12″ of knee clearance under counters. These measurements ensure comfortable seating and align with Scandinavian design principles.
Adaptations and variations: handmade minimalistic furniture ideas
See how simple changes can make a stool more useful at home. You can turn a three-legged seat into a small side table or plant stand. Just widen the top or apply a durable finish.
Retail examples from IKEA and West Elm show this works well. Use a clear oil or satin varnish to seal the surface.
You can keep the look simple but add comfort. Use thin foam pads covered in neutral linen. Hide staples under the seat edge.
This keeps the Scandinavian look but adds a soft seat. It’s perfect for living rooms and bedrooms.
Reclaimed wood and plywood are budget-friendly options. Layered birch plywood or bent-laminate seats give a modern look. Reclaimed oak or pine adds warmth, great with white walls and simple lighting.
Below is a compact comparison to guide your choice. It helps when planning homemade wood stool ideas or working on a simple wooden furniture diy.
| Adaptation | Best For | Material Tip | Estimated Time |
|---|---|---|---|
| Stool to side table | Entryways, balconies, living rooms | Wider top, oil finish for durability | 2–4 hours |
| Plant stand conversion | Indoor plants, small pots | Protective sealant, raised feet for drainage | 1–3 hours |
| Minimal upholstery | Comfort without bulk | Thin foam, linen cover, hidden staples | 1–2 hours |
| Entryways, balconies, and living rooms | Modern look, lightweight | Layered birch plywood, bent-laminate technique | 3–6 hours (plus glue cure) |
| Reclaimed wood build | Rustic-modern interiors | Reclaimed oak or pine, fill and seal | 4–8 hours |
When adapting, keep things simple and functional. These ideas fit the spirit of handmade minimalistic furniture. Each variation works well with a basic DIY plan, making it achievable for most DIYers.
Styling and placement in modern homes
Place stools where they can serve more than one purpose. A simple three-legged stool works as seating, a plant stand, or a bedside surface. Keep sightlines clear and let wood grain and neutral tones tie pieces into the room.
How to integrate stools into Scandinavian interior design trends
Match wood tones from your stool to existing accents like oak shelving or a birch coffee table. Group stools near a kitchen island or reading nook so they read as part of a set, not scattered extras.
Use spare stools to create rhythm along a hallway or under a console. Choose finishes that echo natural textures favored in modern scandinavian furniture to keep a calm, cohesive palette.
Pairing stools with islands, benches, and entryway storage
Tuck low stools beneath an island overhang to free floor space when not in use. Pair a bench and two stools in an entryway to offer flexible seating without overcrowding the area.
Opt for consistent proportions when mixing stools and benches. A low, wide bench with taller stools near it keeps the balance. Add a small basket or built-in shelf for storage to keep the space tidy and practical for daily life.
Photography tips for sharing your DIY home decor projects online
Shoot near windows for soft, natural light. Use plain, uncluttered backgrounds so details like joinery and grain stand out in close-up shots.
Take both context photos that show stools by an island or entryway, and tight detail shots of finishes and joints. Crop for Instagram and pin vertical images for Pinterest to increase visibility for your diy home decor projects.
Maintenance, safety, and longevity of scandinavian wooden stool
To keep a scandinavian wooden stool in great condition, start with a simple routine. Dust it weekly with a soft cloth and clean up spills right away. For oiled surfaces, re-oil every six to twelve months, depending on how much it’s used.
If the stool is in a busy area, use a durable polyurethane or conversion varnish. This will protect the wood grain and finish.
Care routines for different finishes and wood types
Light woods like birch and ash do well with gentle cleaning and occasional oiling. Oak can handle more aggressive finishes and a harder topcoat. Always follow the directions from Rubio Monocoat or Minwax when picking an oil or topcoat.
For water-based finishes, use a damp cloth with mild soap. Stay away from abrasive tools on natural oil finishes to keep the surface smooth. Replace the felt or rubber pads on the feet to protect floors and keep the stool stable.
Repair tips and reinforcing joinery for long-term durability
Regularly tighten screws and bolts to prevent wobbling. For loose joints, apply Titebond wood glue and clamp until it’s set. Add corner blocks or discreet metal brackets inside the apron to strengthen stress points without changing the look.
If a leg cracks, you can splice in a new section or fit a concealed steel dowel for strength. Replace worn-out feet with new rubber or silicone caps to keep a good grip and prevent damage. These tips will help your stool last longer and stay safe to use.
Child- and pet-safe finishes and stability checks
Opt for water-based finishes or natural oils that are low-VOC and certified non-toxic for kitchens and play areas. Brands like General Finishes and Osmo offer products that are safe for indoor use. Make sure finishes are fully cured before letting children or pets near the stool.
Check the stool’s stability by applying weight to the seat and seeing if it sways. A three-legged stool will sit flat on uneven floors; a four-legged one should have all feet touching the ground. Add non-slip pads to improve grip and protect flooring while reducing slip risks for kids and pets.
🪵 Build Your Dream Wooden Projects — The Easy Way!

Stop guessing and start creating with Ted’s Woodworking — the world’s largest collection of 16,000 “done-for-you” woodworking plans. Perfect for beginners & pros!
Why You’ll Love It:
- ✅ Step-by-Step Instructions — No confusion, just clear guidance.
- ✅ Exact Cutting & Materials Lists — Save time, money & wood.
- ✅ Detailed Schematics & Multiple Views — See every joint & angle before you cut.
- ✅ Projects for All Levels — From simple stools to advanced furniture.
- ✅ Lifetime Access + Free Monthly Plans — Endless ideas at your fingertips.
🎯 Turn your DIY ideas into pro-quality results — without expensive tools or years of experience.
👉 Click here to get instant access for just $67 — one-time only!
Conclusion
You now have a clear roadmap for tackling diy scandinavian wooden stool designs. Start by choosing oak, birch, or ash. Then, pick joinery that lasts.
There are many stool styles to choose from, fitting every need. Whether it’s a counter, low accent, or multi-use stool, size and material matter.
Follow step-by-step plans and safe woodworking practices. This will help you create beautiful pieces. With basic tools and careful planning, your projects can look professional.
Remember to choose the right finish and check for stability. This ensures your stools are both beautiful and functional.
Explore woodworking plan libraries and social creators for inspiration. They offer templates and ideas for all skill levels. Use accurate measurements and eco-friendly materials for durable, modern stools.
See each project as a chance to create something special. It’s a small, rewarding design challenge.
FAQ
What seat heights should I plan for when building Scandinavian-style stools for a kitchen island or counter?
For counter stools, aim for 24–26 inches for 36-inch counters. Bar stools should be 29–31 inches for 42-inch islands. Make sure to add 9–12 inches of knee clearance. This keeps the look airy and functional, fitting the modern Scandinavian style.
Which wood species work best for minimalist Scandinavian wooden stool designs?
Oak, birch, and ash are top picks for Scandinavian looks. They offer pale warm tones and strong stability. Plywood, like high-quality birch or Baltic birch, is great for layered seats. For reclaimed-wood stools, choose sound oak or pine boards. Remember to consider thickness and stability when cutting leg joinery.
What basic tools do I need to complete simple wooden furniture DIY stool projects?
Start with basic tools: a circular saw or mitre saw for straight cuts, and a jigsaw for curves. You’ll also need a drill/driver, pocket-hole jig or dowel jig, and a random-orbit sander. A router with a round-over bit is good for seat edges. Don’t forget clamps, chisels, and a hand plane for fine-tuning. Safety gear is crucial, including eye and ear protection, a dust mask, and push sticks.
How do I choose joinery for a durable stool: dowels, pocket screws, or mortise-and-tenon?
Choose joinery based on your skill, tool access, and desired durability. Dowels and pocket screws are quick and strong, perfect for beginners. Mortise-and-tenon offers heirloom-level strength and a clean look if you have the right tools. Always reinforce high-stress joints with glue and test-fit before final assembly.
Can I make a comfortable seat without complex upholstery while keeping a Scandinavian look?
Yes, you can. Carve a shallow dish into a solid-wood seat or sand plywood to a smooth shape. For a soft top, use a thin foam pad wrapped in neutral linen and stapled beneath the seat edge. This keeps the look minimalist and Scandinavian.
What finishes maintain the natural Scandinavian appearance while protecting the wood?
Natural oils like tung oil, Danish oil, or linseed enhance grain and give a matte finish. Water-based polyurethane offers extra protection while keeping a light tone. For eco-friendly options, choose low-VOC water-based finishes or certified natural oils. Re-oil periodically for oiled surfaces.
How long should I expect each DIY stool project to take, from start to finish?
Project time varies by complexity. Simple three-legged stools can be done in an afternoon. Intermediate projects like plywood or laminated-seat stools take a weekend. Advanced builds like steam-bent or mortise-and-tenon stools may take multiple weekends. Always plan extra time for finishing and small adjustments.
Where can I find reliable plans and cut lists for minimalist stool designs?
Woodworking plan repositories, CAD/DWG plan sellers, and social DIY accounts offer downloadable plans. Use these as templates and tweak dimensions to fit your needs. Choose plans that list required tools and difficulty level to match your workshop setup.
Are three-legged stools stable enough for everyday use in homes with kids or pets?
Properly designed three-legged stools are stable on uneven floors. Ensure leg spread and seat diameter provide a low centre of gravity. Use robust joinery and glue for durability. Add non-slip pads to feet and choose child- and pet-safe finishes with low VOCs.
Can I adapt a stool design into a side table or plant stand without major changes?
Yes. Increase the top diameter or use a protective finish for tabletops to convert a stool to a side table. For plant stands, consider a water-resistant finish or add a removable tray. Many Scandinavian designs translate directly into multipurpose pieces by adjusting scale, top thickness, or finish.
What are simple, budget-friendly material choices for homemade stool ideas?
Use high-quality plywood (Baltic birch) for moulded or layered seats. Domestic softwoods or reclaimed oak are good for legs and aprons. Reclaimed boards cut to the proper thickness save cost and add character. Combine plywood seats with solid-wood legs for a modern look that balances budget and aesthetics.
How should I plan spacing when grouping stools at an island to keep a Scandinavian, uncluttered feel?
Allow 24–30 inches centre-to-centre per stool for counter seating. This gives visual breathing room and comfortable elbow space. Keep stools aligned with island edges and leave negative space at the ends. Scandinavian design favours restrained layouts, so avoid overcrowding and maintain consistent wood tones where possible.
What sanding and finishing sequence produces a professional-looking matte stool surface?
Sand progressively from 120 to 220 grit for smoothness. Use a random-orbit sander for flat areas and hand-sanding for contoured seats. Remove dust thoroughly, then apply thin coats of oil or water-based finish. Wipe or brush between coats and light sanding with 320–400 grit between coats if recommended by the finish. Final buffing by hand preserves a matte, tactile surface.
How can I customise a plan to suit different rooms like entryways, bedrooms, and kitchens?
Scale the seat diameter and height to the room function. Lower stools (16–18 inches) are good for entryways or bedside use. Counter heights are best for kitchens, and slightly taller pieces for bar areas. Change wood species, taper legs, or add a small under-seat shelf for storage. Subtle upholstery or a protective top finish adapts stools to high-use zones.
What maintenance and repair tips keep your handmade minimalistic furniture looking great for years?
Routine dusting and periodic re-oiling extend oil-finished surfaces. Tighten screws and check joints annually; re-glue or add discreet corner blocks for loose connections. For surface damage, sand the affected area lightly and reapply the finish. Use floor protectors to prevent wear and stabilise legs on uneven floors.
Which finishes and woods are best if I want low-VOC, eco-conscious Scandinavian DIY crafts?
Choose FSC-certified lumber or reclaimed wood and low-VOC water-based polyurethanes, or natural oils certified for low VOC content. Beeswax- or plant-oil-based finishes can be used for decorative pieces but check durability for high-use surfaces. Always ventilate during finishing and follow product safety guidance.
Do plan packs typically include time estimates and difficulty ratings for stool projects?
Yes. Reputable plan libraries and sellers often categorise projects by difficulty and list time estimates, required tools, cut lists, and photos. Use those details to select projects that match your skill level and workshop resources; beginners should favour pocket-screw or dowel-based designs for faster, predictable results.
What photography tips help show off my DIY Scandinavian wooden stool projects online?
Shoot in natural light, use plain or neutral backgrounds, and capture detail shots of joinery and grain. Contextual images—stools at an island or beside a bench—help viewers gauge scale. Take vertical and square crops for Instagram and Pinterest, and include close-ups of finishes to show texture and craft.

Pingback: 20 Wooden Stool Designs for Living Room: From Rustic to Contemporary (2025 Trends)