
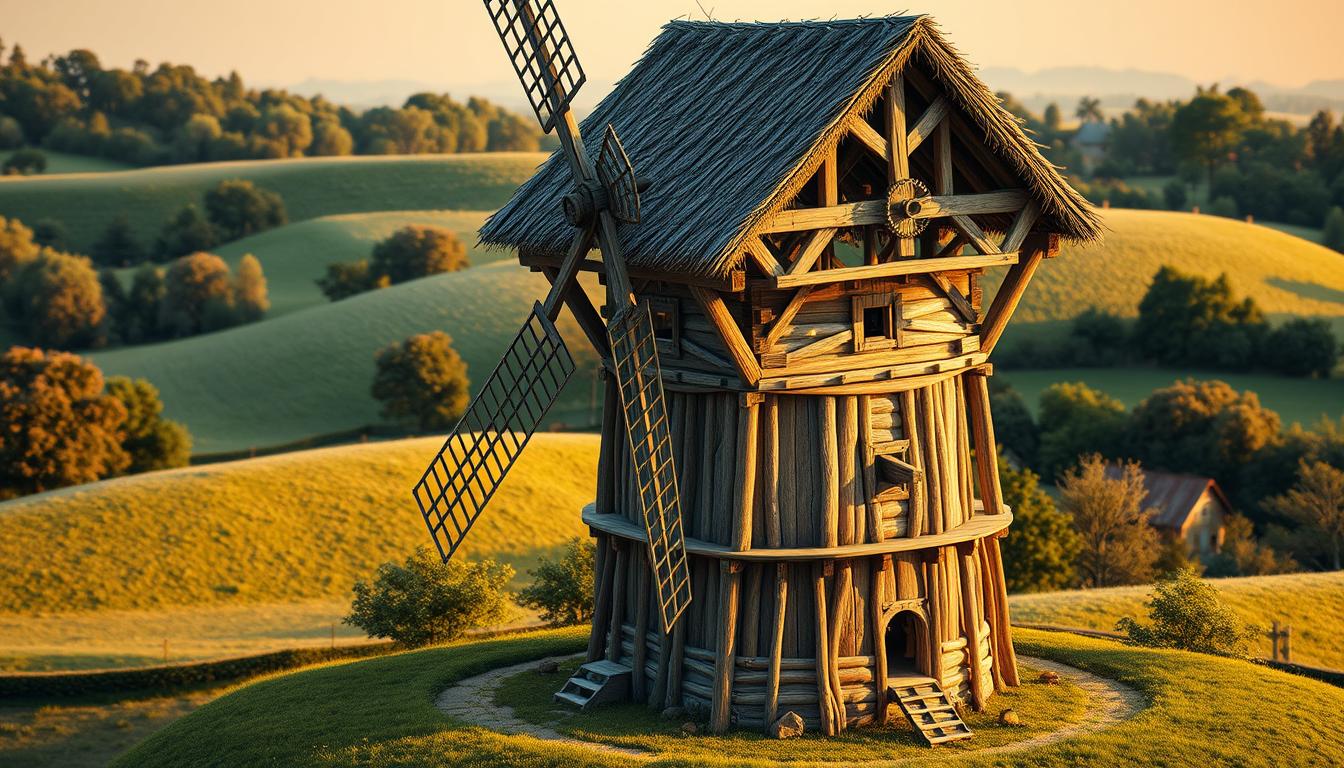
Imagine giving someone a unique and useful piece of art. It makes their outdoor space look better and shows the power of green energy. Building a wooden windmill for your garden is a thoughtful and creative gift for any occasion.
Working on a DIY project like this is fun and rewarding. It lets you add a personal touch to your garden or a gift. With the right materials and some guidance, you can make a beautiful and useful windmill. It will impress your friends and neighbours.
Key Takeaways
- Learn how to build a wooden windmill as a unique gift or garden decoration.
- Understand the essential steps and materials needed for the project.
- Discover tips for creating a functional and beautiful windmill.
- Get insights into making your DIY project a success.
- Explore the benefits of adding a wooden windmill to your garden.
Understanding the Appeal of Garden Windmills
Garden windmills add charm to outdoor spaces. They mix function with beauty. These structures have been around for centuries, serving both practical and decorative roles.
Aesthetic Benefits of Wooden Windmills
Wooden windmills bring a natural charm to gardens. Their wooden material makes them fit well with nature. You can choose from many designs and finishes to make them even more decorative.
Functional Purposes of Garden Windmills
Garden windmills have more than just looks. They were once used for tasks like pumping water or grinding grain. Today, they can still enhance a garden’s feel, maybe even powering small lights or decorations.
Historical Significance and Design Inspiration
Garden windmills mix old designs with new materials. This mix adds depth and character to gardens. If you’re making a DIY wooden windmill, knowing its history can inspire your design.
| Aspect | Description | Benefit |
|---|---|---|
| Aesthetic | Natural, rustic charm | Blends with outdoor environments |
| Functional | Pumping water, grinding grain | Contributes to garden ambiance |
| Historical | Traditional designs | Adds depth and character |
Building a DIY wooden windmill can be rewarding. It lets you create something beautiful and meaningful. By following diy garden windmill instructions and learning how to build a wooden windmill, you can add a unique touch to your garden.
Planning Your DIY Wooden Windmill Project
To start your DIY wooden windmill project, you need a good plan. This plan should cover size, design, and budget. First, decide how tall you want your windmill to be. This choice affects both how it looks and how well it works in your garden.
Determining the Size and Scale
The size of your windmill is key to its look and use. You can pick from many sizes, depending on your garden and what you like.
Small Decorative Options
Small windmills add a nice touch to gardens. They’re great for smaller spaces or to highlight certain areas.
Medium Functional Designs
Medium windmills are good for both looks and function. They add movement and are easy to see in your garden.
Large Statement Pieces
Big windmills stand out in any garden. They’re best for bigger gardens, where they can be the main attraction.

| Size | Description | Ideal Garden Size |
|---|---|---|
| Small | Decorative touch | Small gardens |
| Medium | Decorative and functional | Medium gardens |
| Large | Statement piece | Large gardens |
Choosing a Design Style
Your windmill’s design should match your garden’s style. Whether you like traditional or modern, your choice will make your garden look better.
Setting a Budget and Timeline
Having a budget and timeline is key to a successful DIY project. Think about the cost of materials and tools. Also, plan your timeline to keep your project on track and finish it well.
Essential Tools and Materials for Your Complete Guide DIY Wooden Windmill Garden Project
Starting your DIY wooden windmill garden project needs the right tools and materials. Being prepared with the essentials makes the building process smooth and fun.
Required Tools List
You’ll need various tools to cut, shape, and put together your windmill. The right tools improve the quality and last longer of your project.
Cutting and Shaping Tools
For cutting and shaping wood, a circular saw works well. It’s good for cutting two-by boards to length with a SuperJaws. A circular saw is versatile for different cuts. A jigsaw or bandsaw is great for curved cuts, and a hand saw or coping saw for detailed work.
Assembly Tools
For putting the windmill together, you’ll need a drill press or hand drill for precise holes, and a hammer for fitting pieces together. A drill press is accurate, while a hand drill is flexible. Keep screwdrivers and wrenches ready for tightening and adjusting.
Best Wood Types for Outdoor Windmills
Picking the right wood is key to your windmill’s durability and look. The wood should stand up to the outdoors and match your garden’s style.
Cedar and Redwood Options
Cedar and redwood are top picks because they resist rot, decay, and bugs. They also look beautiful, adding to your garden windmill’s charm.
Pine and Pressure-Treated Alternatives
If you can’t find cedar or redwood, pine or pressure-treated wood are good alternatives. Pressure-treated wood fights off rot and bugs well, but might need sealing to keep out moisture.
Additional Materials and Hardware
You’ll also need extra materials and hardware for your windmill. This includes metal rods or axles for moving parts, bearings for smooth turning, and screws or nails for building. Use galvanised or stainless steel hardware to avoid rust.
Safety Equipment Recommendations
Always put safety first when working on your DIY project. Wear safety glasses to protect your eyes from dust and debris, and ear protection when using loud tools. A dust mask is also a good idea when cutting or sanding wood to avoid breathing in particles.
With the right tools, materials, and safety gear, you’re ready to make a beautiful and useful DIY wooden windmill for your garden.
Preparing and Cutting the Wooden Components

Starting your DIY wooden windmill project means getting the wooden parts right. This step is key to making your windmill look good and work well.
Creating Accurate Templates
First, make precise templates for your wood parts. You can draw them on paper or use software. Accuracy is key here, as it affects how well everything fits together.
Cutting the Main Tower Structure
After making your templates, cut out the main tower. Choose the right saw for your wood type. Maintaining straight cuts is important for the windmill’s stability.
Preparing the Windmill Blades
Next, cut and shape the windmill blades. Make sure they’re balanced for smooth spinning.
Blade Shape and Size Considerations
The shape and size of your blades matter a lot. Think about design and materials when picking their dimensions.
Balancing Techniques for Smooth Operation
It’s vital to balance the blades for smooth spinning. Clamp the blades together to match them. Then, use a file to fine-tune their edges. This ensures uniformity and balance, making your windmill run smoothly.
| Blade Number | Length (inches) | Width (inches) | Weight (ounces) |
|---|---|---|---|
| 1 | 24 | 6 | 12 |
| 2 | 24 | 6 | 12 |
| 3 | 24 | 6 | 12 |
| 4 | 24 | 6 | 12 |
Crafting the Tail and Directional Components
The windmill’s tail is key for pointing into the wind. Make sure it’s strong and aligned right.
By carefully preparing and cutting your wooden components, you’re on your way to a successful DIY wooden windmill project. Remember, the precision of your parts and how you put them together is what makes a windmill work well.
Assembling the Windmill Base and Tower
Building a strong base and tower is key to your wooden windmill’s stability and lifespan. This step is crucial for your DIY garden windmill to stand up to the weather and look great in your garden.
Building a Stable Foundation
A solid foundation is essential for your windmill’s stability. You need to focus on two main things: ground anchoring and a level base.
Ground Anchoring Methods
Ground anchoring keeps your windmill from falling over in strong winds. You can use concrete footings or ground anchors, depending on your windmill’s size and weight. For most DIY garden windmills, ground anchors are enough and easier to set up.
Creating a Level Base
It’s important to make sure your base is level for your windmill to work smoothly. Use a spirit level to check if it’s level and adjust if needed. A level base helps avoid uneven stress on the tower, which can cause damage.
| Foundation Component | Description | Importance Level |
|---|---|---|
| Ground Anchors | Secure the windmill base to the ground | High |
| Level Base | Ensure the base is perfectly level | High |
| Plywood Base | Provides a solid foundation for the tower | Medium |
Constructing the Tower Framework
The tower framework is the heart of your windmill, giving it height and support. Use sturdy wooden beams and make sure they’re well attached to the base and each other.
The legs should be on all four corners of the plywood base for stability. This setup spreads the weight evenly, preventing the tower from tilting or falling.
Adding Decorative Elements to the Tower
You can add decorative touches to make your windmill more beautiful. Think about adding intricate carvings or painted details that show your style or match your garden’s theme.
Ensuring Structural Integrity
Check your windmill’s structure often for any damage or wear. Look for loose joints, wood cracks, and make sure all hardware is tight. Fixing these problems quickly keeps your windmill strong.
Crafting and Mounting the Windmill Mechanism

Making the windmill mechanism is a key step in your DIY guide. It needs precision and care. This part turns your still structure into a moving, working piece that looks like a real windmill.
The mechanism has several important parts. Each part is crucial for the windmill’s working. Let’s look at how to make these parts.
Creating the Rotating Head Assembly
The rotating head is the heart of your windmill’s movement. You’ll need to put together parts that let the head turn easily. Make sure the assembly is strong and can handle the weather.
The bearings, already in bearing housings, support the rotating shaft. They’re on top of the Upper Octagonal Platform. This setup is key for smooth turning.
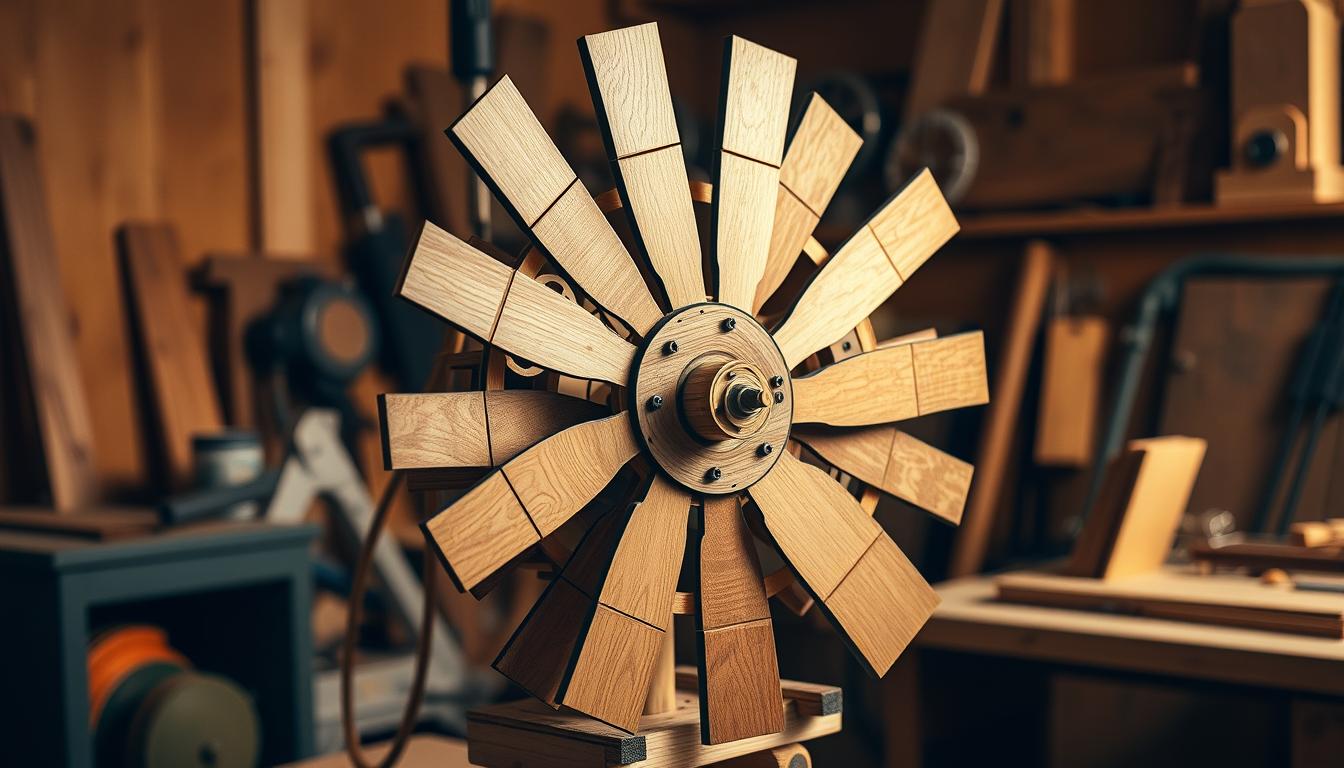
Building and Balancing the Blades
The blades are not just for looks; they’re also key to the windmill’s work. When making the blades, balance is important. They need to be evenly weighted for smooth turning.
To balance the blades, hang them from a pivot point. Adjust their weight until they balance perfectly.
Installing the Axle and Rotation System
The axle and rotation system let your windmill turn towards the wind. Installing them correctly is key for the best performance.
Bearing Selection and Installation
Choosing the right bearings is vital for smooth windmill operation. Pick bearings that can stand up to the weather and handle the turning stress.
Reducing Friction for Better Movement
To cut down on friction, make sure all moving parts are well-lubricated. Regular upkeep also helps keep your windmill running smoothly for longer.
Testing the Movement Mechanism
After putting everything together, test the movement. Gently turn the blades and check for any problems or uneven turns.
Testing makes sure your windmill works right and finds any issues early. This lets you fix them quickly.
By following these steps and focusing on the details, you can make a working and lovely DIY wooden windmill. It will be the highlight of your garden.
Weatherproofing and Finishing Your Wooden Windmill
After building your DIY wooden windmill, it’s time to make it weatherproof and finish it. This step is key to protect your windmill from the weather. It helps keep it looking good for a long time.
Selecting the Right Outdoor Finishes
Choosing the right finish for your windmill is very important. Yacht varnish is a great choice because it’s durable and keeps water out. You can also use exterior-grade polyurethane or oil-based finishes. Think about UV protection, water resistance, and how well the color will stay.
Here’s a table that compares some outdoor finishes:
| Finish Type | Durability | Water Resistance | UV Protection |
|---|---|---|---|
| Yacht Varnish | High | Excellent | Good |
| Exterior Polyurethane | High | Excellent | Good |
| Oil-Based Finish | Medium | Good | Fair |
Applying Protective Sealants
Sealing your windmill is a crucial step. Make sure all wood is sealed to stop moisture damage. Use a waterproof sealant or wood preservative to protect against rot and bugs.
Adding Paint and Decorative Touches
Now you can add paint or decorations to your windmill. Use exterior paint or stain to give it color and style. Always follow the instructions for applying and drying times.
Ensuring Longevity in Various Weather Conditions
To keep your windmill looking great in all weather, regular checks are needed. Look for damage or wear and fix it fast. By doing this, your windmill will last for many years.
Weatherproofing and finishing your windmill makes it a beautiful, lasting part of your garden. It shows off your DIY skills and adds personality to your outdoor space.
Troubleshooting Common DIY Wooden Windmill Issues
Once your DIY wooden windmill is set up, knowing how to fix common problems is key. This way, you can enjoy its beauty and function without worry. Being ready for potential issues saves time and effort.
Addressing Rotation Problems
If your windmill spins slowly or not straight, check the axle. Look for dirt or if it’s not aligned right. Make sure the blades are balanced and tight. Your DIY garden windmill instructions can guide you on fixing the spin.
Fixing Structural Wobbles and Instability
A wobbly windmill looks bad and can get worse. Check the base and tower for any weak spots. Strengthening the base or fixing the tower’s alignment can fix it.
Dealing with Weather Damage
The weather can harm your wooden windmill. Look for rot or damage on the wood. A protective sealant, as in the tips for building a diy windmill garden, can help protect it.
Seasonal Maintenance Tips
Do seasonal checks to catch problems early. Clean the blades, check for pests, and reapply finishes as needed. This keeps your DIY wooden windmill looking and working great.
By using these troubleshooting tips, your DIY wooden windmill will last for many years. It will stay a beautiful and useful part of your garden.
Conclusion: Enjoying and Maintaining Your Handcrafted Garden Windmill
Your handcrafted garden windmill is now a beautiful addition to your garden. To keep it looking great and working well, regular care is essential. This will help your DIY wooden windmill last longer.
Here are some tips to keep your windmill in top shape:
- Regularly check for any wear or damage.
- Apply a protective sealant every few years to shield it from the weather.
- Make sure the rotation mechanism is clean and free from debris.
By following these easy steps, you can enjoy your wooden windmill garden project for many years.
If you enjoyed this project and want to see more, sign up for my email newsletter.
| Maintenance Task | Frequency | Benefit |
|---|---|---|
| Inspect for damage | Monthly | Early detection of issues |
| Apply protective sealant | Every 2-3 years | Protection against weathering |
| Clean rotation mechanism | Quarterly | Smooth operation |
The Complete Guide to Building a DIY Wooden Windmill for Your Garden

Imagine giving someone a one-of-a-kind present that makes their outdoor space look better. It also adds a useful feature. Making a wind-powered decoration is a thoughtful and creative way to show you care.
A handmade windmill can be a meaningful and distinctive gift for any event. It’s a keepsake that will remind them of your kindness for years.
With this detailed guide, you can make a beautiful and useful piece. It will make your garden or a loved one’s outdoor space better.
Key Takeaways
- Create a unique gift for any occasion
- Add a touch of functionality to your garden
- Follow a step-by-step guide to building a wind-powered decoration
- Enhance your outdoor space with a handmade piece
- Show your thoughtfulness with a creative present
Understanding the Appeal of Garden Windmills
Building a wooden windmill for your garden is a fun DIY project. It adds charm to your outdoor area. Garden windmills have been around for centuries, serving both looks and function.
One big reason garden windmills are loved is their beauty. A nicely made wooden windmill can bring elegance and fun to your garden.
Aesthetic Benefits of Wooden Windmills
Wooden windmills can match many garden styles, from old to new. The natural material looks great outside, making your garden look better.
Functional Purposes of Garden Windmills
But garden windmills are more than pretty. They can also make your garden feel more peaceful. Their gentle movement adds to your garden’s calm vibe.
Historical Significance and Design Inspiration
Garden windmills take inspiration from old windmills used for work. Knowing their history helps you see the skill and thought in making a beautiful garden windmill.
| Aspect | Description | Benefit |
|---|---|---|
| Aesthetic | Blends with garden styles | Enhances visual appeal |
| Functional | Creates motion | Adds ambiance |
| Historical | Inspired by traditional windmills | Appreciation for craftsmanship |
Planning Your DIY Wooden Windmill Project
Starting a DIY wooden windmill project for your garden requires careful planning. First, decide how tall you want your windmill to be. This choice affects the size and design of your project.
Determining the Size and Scale
The size of your windmill depends on your garden’s space and the look you aim for. Here are some options to consider:
Small Decorative Options
Small windmills are perfect for small gardens or as a decorative piece on a larger property. They fit well in small spaces and can be placed on a patio or near a pond.
Medium Functional Designs
Medium-sized windmills strike a balance between looks and use. They can be a garden’s centrepiece, adding movement and energy.
Large Statement Pieces
Large windmills are bold and can be the main attraction in a big garden. They need more materials and a strong base, but are a stunning focal point.
Choosing a Design Style
Your windmill’s design should match your garden’s look. You can choose from traditional, modern, or rustic styles. Look for inspiration in wooden windmill plans online or in gardening books.
Setting a Budget and Timeline
Setting a budget and timeline is key to a successful DIY project. Plan your materials and tools and schedule each step. A detailed step-by-step windmill garden tutorial will keep you on track.
With careful planning, your DIY wooden windmill project can become a beautiful addition to your garden. It will enhance your garden’s beauty and charm.
Essential Tools and Materials for Your Complete Guide DIY Wooden Windmill Garden Project
To start your DIY wooden windmill project, you need the right tools and materials. The correct equipment ensures your project is done well and safely.
Required Tools List
For a DIY wooden windmill, you’ll need different tools. These tools can be divided into cutting and shaping tools and assembly tools.
Cutting and Shaping Tools
Cutting tools are key to preparing the wood. A circular saw is great for straight cuts in wood. For example, you can use it to cut two-by boards to the right length, even without a mitre saw.
For precise angled cuts, a mitre saw is best if you have one. You’ll also need a jigsaw for curved cuts and a coping saw for detailed work.
Assembly Tools
Assembly tools are needed to put your windmill together. A drill is essential for making holes for screws or nails. A hammer is used for tapping pieces into place.
You’ll also need a tape measure for accurate measurements, clamps for holding pieces together while glueing, and a level to ensure your windmill is aligned right.
Best Wood Types for Outdoor Windmills
The wood type you choose for your DIY wooden windmill is very important. It will be exposed to the weather.
Cedar and Redwood Options
Cedar and redwood are great for outdoor projects. They naturally resist rot and insects. They are also durable and can handle harsh weather.
Pine and Pressure-Treated Alternatives
If you can’t find cedar or redwood, pine or pressure-treated wood are good alternatives. Pressure-treated wood is treated with chemicals to resist rot and insects. It’s a cost-effective option for outdoor projects.
Additional Materials and Hardware
You’ll also need various hardware components, like nails, screws, hinges, and bearings. These are important for assembling and ensuring your windmill works smoothly.
Safety Equipment Recommendations
Safety is very important when working on your DIY wooden windmill project. You’ll need safety glasses, gloves, and a dust mask.
When using power tools like circular saws and drills, wearing protective gear is crucial to prevent injuries.
Preparing and Cutting the Wooden Components

Before you start building your wooden windmill, you need to prepare and cut the wood. This step is key to making sure everything fits right and works well.
Creating Accurate Templates
Creating precise templates is vital for your DIY project. They help you cut the wood to the right size and shape. Use cardboard or plywood for these templates, making sure they are accurate and last long.
Cutting the Main Tower Structure
The main tower is the heart of your windmill, giving it height and support. Use a saw that makes straight cuts for the tower pieces. Sand the edges to make them smooth and prevent splinters.
Preparing the Windmill Blades
The blades are key to catching wind and turning it into motion. Think about their shape and size when preparing them.
Blade Shape and Size Considerations
The shape and size of the blades affect how well they work. Longer blades catch more wind but need more material and are harder to balance. The blade shape should help catch wind while reducing drag.
Balancing Techniques for Smooth Operation
It’s important to balance the blades for smooth operation. Make sure all blades are the same size and weight. Clamp them together and use a file to adjust them, making them as similar as possible.
Crafting the Tail and Directional Components
The tail directs the blades into the wind, helping capture energy. Think about its size and shape of the blades and your windmill’s design. The tail should be strong enough for wind but light enough to rotate easily.
By carefully preparing and cutting the wood, you’re on your way to a beautiful and functional DIY wooden windmill for your garden.

Assembling the Windmill Base and Tower
Building the base and tower of your DIY wooden windmill is key to your garden project. It needs careful planning and execution for stability and longevity.
Building a Stable Foundation
A stable foundation is crucial for your windmill’s stability. Focus on ground anchoring and creating a level base.
Ground Anchoring Methods
Ground anchoring prevents your windmill from toppling or shifting. Use concrete footings or ground anchors. Ground anchors are easier for DIY projects.
Creating a Level Base
A level base is essential for your windmill’s stability and smooth operation. Use a spirit level to adjust the foundation. Make sure the legs are evenly spaced for stability.
Constructing the Tower Framework
After securing the base, build the tower framework. Assemble the pre-cut wooden components. Ensure all joints are secure and the tower is plumb.
Adding Decorative Elements to the Tower
Decorate the tower to enhance your windmill’s look. Add carvings, wooden details, or a decorative cap.
Ensuring Structural Integrity
Structural integrity is vital for your windmill’s longevity and safety. Regularly check the tower and base for damage. Use durable plans and proper techniques for maintenance.
Crafting and Mounting the Windmill Mechanism
Building the windmill mechanism is a key part of your DIY project. It needs careful planning and execution. This part makes your wooden windmill move and work correctly.
Creating the Rotating Head Assembly
The rotating head is vital for your windmill. You must assemble it carefully, making sure it’s balanced and attached well. Precision is key for smooth operation.
Start by attaching the blades to the hub. Make sure they’re evenly spaced and secure. Then, attach the hub to the shaft for smooth rotation.
Building and Balancing the Blades
Creating the blades requires thought about their shape, size, and weight. Balancing the blades is key to smooth rotation. Any imbalance can cause vibration and noise.
To balance the blades, use weights or adjust their shape. Always test the balance after adjusting to ensure perfect balance.
Installing the Axle and Rotation System
The axle and rotation system make your windmill turn and catch wind energy. Proper installation is crucial for smooth operation and durability in the weather.
Bearing Selection and Installation
Choosing the right bearings is important. They should be durable and weather-resistant. Install them as the manufacturer says, ensuring they’re secure and lubricated.
Reducing Friction for Better Movement
To improve your windmill’s performance, reduce friction. Use the right lubricants on bearings and keep moving parts clean.
Testing the Movement Mechanism
Test your windmill mechanism after installation. Look for imbalance, vibration, or friction. Adjust as needed for better performance.
By following these steps, you can make a functional and beautiful wooden windmill. It will add charm to your garden.
Weatherproofing and Finishing Your Wooden Windmill
As you near the end of your DIY wooden windmill, protecting it from the weather is key. Weatherproofing and finishing are crucial steps. They make sure your windmill stays strong and looks great in your garden.
Selecting the Right Outdoor Finishes
Choosing the right finish for your wooden windmill is vital. You can use yacht varnish, known for its durability and water-resistant properties. Other options include exterior-grade varnishes and oils that can handle different weather.
“Using the right finish can significantly extend the life of your windmill,” says a seasoned DIY expert. “It’s not just about looks; it’s about keeping it safe.”
Applying Protective Sealants
After picking your finish, apply it as the manufacturer says. Make sure all wooden parts are covered, focusing on areas like the blades and base that weather easily.
Adding Paint and Decorative Touches
If you want to add color or decorations, now’s the time. Use exterior-grade paint that matches your finish. It makes your windmill look better and adds more protection.
Ensuring Longevity in Various Weather Conditions
Regular care is essential for your windmill to last through different weather. Check it often for wear and tear, and reapply finishes when needed.
By following these steps, your DIY wooden windmill will last for years. You’ll know it’s safe from the elements.
Troubleshooting Common DIY Wooden Windmill Issues

Even with careful planning, DIY wooden windmills can sometimes experience problems that need fixing. When building a DIY wooden windmill, it’s essential to anticipate and address potential issues. This ensures optimal performance and longevity.
Addressing Rotation Problems
If your windmill’s rotation is stiff or uneven, check the axle and bearings. Look for any signs of wear or misalignment. Make sure the blades are balanced and securely attached to the rotating head assembly.
You can refer to diy garden windmill instructions for guidance on adjusting the rotation mechanism.
Fixing Structural Wobbles and Instability
A wobbly or unstable windmill can be caused by an uneven foundation or loose tower framework. Inspect the base and tower for any signs of weakness or damage. Tightening any loose joints and ensuring the foundation is level should resolve the issue.
Dealing with Weather Damage
Weather conditions can take a toll on your wooden windmill. Regularly inspect the structure for signs of damage, such as cracks or rot. Applying a protective sealant and ensuring that all components are securely fastened can help mitigate weather-related damage.
Seasonal Maintenance Tips
Regular maintenance is crucial for extending the life of your DIY wooden windmill. Check the structure seasonally for any signs of wear or damage, and perform necessary repairs promptly. Refer to the tips for building a diy windmill garden for additional maintenance advice.
By following these troubleshooting tips, you can enjoy a functional and aesthetically pleasing DIY wooden windmill. It will enhance your garden for years to come.
🛠️ Take Your DIY Skills to the Next Level with 16,000+ Step-by-Step Woodworking Plans!
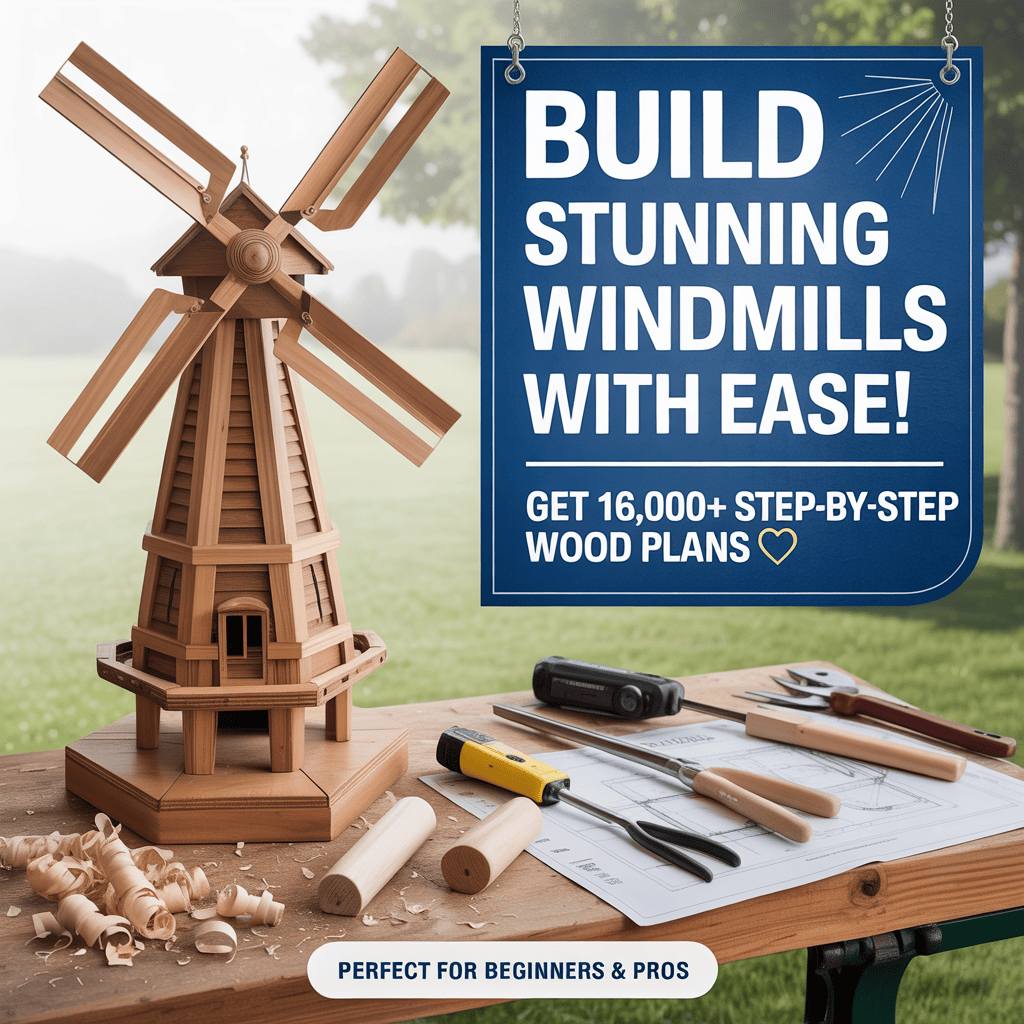
Built your garden windmill? Ready for more?
Discover Ted’s Woodworking – the world’s largest collection of woodworking plans that empowers beginners and pros alike to create stunning wooden projects easily.
✅ 16,000 Done-for-You Projects – from birdhouses to garden benches, decks, furniture & more!
✅ Step-by-Step Instructions – no guesswork, no confusion—just build and enjoy.
✅ Perfect for All Skill Levels – whether you’re just starting or already crafting, there’s something for everyone.
✅ Cutting & Materials Lists Included – save time, money, and effort with exact specs.
✅ Lifetime Access + Monthly New Plans – get fresh project ideas forever!
🎁 BONUS: Request your own custom plan!
👉 Don’t Miss Out! Start your next masterpiece today with Ted’s Woodworking.
🔗 Click Here to Get Instant Access to 16,000 Woodworking Plans »
Conclusion: Enjoying and Maintaining Your Handcrafted Garden Windmill
Now that you’ve finished your DIY wooden windmill garden project, it’s time to enjoy it. Keeping it in good shape is key. Check your windmill often for damage and fix any problems right away.
To keep your windmill running smoothly, check the rotation mechanism and tighten screws. Also, reapply sealants when needed. This way, you can enjoy your handcrafted garden windmill for many years. If you want more DIY ideas, sign up for our email newsletter. You’ll get the latest updates and tips.
FAQ
What are the benefits of building a DIY wooden windmill for my garden?
A DIY wooden windmill can make your garden stand out. It’s a unique and useful decoration. Plus, you can make it your own, matching your garden’s style.
What type of wood is best suited for building an outdoor windmill?
For outdoor windmills, choose durable woods like cedar, redwood, or cypress. These woods resist rot, decay, and bugs well.
How do I determine the size and scale of my DIY wooden windmill?
Think about your garden’s space and the look you want. Also, consider the materials you’ll use. A bigger windmill needs more materials and a stronger base.
What are the essential tools needed for building a DIY wooden windmill?
You’ll need a table saw, drill press, sandpaper, and hand tools like hammers and clamps. Don’t forget safety gear like gloves and safety glasses.
How do I weatherproof and finish my wooden windmill?
Use a waterproof stain or polyurethane to protect the wood. You can also paint or add decorations to make it look better.
What are some common issues that may arise with a DIY wooden windmill, and how can I troubleshoot them?
Issues like rotation problems or weather damage can happen. Check the axle and make sure the tower is level. Use protective finishes to prevent damage.
How do I maintain my handcrafted garden windmill?
Check your windmill often for damage. Apply finishes as needed. Clean and lubricate it seasonally to keep it running smoothly.
Can I customise my DIY wooden windmill to fit my garden’s unique style?
Yes, you can make your windmill fit your garden’s style. Choose designs that match, use different materials, and add your own touches.
Are there any specific safety precautions I should take when building a DIY wooden windmill?
Always wear protective gear and use safe lifting techniques. Follow guidelines for power tools to stay safe while building.


Pingback: Weatherproof Your DIY Wooden Windmill: Materials and Techniques Guide